●Webサーバ(apache)の設定ファイルの編集
●ネームベースのバーチャルホスト設定
ネームベースバーチャルホストは、同一IPアドレスに対しホスト名が異なるサービスを提供する方法です。下記では、ホスト名がwwwとwww_otherとして 設定しています。
●/etc/pki/tls/misc/CA をインストールする方法
参考URL:https://blog.apar.jp/linux/14087/
Rocky 9等では、認証局(CA)を容易に構築するためのスクリプト「/etc/pki/tls/misc/CA」がインストールされなくなりました。
そのため Rocky 9等でプライベート認証局を構築する場合は、opensslコマンドを利用する必要があります。
今回は、Rocky 9等に「/etc/pki/tls/misc/CA」をインストールする方法を記載しました。
最も簡単な方法は、CentOS 7の「/etc/pki/tls/misc/CA」を、Rocky 9等にコピーするだけです。
CentOS 7の環境が無い場合は、以下の手順で「/etc/pki/tls/misc/CA」をインストールすることができます。
適当な作業用ディレクトリを作成して、そこに移動します。
●CA認証局の構築
CA認証局等の有効期限を10年に変更します。
CA秘密鍵:/etc/pki/CA/private/cakey.pem
CA証明書:/etc/pki/CA/cacert.pem
CA認証局再作成時に下記のようなエラーが表示さされる場合があります。
●セキュア(SSL)なWebサーバの構築(オレオレ証明書)
SSLサーバではアクセス時に最初にSSLの認証シーケンスが走ります。しかし、その時点ではApacheはアクセスしてきたホスト名が分からないため、証明書の交換は先頭のバーチャルホストのデータを元に行われます。従って、ネームベースのバーチャルホストでは、SSLは一つのバーチャルホストしか扱えません。
mod_sslをインストールします。
サーバ用秘密鍵を作成します。
作成した各種鍵を確認します。
・秘密鍵の確認
なお、アクセスして「セキュリティの警告」ウィンドウが表示されたら、「証明書の表示」ー「証明書のインストール」を行えば、以降、「セキュリティの警告」ウィンドウは表示されなくなります。
●Let's Encrypt証明書の設定(Snapd)
参考URL:CentOS8.2でSSL証明書(Let's Encrypt)をセットアップする手順
参考URL:SSL 証明書を取得する (Let's Encrypt)
参考URL:Let’s EncryptによるSSLサーバー証明書の取得、自動更新設定(2021年3月版)
「EPELを利用するための設定方法」を参照してEPELを利用できるようにします。
EPELからsnapdをインストールします。
Snapコマンドの基本操作は下記のとおりです。
下記作業は、Apache httpdやNginxなどのWebサーバが稼働していることが前提となります。
また、インターネット側から、作業を実施するサーバ(証明書を取得したいFQDNのサーバ)の80ポート宛てにアクセス可能であることも前提となります。
取得済みの証明書をまとめて更新する場合、renewサブコマンドを使用します。
有効期限が30日未満の証明書が全て自動で更新されます。
有効期限の残り日数に関わらず更新したい場合、--force-renewを合わせて指定します。
ただし、Snapdからインストールしたcertbotクライアントであれば、更新の手動実行は必要ありません。更新は自動で実行されます。
(2021.7.12現在、自動で更新されたかどうかは未確認)
(2021.10.28現在、自動更新されたことを確認できました)
証明書取得のための動作確認は下記のようにします。
Snapdからインストールしたcertbotクライアントの起動時刻変更
参考URL:【簡単】Let’s Encryptの自動更新をcronなしで実現しよう
参考URL:Certbot を自動的に更新するタイマーを設定する。
napdからインストールしたcertbotクライアントは1日2回自動起動するように設定されていますが、起動時刻があまりにも近い時刻でした。
Let's Encryptからの警告メール
Let's Encrypt証明書(Snapd)期限切れ19日前に下記のようなメールが来ていました。
証明書の有効期限を確認します。
その後、手動で更新できるか確認しましたがエラーを表示し更新できませんでした。
SSL証明書が更新できない
参考URL:certbot(LetsEncrypt)でエラー/Invalid response from
結論から言うと原因は2つあったように思われます。
以下は実際に作業した内容です。
今回の作業でwebrootが/usr/share/nginx/・・・となっていますが、実際にはApacheで動作させており今後Nginxを立ち上げる予定であるため、ApacheのDocumentRootを変更しています。
手動で強制的にSSL証明書を更新します。
有効期限が30日未満でしたが、SSL証明書の更新ができませんでした。
https://www.bigbang.mydns.jp/.well-known/acme-challenge/・・・へのアクセスが「404 Not Found」だったので、ディレクトリ作成後、httpd.confも変更しました。
原因が不明なので、下記を実行し強制的にSSL証明書を更新しました。
各証明書を保存しているフォルダ内を確認します。
更新したSSL証明書を読み込ませるため、Apacheを再起動します。
証明書の有効期限を確認します。
下記はうまく更新できない時の有効期限です。
LetsEncryptの自ドメインの設定ファイル(/etc/letsencrypt/renewal/<ドメイン名>.conf)を確認します。
下記はSSL証明書を正常に更新できなかった時の設定ファイルの内容です。
webroot_pathと[[webroot_map]]に違いがありました。
新たに作成された設定ファイルにはpost_hookがありませんでしたので、追記しました。
更新した時のログを確認します。
下記は更新がうまく行かない時のログです。
snapのタイマーは下記のように設定されています。
明らかに更新動作が異常だった時と違っています。
手動更新できるかどうかも確認してみます。
SSLサーバの移行
Certbotのインストール後、下記フォルダを旧サーバから新サーバにコピーします。
CentOS Stream 8からRocky Linux 9への移行時にエラーに関する事項を追加 ---ここから---
CentOS Stream 8からRocky Linux 9への移行時にエラー
下記のようなエラーとなりました。
他方のディレクトリも可らでしたので、旧サーバからコピーしました。
証明書の有効期限が30日以上ある場合、renewサブコマンドでは更新できません。
archiveフォルダの各証明書が最新版になっていることを確認します。
/ not root-owned 1000:1000
月に一度、SSL証明書を自動的に更新するようにcron monthlyで動作させています。
ところが、下記のようなエラーメールが届いていました。
●Let's Encrypt証明書の設定
参考URL:CentOS 7 + Apache 2.4 に Let's Encrypt の証明書を導入する手順
Certbotクライアントのインストール
CentOS 7用のCertbotクライアントは、EPELリポジトリからインストールできます。
EPELリポジトリのインストールについてはこちらを参照してください。
SSL/TLS証明書の作成
Apache httpdのDocumentRootが/var/www/htmlに設定されていると仮定して話を進めます。
下記のようにオプションを指定してcertbotコマンドを実行します。-dオプションには、証明書を発行するサーバーのドメインを、-wにはDocumentRootのパスを指定します。
Apache 2.4の設定
SSL/TLSサーバー証明書が作成できましたので、Apache 2.4に設定を追加します。ssl.confのSSLCertificateFile、SSLCertificateKeyFile、SLCertificateChainFileにそれぞれ設定します。
これで Let's Encrypt での証明書の設定は終了です。
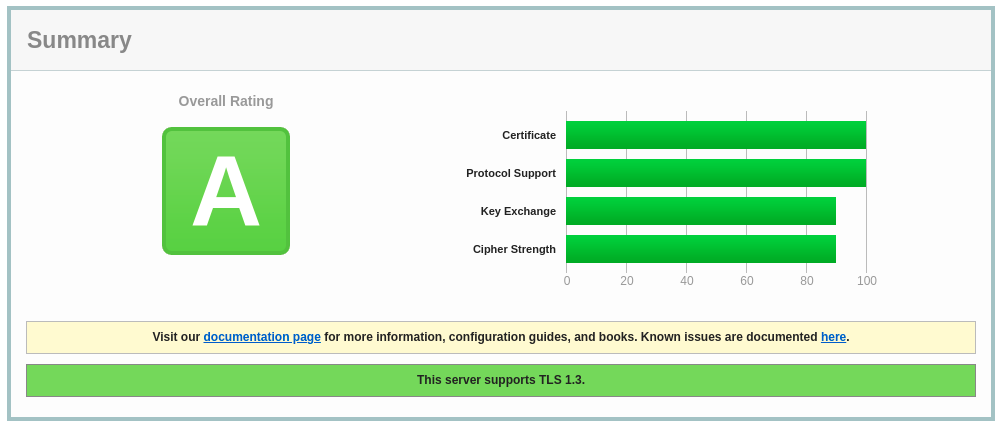
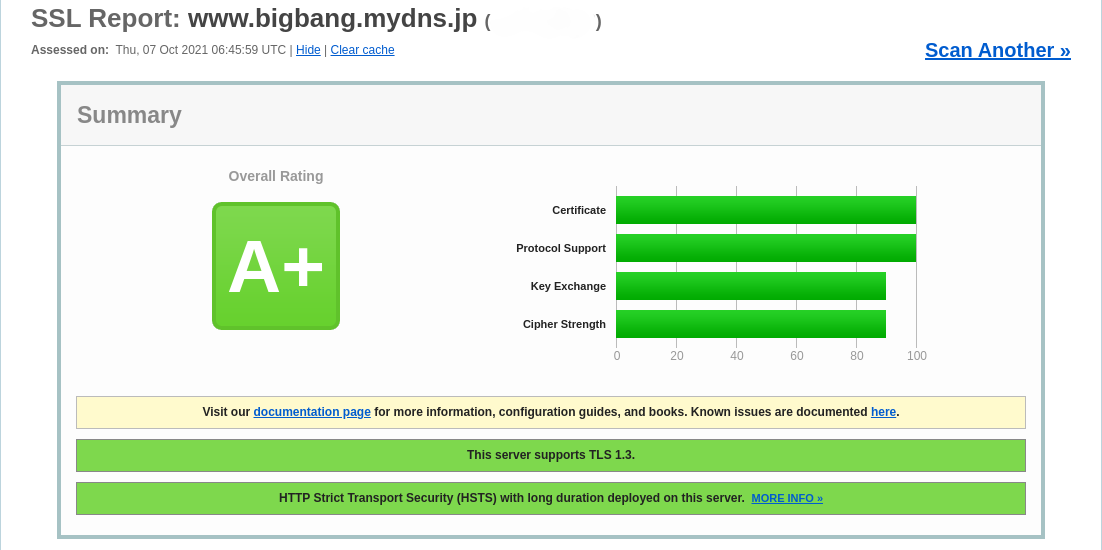
SSL Server TestでA+評価となることを確認します。
証明書の更新設定
※その3を推奨
※その2を推奨
Let's Encryptが発行する証明書の有効期限は90日間と短いので、自動更新されるように設定します。
証明書の更新設定(その2)
参考URL:Webサーバー間通信内容暗号化(Apache+mod_SSL+Certbot)
Let's Encryptが発行する証明書の有効期限は90日間と短いので、自動更新されるように設定します。
SMTPサーバー及びIMAPサーバーで証明書を利用していない場合、下記スクリプトの「SMTPサーバー設定再読込み」及び「IMAPサーバー設定再読込み」は削除して問題ありません。
こちらのスクリプトは certbot でのSSL証明書自動更新用です。
Snapd用は下にあります。
テキスト表示
こちらのスクリプトは Snapd でのSSL証明書自動更新用です。
証明書の更新設定(その3)
参考URL:let's Encryptの証明書更新 CentOS7編
これまでCentOS 7上でcertbotを利用し、更新用スクリプトをcronで起動する方法でSSL証明書を月に一度更新するようにしてきました。
CentOS 7をはじめとして、パッケージでcertbotをインストールするようなディストリビューションでは、certbotと一緒に証明書を更新するための設定ファイルが一緒に配布されている、そうです。
中途半端な設定をスクリプトで記載することなく、証明書を更新する仕組みが用意されていました。
インストールされているcertbotのパッケージを確認します。
.timerは、crontabではなく、systemctlの機構を使ってサービスを定期実行するための設定ファイルです。
この設定ファイルを有効することにより証明書が自動更新されるようになります。
証明書更新後にApacheを再起動するには下記のようにします。
仮想IP構成によるWebサーバ冗長構成の対応
Webサーバが仮想IPにより冗長構成されている場合、他方にSSL証明書をコピーし、証明書の最新版に対しリンクを張っておく必要があります。
これに対処するため、コピーはlsyncd及びrsyncにより、リンクの張り直しはcron.weeklyで対応しました。
lsyncd、rsync及びcron.weeklyの内容は下記の通りです。
●Let's Encrypt証明書のunauthorized
下記のようなメールが来ていました。
参考URL:certbot(LetsEncrypt)でエラー/Invalid response from
参考URL:自宅サーバを作ろう
参考URL:Let's Encrypt certbot renewで躓いた話
もしかしたら、この影響のため証明書の更新が出来なかったのかもしれません。
1週間後に再確認したいと思います。
問題が発生した当日の夜にインターネット側からのHTTPアクセスを証明書の更新cronが動作するサーバに変更したところ、正常に更新されました。
●サーバ証明書のインストール方法
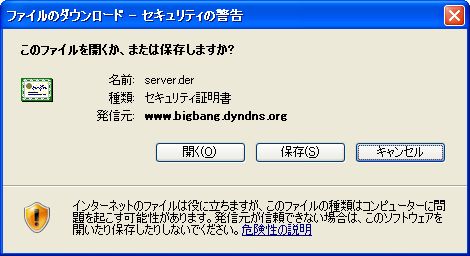
上記の「セキュリティの警告」が表示される前に証明書をインストールする方法を紹介します。
まず、証明書をderファイルにしてダウンロードできる場所に保存します。
IEの場合、下記のようなウィンドウが表示されるので「保存」をクリックします。
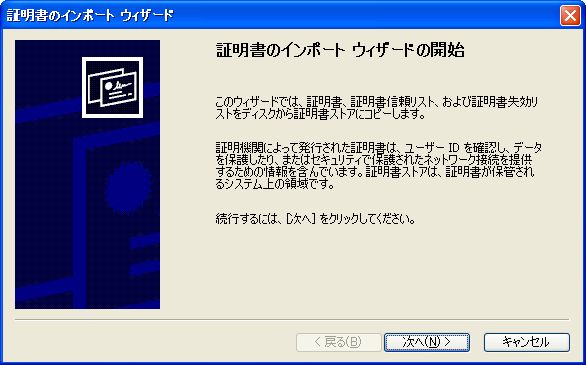
「全般タブ」で「証明書のインストール」をクリックします。

「次へ」をクリックします。
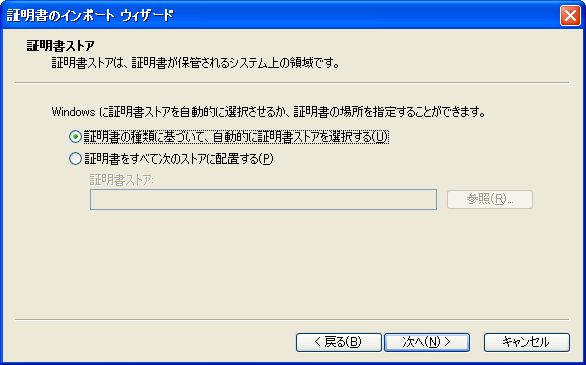
デフォルトで選択されている状態のまま「次へ」をクリックします。
「完了」をクリックします。
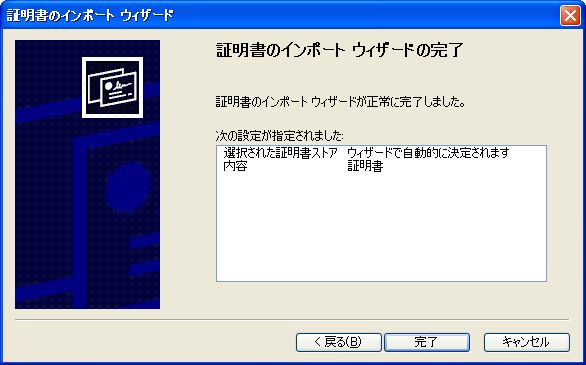
「OK」をクリックします。
●サーバ証明書のインストール方法(Windows 7 IE10編)
自己証明書だとセキュリティが向上したIE 10やIE 11等にインストールすることが出来ません。
その対応策が分かりましたので、記載します。
まず、IEを起動します。
[ツール]ー[インターネットオプション]ー[セキュリティ]タブを選択します。
[インターネット]ゾーンを選択し、[保護モードを有効にする]のチェックを外します。
「現在のセキュリティ設定では、コンピュータが危険にさらされます。」というウィンドウが表示されますが、[OK]をクリックします。
[インターネットオプション]の[OK]をクリックします。
IEを再起動します(うまくいかない場合は、OSを再起動)。
IEを起動すると「保護モードはインターネットのゾーンで無効になっています」とウィンドウが表示されますが、「×」を押して消します(放っておいても消えます)。
webdavで接続したい、URL(例:https://www.bigbang.mydns.jp/)を記載して接続します。
「この Web サイトのセキュリティ証明書には問題があります。」と表示されますのが、「このサイトの閲覧を続行する (推奨されません)。 」をクリックします。
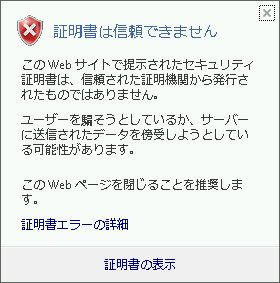
すると、下記のように証明書が信頼されていない場合に赤くなる箇所の「×」をクリックします。

「証明書は信頼できません」のウィンドウ下部の「証明書の表示」をクリックします。
すると、証明書の情報を示すウィンドウが表示されます。[証明書]ウィンドウー[全般]タブー[証明書のインストール]をクリックします。
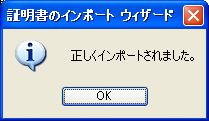
[証明書のインストールウィザード]ウィンドウで[証明書のインストールウィザードの開始]で[次へ]をクリック、[証明書ストア]で[証明書をすべての次のストアへ配置する]を選択し、[信頼されたルート証明書]を選択、[次へ]をクリック、[証明書のインストールウィザードの完了]で[次へ]をクリック、[セキュリティ警告]が表示されますが[はい]をクリックして証明書をインストールします。[正しくインポートされました]と表示されます。[証明書]ウィンドウの[OK]をクリックし、ウィンドウ閉じます。
該当ページを一旦閉じて、再度開いても証明書の問題は発生しなくなります。
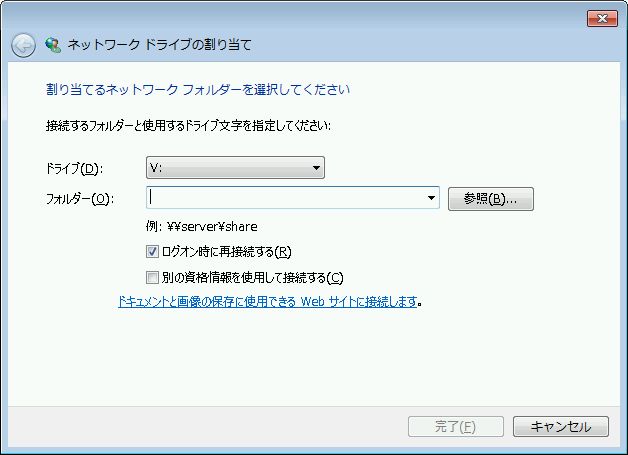
Windows 7で[コンピュータ]を開きます。[ネットワークドライブの割り当て]をクリック、ドライブレター(下図では「V:」)を選択、フォルダにwebdavとして接続するフォルダを記載(例:https://www.bigbang.mydns.jp/webdav/)します。[別の資格情報を使用して接続する]にチェックを入れ[完了]をクリックします。
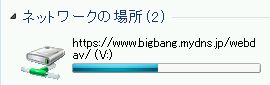
webdavにアクセスするための、ユーザ名とパスワードを聞いていきますので入力します。問題なく接続できれば、ネットワークドライブを割り当てたアイコンが表示されます。
以上で設定は完了です。OS再起動後も問題なく接続できるようになりました。
最後に[保護モードを有効にする]をクリックして、IEの状態を元に戻します。
●webdavの設定
今回はSSL経由でのwebdavを構築します。
また、webdavへのアクセスはBASIC認証を用いることとします。
「https://www.bigbang.mydns.jp/webdav/」というURIでアクセス出来るようにします。この際、LocationディレクティブとDAVディレクティブを使用します。アクセス時には「davaccount」を使用します。
また、webdav用のホームディレクトリ(/home/test)を作成し、さらにwebdavディレクトリを作成します。
バーチャルホストの設定を参照してください。
cadaverは、ここからダウンロード出来ます。
参考URL:webdav by hand
こういう方法があるとは知りませんでした。
参考URL:curl コマンド
クライアントからアクセスできるかも動作確認しよう。Windows XPの場合は、[マイネットワーク]−[ネットワークプレースを追加]をクリックし表示される[ネットワークプレースの追加ウィザード]でWebフォルダを作成してアクセスします。サービスプロバイダの指定では[別のネットワークの場所を選択]を選び、インターネットのアドレスとしては「https://www.bigbang.mydns.jp/webdav」を入力します。認証ダイアログが表示されたら、登録したアカウント名とパスワードを指定します。[このネットワークプレースの名前を入力してください]では初期値をそのまま使っても良いし、わかりやすいものに変更しても良いです。
●PROPFIND /webdav/ HTTP/1.1" 405
WebDAVが動作しているサーバからの接続は問題ありません。
イントラにある別端末から接続できない、インターネットから接続できない状態で、接続失敗時には下記のようなログが記録されます。
クラスタの設定で仮想IPを割り当てており、そのIPアドレスに対しWebDAVを接続させるように設定していました。
hostsの設定を実IPアドレスに変更したところ問題なく接続できるようになりました。
まさか、仮想IPが原因だとは全く思いませんでした。
●ApacheとPHPの連携(CentOS Stream 8)
参考URL:CentOS 8のApache環境にPHP 7.2をインストールして使えるようにする手順
概要
CentOS 8ではApache httpdのバージョンがCentOS 7の「2.4.6」から大きく変更されて「http/2」が利用できる「2.4.37」が採用されています。
Apache HTTP Server 2.4.37では、mod_sslに「OpenSSL 1.1.1」および「TLS 1.3」のサポートが追加されました。
「TLS 1.3」は「1.2」と取り扱い方が異なる部分があり、設定やクライアントの変更が必要になる場合があるといわれています。
その他にもHTTP/2関連の機能強化、安定性の向上などが施されています。
また、PHPでもCentOS 7まで利用されていた5.4系ではなく7.2系が採用されています。
インストールに関連する違いとしてはApache httpdがデフォルトで「eventMPM」に対応していることです。
そのため、PHPのインストールと設定手順がCentOS 7とは大きく異なります。
MPM
参考URL:Apache2.4のMPM prefork/worker/eventの違いを理解する
RHEL 8.0(CentOS 8.0)からは、Apache HTTP Server(以下Apache)のデフォルトマルチプロセッシングモジュール(以下、MPM)がpreforkからeventに変更になったようです。
ApacheではMPMを使用することで、同時の複数リクエストに対処するようになりました。
Apache 2.4系で選択できるMPMには以下の通りです。
CentOS 8ではApache httpdをパッケージでインストールした場合、デフォルトではeventMPMモジュールが読み込まれるように設定されています。
eventMPMでPHPを導入するためにはCGIモードで動作する「php-fpm」のインストールと設定が必要になります。
PHPのインストール
現在、有効になっている PHP のバージョンを確認します。
php:8.0インストール時の状況は下記のようです。
php74 clientの動作確認
PHPはウェブサーバー以外に「CLI」(Command Line Interface:コマンド入力用インターフェイス)から動作させることも可能です。CLI用に用意された"php"コマンドを使ってPHPのバージョンを確認してみます。"-v"オプションを付けて以下のように実行します。
php-fpmの設定
php-fpm(FastCGI Process Manager)はPHPスクリプトをCGIとして動作させるためのパッケージです。
PHPには「モジュール版」と「CGI版」があり、古いバージョンのApacheで利用されるものはモジュール版になります。「php-fpm」はCGI版で、FastCGIは通常のCGIよりパフォーマンスの向上が見込めるものになります。モジュール版と比較して、高負荷なサイトでのパフォーマンスアップを期待できます・・・、ということです。
php-fpmの設定は/etc/php-fpm.d/以下にある「www.conf」ファイルで行います。www.confの設定変更前に、ファイルをバックアップしておきます。
php.iniの変更
PHPの設定は/etc/以下にあるphp.iniファイルで行います。php.iniの設定変更前に、既存のファイルをバックアップしておきます。
動作確認
コマンドラインからphpコマンドを利用してPHPの動作を確認します。
ブラウザでのPHP動作確認
ブラウザでPHPの動作を確認するために利用するファイルを作成します。
●Apacheの動作確認
Webページ表示確認
CGI確認
CGIで簡単なテストページを表示してみます。
もし、内容が表示されてしまう場合は/etc/httpd/conf/httpd.confのAddHandler cgi-script .cgiがコメントアウトされているか確認してください。
確認後、削除します。
SSI確認
SSIで現在日時を表示してみる。
SSIテストページが表示されない場合は、●SSIが有効にならないを参照してください。
.htaccess確認
.htaccessでDirectoryIndex(ファイル名を省略した場合に表示されるページ)をindex.htmlからindex.shtmlに変更してみます。
PHP確認
PHPで簡単なテストページを表示してみます。
表示されない場合は、/etc/httpd/conf.d/php.confの下記の行が有効になっているか確認してください。
Webサーバの確認後始末
上記の確認で作成したテスト用ページ等を全て削除します。
●PostgreSQLとの連携確認
PostgreSQLデータベース設定を参照してください。
●MySQLとの連携確認
MySQLデータベース設定を参照してください。
●Webサーバのログファイル
通常は/var/log/httpd/access_logと/var/log/httpd/error_logに出力されます。
SSL経由の場合は、/var/log/httpd/ssl_access_logと/var/log/httpd/ssl_error_logに出力されます。
●ユーザごとのWebディレクトリ公開
参考URL:ユーザ毎のウェブディレクトリ
参考URL:Apache httpd : ユーザのホーム領域を有効にする
ユーザごとのWebの公開
userdir.confを下記のように変更します。
apacheでユーザのホームページを公開するには、ユーザのホームディレクトリのアクセス権をあらかじめ下記のように変更しておく必要があります。
<Directory "/home/*/public_html"> 〜 </Directory> の記載方法を間違えると、ブラウザでindex.htmlを表示させた時に「Internal Server Error」と表示されることがありますので注意が必要です。
ユーザディレクトリ追加
既存ユーザの場合、スクリプトで一括してユーザディレクトリを作成するようにします。
Webを公開するユーザの追加。ただし、SSHによるリモート接続はできないようにする場合。
Webを公開するユーザの追加。ただし、SSHによるリモート接続をできるようにする場合。
ユーザごとのCGIの確認
Perlの設定
ユーザディレクトリでCGIが動作するか確認します。
もし、内容が表示されてしまう場合は/etc/httpd/conf/httpd.confのAddHandler cgi-script .cgiがコメントアウトされているか確認してください。
SSIの確認
現在時刻を表示させます。
.htaccessの確認
.htaccessでDirectoryIndex(ファイル名を省略した場合に表示されるページ)をindex.htmlからindex.shtmlに変更してみます。
http://www.bigbang.mydns.jp/~user1/にアクセスしてindex.shtmlが表示されれば完了です。
PHPの確認
PHPで簡単なテストページを作成して表示してみます。
最後に上記で作成したファイルを削除します。
●特定ディレクトリにアクセス時のみhttpsにリダイレクトする設定
参考URL:特定ディレクトリのみ共有SSL化する.htaccess設定
http://www.bigbang.mydns.jp/redmine/とアクセスすると、https://www.bigbang.mydns.jp/redmine/にリダイレクトさせるための設定方法です。
●常時SSL化の設定準備
参考URL:How to enable mod_rewrite on Apache on CentOS
モジュールが存在しているかどうか確認します。
モジュールの設定場所を確認します。
●常時SSL化の設定
参考URL:よく使うhtaccess
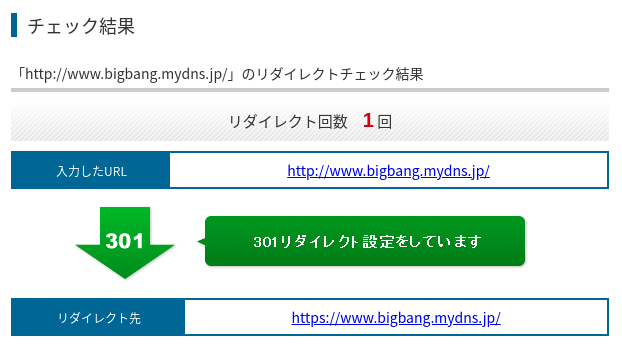
Googleカスタム検索での設定がよくわからないためhttp://www.bigbang.mydns.jp/、http(s)://bigbang.mydns.jp/となってしまう対策としてリダイレクト機能を使用することにしました。
インターネット上では.htaccessの設定でhttpsへのリダイレクトができるらしいとの記載がありましたので早速試してみました。
.htaccessが利用不可なのかと思い、.htaccess確認を実施したところ設定したindex.htmlにリダイレクトしました。
いろいろ調べてみるとrewrite.confを設定することによりリダイレクトできる記事を見つけました。
参考URL:apacheでhttpへのアクセスをhttpsへ自動リダイレクトする
参考URL:Apacheのmod_rewriteモジュールの使い方を徹底的に解説
下記のように設定したところ、リダイレクトされるようになりました。
正常にリダイレクトされていれば下記のような結果になります。
インターネットからの接続時のURLとイントラネットからの接続時のURLが異なるため、上記の設定だけでは切り分けができず全て上記で設定したURLでの接続となってしまいました。
これでは内部での監視状態で異常となってしまう(Xymonでhttpへのアクセスが「http://serverA.bigbang.dyndns.org/ - Moved Permanently」の警告表示)ため実施し、下記のような設定に変更しました。
●HSTSの設定
参考URL:HSTS (HTTP Strict Transport Security) の導入
参考URL:HSTSとは?推奨される理由とプリロードリスト登録方法
TLS暗号設定ガイドラインを参照して、HTTP Strict Transport Security(HSTS)を設定します。
現在のWebサーバの設定では、HSTSの設定が可能である場合、有効にすることを推奨しています。
HSTSの詳細は、TLS暗号設定ガイドラインの「7.4.1 HTTP Strict Transport Security(HSTS)の設定有効化」を参照してください。
Webサーバを常時SSL化しても、常時SSL化未対応だった頃のリンクからの接続は、そのURLへのアクセスをhttpからhttpsに変更してもらわない限りhttpでの接続となります。
また、URL直打ちでもhttp接続の可能性があります。したがって、常時SSL化設定をすることによりhttp接続を全てhttpsへリダイレクトすることができます。
しかし、常時SSL化の設定でも最初に一度はhttp接続してしまいます。
一方、HSTSは一度サイトを閲覧すれば、2回目以降はhttpsに直接接続するようになりセキュリティが高まります。
それでもなお、1回目の接続は残念ながら一旦http接続されてしまいます。
そこで、初回訪問時からhttpsに直接アクセスさせるための機能が、HSTS preload(HSTSプリロード)です。
それでは、まず、ApacheでHSTSを設定します。
各サーバの設定方法は、TLS暗号設定 サーバ設定編に記載されています。Apacheの場合、「5. HTTP Strict Transport Security 5.1. Apacheの場合 (HSTS)の設定方法例」に記載されています。
HSTS preloadの対応方法
参考URL:3分で出来るHSTSプリロードの設定方法 – 常時SSL化後に必ず行うべき設定
HSTSプリロード設定は、対象のサイトが既に常時SSL化されていることが前提となります。
登録条件を記載しておきます。
HSTSが設定されたサイトの不具合でhttps接続できない場合の対応方法
参考URL:HSTS が原因で、ウェブサイトが勝手にhttps接続しないようにする
上記のサイトを見て、ナルホドなって思いましたのでメモしておきます。
これを解消するためにHSTSを停止させるためには、WebサーバでStrict-Transport-Securityヘッダのmax-age=0を指定します。上記のように Strict-Transport-Securityヘッダそのものを削除すると、ユーザがブラウザでbigbang.mydns.jpドメインへのアクセスをHSTSを使わないように設定変更する以外は方法がありません。
chromeで特定のドメインのHSTS設定を削除する方法
アドレスバーに「chrome://net-internals/#hsts」と入力します。
まず「Query HSTS/PKP domain」で、目的のドメインがHSTSを使うドメインとして登録されているか確認します。
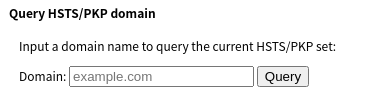

www.cpan.orgを例に示します。
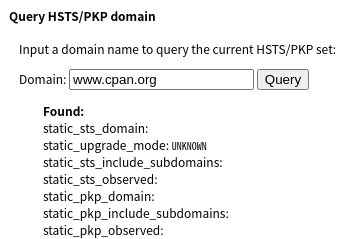
Domain:の箇所に「www.cpan.org」を入力し、Queryをクリックします。
登録されている場合、下記のように表示されます。
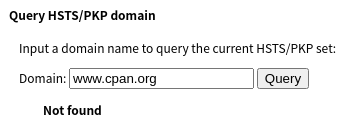
登録されていない場合、Not foundと表示されます。
登録されているドメインを削除します。「Delete domain security policies」で、目的のドメインを入力し削除します。

再度、確認し削除されていることを確認します。
Webサーバで常時SSL化の設定がされていなければHTTPでアクセスできるはずです。
Firefoxで特定のドメインのHSTS設定を削除する方法
Ctrl + Shift + Hを押下します。
ブラウジングライブラリーで該当ドメインを削除します。
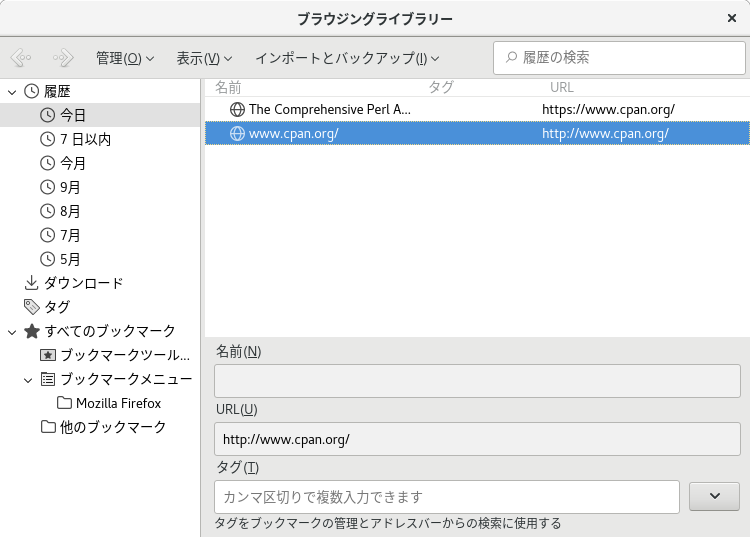
Webサーバで常時SSL化の設定がされていなければHTTPでアクセスできるはずです。
●mod_securityの有効化
こちらを参照してください。
●ApacheをTLS1.2、TLS1.3に対応させる方法(CentOS 8標準Apacheを使用)
参考URL:ApacheのSSLCipherSuiteで!RC4が効かない(解決済み)
CentOS 8標準のApache(2.4.37)でTLS1.2、TLS1.3に対応させるには下記のように設定します。
Qualys SSL Labs SSL Server TestでスキャンするとA評価に変わりました。
サポートしているTLSのバージョンの確認方法
参考URL:SSL/TLSの暗号化通信をTLS1.2 のみに制限する
opensslコマンドでサポートしているTLSを確認することができます。
サポートしていないTLS1.1を確認してみます。
●ApacheをOpenSSL 3.0に対応させる方法(Apache等ソースからインストール)
参考URL:Apache httpd 2.4.52(TLS1.3対応)+ HTTP/2 + Brotli インストールメモ
4回目のトライでようやくバージョン2.4.52でHTTP(80)、HTTPS(443)が動作するようになりました。
ことの顛末
動作確認のため(Apacheが起動しない)OpenSSL 1.1.1l、OpenSSL 3.0.2及httpd 2.4.50、httpd 2.4.52を別フォルダにインストールすることにしました。
2.4.52をmakeすると2.4.50(のフォルダが残っている場合)にMAKEFILEが作成されたため、2.4.50フォルダを一時的に別フォルダ名に変更しました。
その後、httpd 2.4.52をmake、make installしたところ、(デフォルトの設定ファイルの状態で)正常に起動するようになりました。
ただし、起動するのはHTTP(80)だけで、HTTPS(443)を有効にしようとるすと(古いバージョンのOpenSSLを読み込もうとして)エラーとなり起動しませんでした。
そこで、展開後のソースファイル(Apache 2.4.50、Apache 2.4.51、Apache 2.4.52、OpenSSL 1.1.1l、OpenSSL 3.0.2)及びインストール済みのディレクトリ(Apache 2.4.50、Apache 2.4.51、Apache 2.4.52、OpenSSL 1.1.1l、OpenSSL 3.0.2)を一度全て削除しました。
削除したインストール済みディレクトリ:/opt/openssl、/opt/openssl3、/opt/httpd、/opt/httpd2450、/opt/httpd2451、/opt/httpd2452
その後、OpenSSL 3.0.2、Apache 2.4.52を再インストールし、Apacheを起動したところ、正常に起動しました(HTTP(80)、HTTPS(443)も正常)。
インストール先
OpenSSL 3.0.2のインストール先:/opt/openssl3
Nghttp2 のインストール先:/opt/nghttp2
httpd 2.4.52のインストール先:/opt/httpd2452
OpenSSL 3.0.2のインストール
OpenSSL 3.0.2をインストールします。
Nghttp2のインストール
Nghttp2 1.47.0をインストールします。
HTTP/2のライブラリにパスを通します。
Apache 2.4.52のインストール
あらかじめ、APR及びAPR-utilをインストールしておきます。
Apache 2.4.52をインストールします。
systemdサービスファイルを作成します。
旧バージョンのApacheが起動していなことを確認してから、Apache 2.4.52を起動します。
●ApacheをTLS1.2、TLS1.3に対応させる方法(Apache等ソースからインストール)
参考URL:TLS1.3に対応したApache(httpd)のインストール・設定方法
参考URL:ApacheのTLS設定を2020年向けに更新する
参考URL:Apache httpd 2.4.49(TLS1.3対応)+ HTTP/2 + Brotli インストールメモ
CentOS 7上のApache及びOpenSSLのバージョンは
結果は下記のとおりでした。
そこで、Apache及びOpenSSLをyumからではなく、ソースから最新版をインストールします(これまで使用してきたApacheは、自動起動無効及びサービス停止とし、インストールしたままとします)。
最新のApacheをインストールするには、下記ライブラリが必要になります。
OpenSSLのインストール
OpenSSLの最新版をダウンロードし、インストールします。
APRのインストール
APRの最新版をダウンロードし、インストールします。
APR(Apache Portable Runtime)は、Apacheを様々なプラットフォームで動作させるためのライブラリです。
APR-utilのインストール
expat-develはビルドに必要ですので、インストールしていない場合インストールします。
Apacheのインストール
Apacheの最新版をダウンロードし、インストールします。
Apacheの設定
SSL及びTLS関連の設定に限って説明します。
httpd.configの設定
httpd.confを編集します。
httpd-ssl.confの設定
必要最低限の設定です。
httpd-ssl.confファイル後半の、VirtualHost コンテキスト内を少し修正します。
TLS1.2及びTLS1.3に対応させる
下記を有効化すると、これまで接続できていたクライアントから接続できなくなることがあるため注意してください。
TLS1.3では、暗号スイートの種類と表記が変更になりました(公開鍵アルゴリズムは、サーバ証明書から自動的に判定してくれるようになったので表記しません)。
TLS1.2以下の暗号スイートとは別に設定します。
第一パラメータにTLSv1.3を指定することで、TLS1.3の暗号スイートを設定することができます。
現状利用できるのは、設定例に書いてある3つのみです。
基本的にはAESを優先的に利用することになるのではないでしょうが。鍵長が128ビットと256ビットから選べますが、上記設定では128ビットを優先しています。
SSLProtocolィレクティブで利用可能なプロトコルを設定できます。
デフォルト設定では、TLSv1.0~TLSv1.3が有効になります。
SSLSessionTickets ディレクティブでは、TLSセッションチケットのオンオフを設定できます。
Apacheの実装だとセッションチケットの秘密鍵が定期的に更新しないため、Perfect Forward Security(前方秘匿性)が保たれません(ちなみにこれはnginxでも同様)。
PFSを保つには、①定期的にApacheを再起動する、②定期的にセッションチケットの秘密鍵を更新する、③セッションチケットを使わない、のいずれかが必要です。
設定が完了したら、Apacheを起動します(yumでインストールしていたApacheは自動起動を無効化し、停止させます)。
TLS1.3の暗号スイートの設定及びTLS1.2の暗号スイートの設定が完了しましたので、Qualys SSL Labs SSL Server Testでスキャンを実施します。
結果は下記のとおりでした。
Systemdへの登録
旧バージョン(2.4.6)の設定が残っていることもあり、新バージョン(2.4.50)用のユニットファイルを作成します。
ログローテションの変更
ローテンション後、Webでアクセスしてもログに記録されなくなりました。
Apacheの手動再起動後、ページにアクセスすると記録されるようになりました。
/etc/logrotate.dにあるhttpログのローテンションコマンドを変更します。
常時SSL化の設定
リダイレクト設定を引き継ぎます。
rewriteモジュールを読み込んでいることを確認します。
正常にリダイレクトされていれば下記のような結果になります。
HSTSの設定
参考URL:HSTS (HTTP Strict Transport Security) の導入
参考URL:HSTSとは?推奨される理由とプリロードリスト登録方法
TLS暗号設定ガイドラインを参照して、HTTP Strict Transport Security(HSTS)を設定します。
現在のWebサーバの設定では、HSTSの設定が可能である場合、有効にすることを推奨しています。
HSTSの詳細は、TLS暗号設定ガイドラインの「7.4.1 HTTP Strict Transport Security(HSTS)の設定有効化」を参照してください。
それでは、Apacheで実際に設定します。
各サーバの設定方法は、TLS暗号設定 サーバ設定編に記載れています。Apacheの場合、「5. HTTP Strict Transport Security 5.1. Apacheの場合 (HSTS)の設定方法例」に記載されています。
SSIの有効化
/opt/httpd/conf/httpd.confを編集します。
PHP 5.4の有効化(以前の環境からの移行)
参考URL:Apacheのhttpd.confにPHPを設定する方法
参考URL:PHPインストール時のMPMのエラーを手っ取り早く解消する
もともとCentOS 7上で動作していたPHPのバージョンは5.4でしたので、これを動作するように設定します。
/opt/httpd/conf/extra/httpd-php.confを作成します。
Apacehがマルチスレッド(worker)で動作しているのに対して、CentOS付属のPHPはマルチスレッド処理に対応していないため、PHPが「マルチスレッドには対応していません。」
とエラーを吐いています。
これに対応するため、/opt/httpd/conf/extra/httpd-mpm.confを修正します(Apacheがシングルスレッドとして動作しますので、マシンスペックによってはパフォーマンスを生かしきれません。)。
PHP 8.0の有効化のための事前作業
参考URL:AlmaLinux + Apache2.4 + MySQL8.0 + PHP8.0をソースインストール縛りで構築しWordPressを動かす
pcre及びexpatのインストール
pcre及びexpatのソース最新版をダウンロードし、インストールします。
libxml2のインストール
libxml2のソース最新版をインストールします。
SQLiteのインストール
SQLiteのソース最新版をインストールします。
参考URL:(Amazon Linux2(ec2),CentOS7)SQLite3の最新バージョンをインストールする
onigurumaのインストール
onigurumaのソース最新版をインストールします。
zlibのインストール
zlibのソース最新版をインストールします。
ようやくこれでPHP 8.0のソースインストールの準備が完了しました。
PHP 8.0の有効化
PHP 8.0の最新版をインストールします。
バージョンを確認します。
php.iniの初期設定
参考URL:PHPインストール時のMPMのエラーを手っ取り早く解消する
php.iniファイルを編集します。
上記の設定は、開発環境として利用する上での最小限の設定です。
Webdavの有効化
/opt/httpd/conf/httpd.confに記載されているWebdav関連のモジュールを有効化します。
Xymonの有効化
Xymonのconfファイルをコピーします。
apcupsdの有効化
Xymonのconfファイルをコピーします。
awstatsの有効化
Xymonのconfファイルをコピーします。
ModSecurity(WAF、ソース)のインストール
参考URL:Apache×Mod SecurityでカンタンWAF構築
参考URL:CentOS7 apacheにmod_securityの導入と設定
参考URL:CentOS 7 ModSecurity 2.9.2のソースファイルからのインストール
ModSecurityの最新版をダウンロードし、インストールします。
mod_security2.soのパーミッションを変更します。
http://<サーバ名>?union+selectにアクセスして、Forbiddenと表示されれば問題なく動作しています。
(WAF)設定ファイルの変更(modsecurity.conf)
上記(ModSecurity(WAF、ソース)のインストール)では、WAFに関する設定を/opt/httpd/conf/httpd.conf内に記載しましたが、/opt/httpd/conf/extra/modsecurity.confを利用するように変更します。
まず、httpd.conf内の<IfModule security2_module> 〜 </IfModule>までをコメントアウトまたは削除します。
新たに下記行を追記します。
(WAF)独自ルールの設定
ローカルネットワーク等をWAFの監視から除外します。
(WAF)Execution error - PCRE limits exceeded
参考URL:The word "Warning" causes "PCRE limit exceeded" #1689
下記を実行しました。
SecPcreMatchLimit及びSecPcreMatchLimitRecursionの値を変更します。
(WAF)Request Entity Too Large
参考URL:Apache(httpd)のリバースプロキシで大きなリクエストを制限する
WAFのログで記録されていました。
●SSLProxyの設定
参考URL:SSLProxyを使っているApacheを2.2から2.4にバージョンアップする際の注意点
イントラ用にリバースプロキシを設定したかったため、下記のように設定しました。
のようにエラーが記録されていました。
どうもプロキシサーバとserverBとのSSL処理が正常に動作していないようです。
調査したところ、当該エラーはプロキシサーバでホスト名が証明書の検証でCommonName(CN)やSubject Alternative Name(SANs)に一致しないというエラーのようです。
このため、SSLProxyCheckPeerCN offとSSLProxyCheckPeerName offの設定を追加することとしました。
これにより問題が解消され、リバースプロキシとして機能するようになりました。
●robots.txtについて
参考URL:robots.txtとは?クロール拒否する方法・書き方・必要性を解説
Googleアカウントを持っているのであれば、上記によりrobots.txtの内容をチェックできます。
●Webdavクライアント「CarotDAV」を使用する
参考URL:麗の小屋 - WebDAV Client CarotDAV -
CarotDAVは上記からダウンロード出来ます。
サーバ側の設定が問題が無ければCarotDAVを使用して簡単に接続できます。
SSL接続する場合でオレオレ証明書(自己証明書)の場合、接続時に「Server Certificate Error」と表示されますが、「Ignore」をクリックすることで接続することが出来ます。
また、Proxy経由での接続時、環境により下記の設定が必要かもしれません。
●Apacheで作るファイルサーバ(LDAP認証編)
LDAPのインストールと基本設定
LDAPにはOpenLDAPを使用します。必要なパッケージは以下のとおりです。openldap-serversのインストールを忘れる場合が多いので、忘れないように注意しましょう。
(記載中断中)
500 Internal Server Error
Apacheで、エラー500で「Internal Server Error」となる原因としては、以下が考えられます。
CGIの改行コードが違っている。(Linuxのみ)
Windowsの改行コードは「CR+LF」、これに対してLinuxの改行コードは「LF」のため、たったこれだけですが、CGIは動いてくれません。対策としては、エディタで改行コードを変更する方法ありますが、もっと簡単には、FTPクライアントで、CGIをアスキーモード又はテキストモードで転送すれば、OSに応じて自動変換してくれるので、この方法でもかまいません。
Internal Server Error
上記の設定を行ったにもかかわらず、「Internal Server Error」が表示されてしまう。
Apacheのエラーログには、下記のようなものが出力されています。
●SSIが有効にならない
・/var/www/htmlの場合
有効にするために下記のように変更します。
・/home/(ユーザ名)/public_htmlの場合
前提条件としては下記のとおりです。
ホームディレクトリを利用してホームページを公開しており、公開領域は/home/(ユーザ名)/public_html、CGI領域は/home/(ユーザ名))/cgi-binです。
public_html以下にあるhtmlファイル等は問題なく表示できる。
index.shtml内での表示部分は<!--#exec cgi="cgi-bin/uptime.cgi"-->となっており、HTTPSを利用して、https://〜/cgi-bin/uptime.cgiでアクセスすると問題なく表示される。
しかし、https://〜/index.shtmlとすると想定どおりに表示されない。
まず、SSIが利用できるようにssl.confの下記(緑色)部分を追記しました。ssl.con変更後はhttpデーモンのリロードまたは再起動が必要です。
●Windows 7でwebdavを利用できない
OSがWindows 7だとwebdavフォルダと接続できないようです。
インターネットにはそれに関する情報がいろいろありました。
Windows7でwebdavが使えない不具合やWindows7でwebdavを使ってみたのような情報があり、簡単にまとめると以下のとおりです。
32bit版はこちらから、64bit版はこちらからダウンロードできます。
(2104.3.5現在)
IEのバージョンが10位になった頃からか、上記のTeamFileが使用出来なくなってしまった。どうもIEのセキュリティに関係があるらしい。
ようやくその対応方法が分かったので、その対策として●サーバ証明書のインストール方法(Windows 7 IE10編)にその対応方法を記載しました。
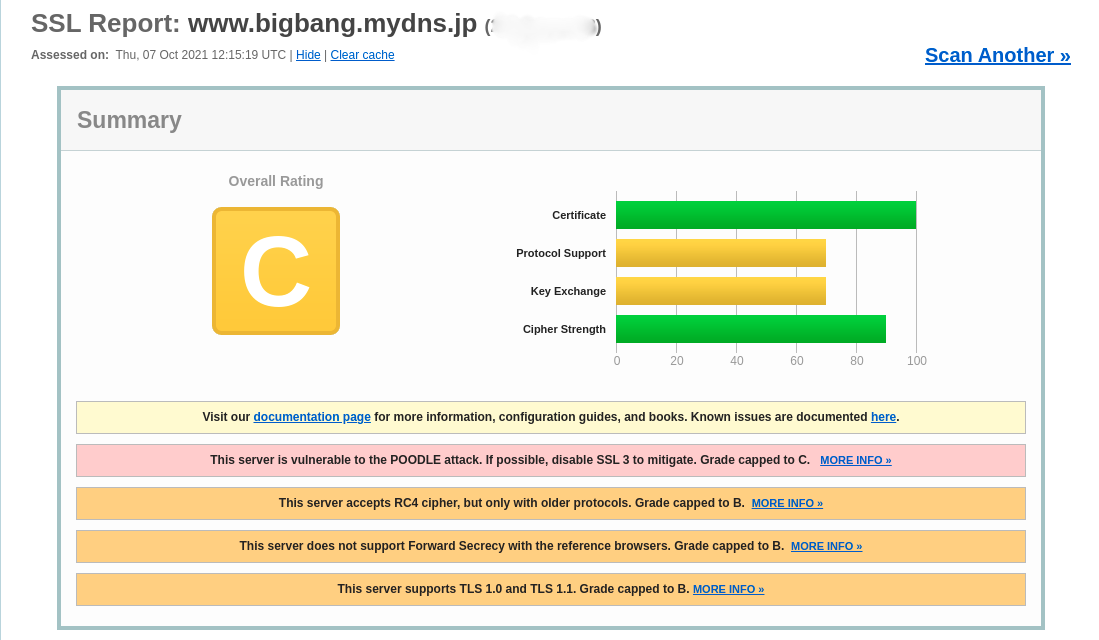
●SSLv2、SSLv3の無効化
昨今、SSLv2の脆弱性が取り沙汰されています。このため、SSLv2を無効化したいと思います。
SSLv2を無効化するには。ssl.confを下記のとおり編集します。
上記の設定では、下記のようなエラーが表示されました。
最後にSSLのセキュリティランクを確認してはいかがでしょうか。
OpenSSLを利用されている方は下記サイトでセキュリティランクを確認してみると良いでしょう。
https://sslcheck.globalsign.com/ja/
●Unable to verify certificate 'Server-Cert'. Add "NSSEnforceValidCerts off" to nss.conf so the server can start until the problem can be resolvedでWebサーバ(httpd)が突然起動しなくなった
CentOS 6でWeb(apache)サーバが突然起動しなくなりました。起動しようとすると/var/log/messagesに下記のようなエラーが表示されます。
これを回避するには、nss.confにNSSEnforceValidCerts offを追加すればよいです。もちろんもし有効期限が切れているなら、サーバ証明書を更新したほうがよいです。
サーバ証明書の確認方法は、まず証明書の一覧を見て、次にサーバ証明書のニックネームを指定して(デフォルトはServer-Cert)、サーバ証明書の中身を見ます。
上記の方法では一時凌ぎ的な感じです。したがって、下記の方法で証明書の期限を本来の正常なものに更新されますので、こちらは実施したほうが良いかと思います。
●AH01906: RSA server certificate is a CA certificate (BasicConstraints: CA == TRUE !?)
●バーチャルホストの設定
CentOS 7でhttpdを再起動すると下記エラーが記録されていることに気が付きました。
なお、下記記載方法はapache2.4対応版です。
●A lock database was not specified with the DAVLockDB directive. One must be specified to use the locking functionality.
下記行を設定ファイルに追記します。
●CentOSのOpenSSL脆弱性について
参考URL:【CentOS】CentOS導入OpenSSLバージョン確認・脆弱性対応の確認方法
インターネット上にOpenSSLに関する脆弱性情報の掲載があってもCentOSのパッチが表示されない(ダウンロードできない)ことがあります。
上記URLによると、
【公式】Redhat CVE Database
●CentOS 7のApacheが突然起動しなくなった
参考URL:SSLライブラリエラー:-8181証明書の有効期限が切れています
参考URL:apache mod_nss nss証明書について
/var/log/httpd/error_logに下記のようなログが記録されていました。
ログからmod_sslではなく、mod_nssの証明書の有効期限に問題があるようです。
mod_nssの有効期限を確認します。
もし、mod_ssl(ssl.conf)が443番ポートを受け持っているのであれば、nssを無効にすることでApacheを起動できます。
ただし、ssl.confで設定している証明書もnssと同じく期限切れになっている可能性があります。
mod_nssで443番ポートを使用している場合の一時的な対処方法は下記のとおりです。
/etc/httpd/conf.d/nss.conf内の記述に「NSSEnforceValidCerts off」を追記、Apacheを再起動します。
永続的な対処方法は下記のとおりです。
●Update SSL Certfile <サーバ名>
参考URL:認証局がLet’s Encryptの証明書を更新しようとしたらエラーが出た
参考URL:Let’s Encryptのサーバー証明書期限を自動延長するには?
参考URL:SSL 証明書を取得する (Let's Encrypt)
月に一度、Let's Encript(snapd利用)の証明書を更新スクリプトを動作させるようにしていました。
動作してメールに「Update SSL Certfile <サーバ名>」が来ていましたが、内容が「Update SSL Certfile failed」となっていて、SSL証明書は更新されていませんでした。
(CentOS 7で動作しているLet's Encript(certbot-autoを利用))は正常に毎月一度更新されています。
手動で実行してみた結果です。
証明書を手動で更新するためのコマンド「certbot renew」を使用してみます。
「Certificate not yet due for renewal」というメッセージは、サーバー証明書の更新の必要がないという意味のようです。
renewalコマンドは、30日以内に期限切れになるサーバー証明書のみ更新するそうです。
まだ、期限まで余裕があるサーバー証明書の場合、このようなメッセージが表示される、とのことでした。
●directory index forbidden by Options directive
Apacheのエラーログに下記が記録されていることを見つけました。
このエラーは「https://www.bigbang.mydns.jp/test/」のように「/」で終わるようなアクセスをした場合、/etc/httpd/conf/httpd.confのDirectoryIndexディレクティブの記載がないか、漏れがあると記録されます。
これを修正にするには、/etc/httpd/conf/httpd.confのDirectoryIndexディレクティブを修正するか、Directoryディレクティブを使用して下記のように設定します。
再度、URLにアクセスし表示されれば完了です。
解決手順としては下記のような順序でしょうか。
参考URL:perl のCGIで、Service Unavailable
ソースからインストールしたApache(2.4.50)でPerlで作成したCGIを動作させるとService Unavailableとなり、正常に結果が表示されません。
エラーログには下記にように記録されていました。
ApacheでCGIを実行するモジュールが読み込まれているか確認します。
この場合、モジュールの問題ではありません。
参照URLのとおり設定したところ、正常に動作するようになりました。
# vi /etc/httpd/conf/httpd.conf以下の箇所を、変更しました。
Listen 80
SxymoerverAdmin webmaster@mail.bigbang.example.jp
ServerName www.bigbang.example.jp:80
Options Includes ExecCGI FollowSymLinks ← CGI・SSI許可、ファイル一覧表示禁止
AllowOverride All ← .htaccessの許可
DirectoryIndex index.html index.html.var index.htm
#AddDefaultCharset UTF-8 ← コメントアウトする
AddHandler cgi-script .cgi .pl ← CGIスクリプトに.plを追加
# httpd.confの最終行に下記4行を追記
ServerTokens prod ← エラーページ等でOS名を表示しないようにする
ServerSignature off ← エラーページ等でApacheのバージョンを表示しないようにする
HostnameLookups off
KeepAlive on ← 接続の定期的チェックをオン
設定が完了したら、apacheを再起動します。
# service httpd restart
# chkconfig httpd on ← apache自動起動設定
# chkconfig --level httpd ← apache自動起動設定確認
httpd         0:off   1:off   2:on    3:on    4:on    5:on    6:off ← ランレベル2〜5のonを確認
●ネームベースのバーチャルホスト設定
ネームベースバーチャルホストは、同一IPアドレスに対しホスト名が異なるサービスを提供する方法です。下記では、ホスト名がwwwとwww_otherとして 設定しています。
# vi /etc/httpd/conf/httpd.conf
NameVirtualHost *:80
<VirtualHost *:80>
  ServerName www.bigbang.example.jp
</VirtualHost>
<VirtualHost *:80>
  ServerName www_other.bigbang.mydns.jp
  DocumentRoot /home/www_other/public_html
  ScriptAlias /cgi-bin/ "/home/public/cgi-bin"
  DirectoryIndex index.htm
  Options Indexes MultiViews
</VirtualHost>
上記の場合、アクセスログ及びエラーログは<VirtualHost>ディレクティブの外に記載されている各ログに記録されます。バーチャルホスト用にアクセスログ、エラーログを記録したい場合は以下の用に記載します。
<VirtualHost *:80>
  ServerName www_other.bigbang.mydns.jp
  DocumentRoot /home/www_other/public_html
  ScriptAlias /cgi-bin/ "/home/www_other/cgi-bin"
  DirectoryIndex index.htm
  Options Indexes MultiViews
  TransferLog logs/www_other.bigbang.example.jp_log ← 追記
  ErrorLog logs/www_other.bigbang.example.jp-error_log ← 追記
</VirtualHost>
バーチャルホストの設定が完了したら、DNSの設定もしなければアクセスすることが出来ません。したがって、下記のような正引きゾーンの設定が必要になります。
www		IN	A 	192.168.0.1
www_other 	IN	CNAME	www
●/etc/pki/tls/misc/CA をインストールする方法
参考URL:https://blog.apar.jp/linux/14087/
Rocky 9等では、認証局(CA)を容易に構築するためのスクリプト「/etc/pki/tls/misc/CA」がインストールされなくなりました。
そのため Rocky 9等でプライベート認証局を構築する場合は、opensslコマンドを利用する必要があります。
今回は、Rocky 9等に「/etc/pki/tls/misc/CA」をインストールする方法を記載しました。
最も簡単な方法は、CentOS 7の「/etc/pki/tls/misc/CA」を、Rocky 9等にコピーするだけです。
CentOS 7の環境が無い場合は、以下の手順で「/etc/pki/tls/misc/CA」をインストールすることができます。
適当な作業用ディレクトリを作成して、そこに移動します。
# mkdir work
# cd work/
CentOS 7のopensslのRPMパッケージをダウンロードします。
# wget http://ftp.riken.jp/Linux/centos/7/os/x86_64/Packages/openssl-1.0.2k-19.el7.x86_64.rpm/etc/pki/tls/misc/CA を取り出します。
# rpm2cpio openssl-1.0.2k-19.el7.x86_64.rpm | cpio -id ./etc/pki/tls/misc/CA/etc/pki/tls/misc/CA を従来の場所に移動します。
# mv -i etc/pki/tls/misc/CA /etc/pki/tls/misc//etc/pki/tls/misc/CAが動作することを確認します。
/etc/pki/tls/misc/CA -h
(下記のように、表示されればOKです。)
usage: ./CA -newcert|-newreq|-newreq-nodes|-newca|-sign|-verify
●CA認証局の構築
CA認証局等の有効期限を10年に変更します。
# sed -i "s/365/3650/g" /etc/pki/tls/openssl.cnf
# sed -i "s/365/3650/g" /etc/pki/tls/misc/CA
# sed -i "s/1095/3650/g" /etc/pki/tls/misc/CA
CA認証局を作成します。
# cd /etc/pki/tls/certs/
# /etc/pki/tls/misc/CA -newca
CA certificate filename (or enter to create)
Making CA certificate ...
Generating a 2048 bit RSA private key
.............................................................+++
..........................................+++
writing new private key to '/etc/pki/CA/private/./cakey.pem'
Enter PEM pass phrase: ← パスワードを入力
Verifying - Enter PEM pass phrase: ← パスワードを入力(再確認用)
-----
You are about to be asked to enter information that will be incorporated
into your certificate request.
What you are about to enter is what is called a Distinguished Name or a DN.
There are quite a few fields but you can leave some blank
For some fields there will be a default value,
If you enter '.', the field will be left blank.
-----
Country Name (2 letter code) [XX]:JP
State or Province Name (full name) []:Tokyo
Locality Name (eg, city) [Default City]:(ENTER)
Organization Name (eg, company) [Default Company Ltd]:BIGBANG
Organizational Unit Name (eg, section) []:(ENTER)
Common Name (eg, your name or your server's hostname) []:bigbang.mydns.jp
Email Address []:webmaster@mail.bigbang.mydns.jp
Please enter the following 'extra' attributes
to be sent with your certificate request
A challenge password []:(ENTER)
An optional company name []:(ENTER)
Using configuration from /etc/pki/tls/openssl.cnf
Enter pass phrase for /etc/pki/CA/private/./cakey.pem: ← cakey.pem作成時のパスワードを入力
Check that the request matches the signature
Signature ok
Certificate Details:
        Serial Number: 9348937751764410289 (0x81be195a39281fb1)
        Validity
            Not Before: Mar  3 08:14:45 2016 GMT
            Not After : Mar  1 08:14:45 2026 GMT
        Subject:
            countryName               = JP
            stateOrProvinceName       = Tokyo
            organizationName          = BIGBANG
            commonName                = bigbang.mydns.jp
            emailAddress              = webmaster@mail.bigbang.mydns.jp
        X509v3 extensions:
            X509v3 Subject Key Identifier:
                79:00:……
            X509v3 Authority Key Identifier:
                keyid:79:00:……
            X509v3 Basic Constraints:
                CA:TRUE
Certificate is to be certified until Mar  1 08:14:45 2026 GMT (3650 days)
Write out database with 1 new entries
Data Base Updated
鍵等は下記フォルダに保存されます。
CA秘密鍵:/etc/pki/CA/private/cakey.pem
CA証明書:/etc/pki/CA/cacert.pem
CA認証局再作成時に下記のようなエラーが表示さされる場合があります。
failed to update database
TXT_DB error number 2
この場合は、下記を実行後再作成してください。
# rm /etc/pki/CA/private/cakey.pem
# rm /etc/pki/CA/index.txt
CA認証局を構築したサーバとは異なるサーバで、下記で作成するサーバ証明書を利用できるようにderファイルを作成します。
# openssl x509 -inform pem -in /etc/pki/CA/cacert.pem -outform der -out /var/www/html/cacert.der
●セキュア(SSL)なWebサーバの構築(オレオレ証明書)
SSLサーバではアクセス時に最初にSSLの認証シーケンスが走ります。しかし、その時点ではApacheはアクセスしてきたホスト名が分からないため、証明書の交換は先頭のバーチャルホストのデータを元に行われます。従って、ネームベースのバーチャルホストでは、SSLは一つのバーチャルホストしか扱えません。
mod_sslをインストールします。
# yum -y install mod_sslセキュアなWebサーバを構築するには、サーバ用秘密鍵、証明書を作成する必要があります。
サーバ用秘密鍵を作成します。
# cd /etc/pki/tls/certs/

# openssl genrsa -out server.key -aes256 2048
Generating RSA private key, 2048 bit long modulus
......................+++
....+++
e is 65537 (0x10001)
Enter pass phrase for server.key:パスワードを入力
Verifying - Enter pass phrase for server.key:パスワードを入力(再確認用)
サーバ署名要求証明書を作成します。
# openssl req -new -key server.key -out server.csr
Enter pass phrase for server.key:
You are about to be asked to enter information that will be incorporated
into your certificate request.
What you are about to enter is what is called a Distinguished Name or a DN.
There are quite a few fields but you can leave some blank
For some fields there will be a default value,
If you enter '.', the field will be left blank.
-----
Country Name (2 letter code) [XX]:JP
State or Province Name (full name) []:Tokyo
Locality Name (eg, city) [Default City]:空ENTER
Organization Name (eg, company) [Default Company Ltd]:BIGBANG
Organizational Unit Name (eg, section) []:空ENTER
Common Name (eg, your name or your server's hostname) []:www.bigbang.mydns.jp
Email Address []:webmaster@mail.bigbang.mydns.jp
Please enter the following 'extra' attributes
to be sent with your certificate request
A challenge password []:空ENTER
An optional company name []:空ENTER
CAの役割を担うサーバでサーバ署名要求証明書へCAの署名を付加します。
# openssl ca -config /etc/pki/tls/openssl.cnf -in server.csr -keyfile /etc/pki/CA/private/cakey.pem \
-cert /etc/pki/CA/cacert.pem -out server.crt
Using configuration from /etc/pki/tls/openssl.cnf
Enter pass phrase for /etc/pki/CA/private/cakey.pem:
Check that the request matches the signature
Signature ok
Certificate Details:
        Serial Number: 9348937751764410292 (0x81be195a39281fb4)
        Validity
            Not Before: Mar  3 10:30:24 2016 GMT
            Not After : Mar  1 10:30:24 2026 GMT
        Subject:
            countryName               = JP
            stateOrProvinceName       = Tokyo
            organizationName          = BIGBANG
            commonName                = www.bigbang.mydns.jp
            emailAddress              = webmaster@mail.bigbang.mydns.jp
        X509v3 extensions:
            X509v3 Basic Constraints:
                CA:FALSE
            Netscape Comment:
                OpenSSL Generated Certificate
            X509v3 Subject Key Identifier:
                81:06:……
            X509v3 Authority Key Identifier:
                keyid:DE:A6:……
Certificate is to be certified until Mar  1 10:30:24 2026 GMT (3650 days)
Sign the certificate? [y/n]:y
1 out of 1 certificate requests certified, commit? [y/n]y
Write out database with 1 new entries
Data Base Updated
この際、下記のようなエラーが表示される場合があります。
(…省略…)
Sign the certificate? [y/n]:y
failed to update database
TXT_DB error number 2
これは、CAに対する証明書要求を一度revoke(無効化)して下さい。再度、SSL証明書の作成を実行すれば、正常に完了します。
# ls -l /etc/pki/CA/newcerts
合計 32
-rw-r--r-- 1 root root 4510  3月  3 16:43 81BE195A39281FB0.pem
-rw-r--r-- 1 root root 4504  3月  3 17:14 81BE195A39281FB1.pem
-rw-r--r-- 1 root root 4504  3月  3 18:44 81BE195A39281FB2.pem
-rw-r--r-- 1 root root 4504  3月  3 19:21 81BE195A39281FB3.pem
# openssl ca -revoke /etc/pki/CA/newcerts/81BE195A39281FB0.pem
Using configuration from /etc/pki/tls/openssl.cnf
Enter pass phrase for /etc/pki/CA/private/cakey.pem:
Adding Entry with serial number 81BE195A39281FB0 to DB \
for /C=JP/ST=Tokyo/O=BIGBANG/CN=www.bigbang.mydns.jp/ailAddress=postmaster@mail.bigbang.mydns.jp
Revoking Certificate 81BE195A39281FB0.
Data Base Updated
サーバ証明書の秘密鍵からパスワードを削除します。
# openssl rsa -in server.key -out server.key
Enter pass phrase for server.key: ← サーバ秘密鍵・証明書作成時のパスワードを入力
writing RSA key
パスワードを削除するのは、Webサーバ起動時にパスワードを要求されないようにするためです。
作成した各種鍵を確認します。
・秘密鍵の確認
# openssl rsa -in server.key -text・CSR(署名要求書)の確認
# openssl req -in server.csr -text・証明書の確認
# openssl x509 -in server.crt -text

or

# openssl s_client -connect localhost:443 | openssl x509 -text -noout

or

※Let's Encryptの場合
# openssl x509 -in /etc/letsencrypt/live/(管理しているドメイン名)/cert.pem -text
・サーバに設定されている証明書の有効期限の確認
# echo | openssl s_client -connect www.bigbang.mydns.jp:443 -showcerts | openssl x509 -dates -noout
depth=0 C = JP, ST = Tokyo, L = Chiyoda-Ku, O = BIGBNAG, CN = www.bigbang.mydns.jp, emailAddress = webmaster@mail.bigbang.mydns.jp
verify error:num=18:self signed certificate
verify return:1
depth=0 C = JP, ST = Tokyo, L = Chiyoda-Ku, O = BIGBNAG, CN = www.bigbang.mydns.jp, emailAddress = webmaster@mail.bigbang.mydns.jp
verify return:1
DONE
notBefore=Aug 13 23:55:10 2015 GMT
notAfter=Aug 12 23:55:10 2020 GMT
次に、SSLの設定を行います。
# vi /etc/httpd/conf.d/ssl.conf
SSLCertificateFile /etc/pki/tls/certs/server.crt ← サーバ証明書を指定
SSLCertificateKeyFile /etc/pki/tls/certs/server.key ← サーバ秘密鍵を指定
#  General setup for the virtual host, inherited from global configuration
#DocumentRoot "/var/www/html" ← #を削除(コメント解除)
DocumentRoot "/var/www/html"
設定が完了したら、apacheを再起動します。ポートは443番を使用しますので、ファイアーウォールの設定で通るようにしてください。下記のように確認します。
https://(Webサーバ名、または、IPアドレス)/アクセスできると、「セキュリティの警告」ウィンドウが表示され、"はい"をクリックし、Webページが表示されればOKです。
なお、アクセスして「セキュリティの警告」ウィンドウが表示されたら、「証明書の表示」ー「証明書のインストール」を行えば、以降、「セキュリティの警告」ウィンドウは表示されなくなります。
●Let's Encrypt証明書の設定(Snapd)
参考URL:CentOS8.2でSSL証明書(Let's Encrypt)をセットアップする手順
参考URL:SSL 証明書を取得する (Let's Encrypt)
参考URL:Let’s EncryptによるSSLサーバー証明書の取得、自動更新設定(2021年3月版)
「EPELを利用するための設定方法」を参照してEPELを利用できるようにします。
EPELからsnapdをインストールします。
# dnf --enablerepo=epel -y install snapd
# systemctl enable --now snapd.socket
# ln -s /var/lib/snapd/snap /snap
# snap install core
##### updateがあるかもしれないのでrefreshする。
# snap refresh core
Snapコマンドの動作確認を飛ばして、certbotをインストールするにはこちらをクリックしてください。
Snapコマンドの基本操作は下記のとおりです。
##### インストール済Snapパッケージ一覧
# snap list
No snaps are installed yet. Try 'snap install hello-world'.
##### Snapリポジトリからパッケージをワード検索
# snap find kubernetes
Name Version Publisher Notes Summary
microk8s v1.21.1 canonical✓ classic Lightweight Kubernetes for workstations and appliances
kata-containers 2.1.1 katacontainers✓ classic Lightweight virtual machines that seamlessly plug into the containers ecosystem
doctl v1.61.0 digitalocean✓ - The official DigitalOcean command line interface
kubectl 1.21.1 canonical✓ classic Command line client for controlling a Kubernetes cluster.
.....
.....
##### hello-worldパッケージをインストール
# snap install hello-world
hello-world 6.4 from Canonical✓ installed
[root@nezumi ~]# snap list
Name         Version    Rev    Tracking       Publisher     Notes
core         16-2.51.1  11316  latest/stable  canonical✓    core
core20       20210429   1026   latest/stable  canonical✓    base
hello-world  6.4        29     latest/stable  canonical✓    -

##### パッケージ情報を表示
# snap info hello-world
name:      hello-world
summary:   The 'hello-world' of snaps
publisher: Canonical✓
store-url: https://snapcraft.io/hello-world
contact:   snaps@canonical.com
license:   unset
description: |
  This is a simple hello world example.
commands:
  - hello-world.env
  - hello-world.evil
  - hello-world
  - hello-world.sh
snap-id:      buPKUD3TKqCOgLEjjHx5kSiCpIs5cMuQ
tracking:     latest/stable
refresh-date: today at 13:32 JST
channels:
  latest/stable:    6.4 2019-04-17 (29) 20kB -
  latest/candidate: 6.4 2019-04-17 (29) 20kB -
  latest/beta:      6.4 2019-04-17 (29) 20kB -
  latest/edge:      6.4 2019-04-17 (29) 20kB -
installed:          6.4            (29) 20kB -

##### アプリケーション実行
# hello-world
Hello World!

##### 実PATHは下記のとおり
# which hello-world
/var/lib/snapd/snap/bin/hello-world

##### 実体はリンク
# ll /var/lib/snapd/snap/bin/hello-world
lrwxrwxrwx. 1 root root 13  7月 12 13:32 /var/lib/snapd/snap/bin/hello-world -> /usr/bin/snap

##### アプリケーションの無効化
# snap disable hello-world
hello-world disabled
# snap list
Name         Version    Rev    Tracking       Publisher     Notes
core         16-2.51.1  11316  latest/stable  canonical✓    core
core20       20210429   1026   latest/stable  canonical✓    base
hello-world  6.4        29     latest/stable  canonical✓    disabled

# hello-world
-bash: /var/lib/snapd/snap/bin/hello-world: No such file or directory

##### アプリケーションの有効化
# snap enable hello-world
hello-world enabled
# hello-world
Hello World!

##### アンインストールする場合は以下
##### [snap remove] 実行にはシステムにtarコマンドが必要
##### CentOS Minimal Install にはtarは含まれていない
# snap remove hello-world
hello-world removed

# snap list
Name     Version    Rev    Tracking       Publisher     Notes
core     16-2.51.1  11316  latest/stable  canonical✓    core
core20   20210429   1026   latest/stable  canonical✓    base
証明書を取得するためのツール Certbot クライアントをインストールします。
# snap install certbot --classic
certbot 1.17.0 from Certbot Project (certbot-eff✓) installed

# ln -s /snap/bin/certbot /usr/bin/certbot
証明書を取得します。
下記作業は、Apache httpdやNginxなどのWebサーバが稼働していることが前提となります。
また、インターネット側から、作業を実施するサーバ(証明書を取得したいFQDNのサーバ)の80ポート宛てにアクセス可能であることも前提となります。
##### --webroot指定で稼働中Webサーバの公開ディレクトリ配下を認証用の一時領域に使用
##### -w <ドキュメントルート> -d <証明書を取得したいFQDN>
##### FQDN(Fully Qualified Domain Name):ホスト名.ドメイン名を省略なしで表記
##### ドキュメントルートはバーチャルホストで複数のホスト定義がある場合、該当するホスト定義のものを指定
##### 証明書を取得したいFQDNが複数ある場合は、-d <証明書を取得したいFQDN>を複数指定
##### 例 : bigbang.mydns.jp/www.bigbang.mydns.jp の二つについて取得する場合
##### ⇒ <-d bigbang.mydns.jp -d www.bigbang.mydns.jp>

# certbot certonly --webroot -w /var/www/html -d www.bigbang.mydns.jp
Bootstrapping dependencies for RedHat-based OSes that will use Python3... (you can skip this with --no-bootstrap)
dnf is /usr/bin/dnf
dnf is hashed (/usr/bin/dnf)
.....
.....
##### 初回のみメールアドレスの登録と利用条件への同意が必要
##### 受信可能なメールアドレスを指定
Enter email address (used for urgent renewal and security notices)
(Enter 'c' to cancel): root@mail.bigbang.mydns.jp

- - - - - - - - - - - - - - - - - - - - - - - - - - - - - - - - - - - - - - - -
Please read the Terms of Service at
https://letsencrypt.org/documents/LE-SA-v1.2-November-15-2017.pdf. You must
agree in order to register with the ACME server at
https://acme-v02.api.letsencrypt.org/directory
- - - - - - - - - - - - - - - - - - - - - - - - - - - - - - - - - - - - - - - -
# 利用条件に同意する
(A)gree/(C)ancel: A

- - - - - - - - - - - - - - - - - - - - - - - - - - - - - - - - - - - - - - - -
Would you be willing to share your email address with the Electronic Frontier
Foundation, a founding partner of the Let's Encrypt project and the non-profit
organization that develops Certbot? We'd like to send you email about our work
encrypting the web, EFF news, campaigns, and ways to support digital freedom.
- - - - - - - - - - - - - - - - - - - - - - - - - - - - - - - - - - - - - - - -
(Y)es/(N)o: Y
Obtaining a new certificate
Performing the following challenges:
http-01 challenge for www.bigbang.mydns.jp
Using the webroot path /var/www/html for all unmatched domains.
Waiting for verification...
Cleaning up challenges

IMPORTANT NOTES:
 - Congratulations! Your certificate and chain have been saved at:
   /etc/letsencrypt/live/www.bigbang.mydns.jp/fullchain.pem
   Your key file has been saved at:
   /etc/letsencrypt/live/www.bigbang.mydns.jp/privkey.pem
   Your cert will expire on 2020-03-17. To obtain a new or tweaked
   version of this certificate in the future, simply run certbot
   again. To non-interactively renew *all* of your certificates, run
   "certbot renew"
 - Your account credentials have been saved in your Certbot
   configuration directory at /etc/letsencrypt. You should make a
   secure backup of this dir now. This configuration directory will
   also contain certificates and private keys obtained by Certbot so
   making regular backups of this dir is ideal.
 - If you like Certbot, please consider supporting our work by:

   Donating to ISRG / Let's Encrypt:   https://letsencrypt.org/donate
   Donating to EFF:                    https://eff.org/donate-le

##### [Congratulations] と表示されれば成功
##### メッセージ中に記載の通り [/etc/letsencrypt/live/(FQDN)/] 配下に証明書が取得されている

##### cert.pem       ⇒ SSLサーバー証明書(公開鍵含む)
##### chain.pem      ⇒ 中間証明書
##### fullchain.pem  ⇒ cert.pem と chain.pem が結合されたファイル
##### privkey.pem    ⇒ 公開鍵に対する秘密鍵
取得済みの証明書をまとめて更新する場合、renewサブコマンドを使用します。
有効期限が30日未満の証明書が全て自動で更新されます。
有効期限の残り日数に関わらず更新したい場合、--force-renewを合わせて指定します。
ただし、Snapdからインストールしたcertbotクライアントであれば、更新の手動実行は必要ありません。更新は自動で実行されます。
(2021.7.12現在、自動で更新されたかどうかは未確認)
(2021.10.28現在、自動更新されたことを確認できました)
##### Snapd の Certbot パッケージはタイマーが付属
# systemctl status snap.certbot.renew.timer
*  snap.certbot.renew.timer - Timer renew for snap application certbot.renew
   Loaded: loaded (/etc/systemd/system/snap.certbot.renew.timer; enabled; vendo>
   Active: active (waiting) since Thu 2021-01-07 19:42:23 JST; 51min ago
  Trigger: Thu 2021-01-07 23:26:00 JST; 2h 52min left

Jan 07 19:42:23 dlp.srv.world systemd[1]: Started Timer renew for snap applicat>

##### デフォルトでは以下のように毎日2回、renewを実行
# systemctl cat snap.certbot.renew.timer
# /etc/systemd/system/snap.certbot.renew.timer
[Unit]
# Auto-generated, DO NOT EDIT
Description=Timer renew for snap application certbot.renew
Requires=var-lib-snapd-snap-certbot-1280.mount
After=var-lib-snapd-snap-certbot-1280.mount
X-Snappy=yes

[Timer]
Unit=snap.certbot.renew.service
OnCalendar=*-*-* 11:42
OnCalendar=*-*-* 14:32

[Install]
WantedBy=timers.target
手動で更新する場合は、下記のとおりとなります。
# certbot renew --post-hook "systemctl restart httpd"
-
オプション
- –dry-run
実際には証明書を更新しないでコマンドを実行します。–pre-hook、–post-hookで指定したコマンドは実行されます。このオプションはcertonlyサブコマンドでも使用可能です。 - –force-renewal
有効期限までの日数に関わらず、強制的に証明書を更新します。ただし、一定期間内に更新できる回数には制限があります。 - –post-hook
証明書の更新後に実行するコマンドを指定します。更新が必要なときのみ(=デフォルトでは証明書の有効期限が30日未満となっている場合)実行されます。一般的には、更新された証明書を反映するために再起動するコマンドを指定します。 - –pre-hook
証明書の更新前に実行するコマンドを指定します。更新が必要なときのみ(=デフォルトでは証明書の有効期限が30日未満となっている場合)実行されます。
/etc/letsencrypt/renewal/<ドメイン名>.confで、ドキュメントルートや認証方式等を変更する場合は上記を変更します。
証明書取得のための動作確認は下記のようにします。
# /usr/bin/certbot renew --post-hook "systemctl restart httpd" --dry-run
Saving debug log to /var/log/letsencrypt/letsencrypt.log

- - - - - - - - - - - - - - - - - - - - - - - - - - - - - - - - - - - - - - - -
Processing /etc/letsencrypt/renewal/www.bigbang.mydns.jp.conf
- - - - - - - - - - - - - - - - - - - - - - - - - - - - - - - - - - - - - - - -
Simulating renewal of an existing certificate for www.bigbang.mydns.jp

- - - - - - - - - - - - - - - - - - - - - - - - - - - - - - - - - - - - - - - -
Congratulations, all simulated renewals succeeded:
  /etc/letsencrypt/live/www.bigbang.mydns.jp/fullchain.pem (success)
- - - - - - - - - - - - - - - - - - - - - - - - - - - - - - - - - - - - - - - -
2021.10.28にSSL証明書が自動更新されていることに気が付きました。
# ls -l /etc/letsencrypt/archive/www.bigbang.mydns.jp/*[56].pem
-rw-r--r--. 1 root root 1854  8月 23 22:18 /etc/letsencrypt/archive/www.bigbang.mydns.jp/cert5.pem
-rw-r--r--  1 root root 1854 10月 23 09:25 /etc/letsencrypt/archive/www.bigbang.mydns.jp/cert6.pem
-rw-r--r--. 1 root root 3749  8月 23 22:18 /etc/letsencrypt/archive/www.bigbang.mydns.jp/chain5.pem
-rw-r--r--  1 root root 3749 10月 23 09:25 /etc/letsencrypt/archive/www.bigbang.mydns.jp/chain6.pem
-rw-r--r--. 1 root root 5603  8月 23 22:18 /etc/letsencrypt/archive/www.bigbang.mydns.jp/fullchain5.pem
-rw-r--r--  1 root root 5603 10月 23 09:25 /etc/letsencrypt/archive/www.bigbang.mydns.jp/fullchain6.pem
-rw-------. 1 root root 1704  8月 23 22:18 /etc/letsencrypt/archive/www.bigbang.mydns.jp/privkey5.pem
-rw-------  1 root root 1704 10月 23 09:25 /etc/letsencrypt/archive/www.bigbang.mydns.jp/privkey6.pem
SSL証明書の内容は下記のとおりです。
# openssl s_client -connect localhost:443 | openssl x509 -text -noout
Can't use SSL_get_servername
depth=2 C = US, O = Internet Security Research Group, CN = ISRG Root X1
verify return:1
depth=1 C = US, O = Let's Encrypt, CN = R3
verify return:1
depth=0 CN = www.bigbang.mydns.jp
verify return:1
Certificate:
    Data:
        Version: 3 (0x2)
        Serial Number:
              **:**:**:**:**:**:**:**:**:**:**:**:**:**:**:**:**:**:**:**:
        Signature Algorithm: sha256WithRSAEncryption
        Issuer: C = US, O = Let's Encrypt, CN = R3
        Validity
            Not Before: Oct 22 23:25:25 2021 GMT
            Not After : Jan 20 23:25:24 2022 GMT
        Subject: CN = www.bigbang.mydns.jp
        Subject Public Key Info:
            Public Key Algorithm: rsaEncryption
                RSA Public-Key: (2048 bit)
                Modulus:
(以下、省略)
Snapdからインストールしたcertbotクライアントの起動時刻変更
参考URL:【簡単】Let’s Encryptの自動更新をcronなしで実現しよう
参考URL:Certbot を自動的に更新するタイマーを設定する。
napdからインストールしたcertbotクライアントは1日2回自動起動するように設定されていますが、起動時刻があまりにも近い時刻でした。
# systemctl cat snap.certbot.renew.timer
# /etc/systemd/system/snap.certbot.renew.timer
[Unit]
# Auto-generated, DO NOT EDIT
Description=Timer renew for snap application certbot.renew
Requires=var-lib-snapd-snap-certbot-1280.mount
After=var-lib-snapd-snap-certbot-1280.mount
X-Snappy=yes

[Timer]
Unit=snap.certbot.renew.service
OnCalendar=*-*-* 11:42
OnCalendar=*-*-* 14:32

[Install]
WantedBy=timers.target
このため一方を変更します。
# vi /etc/systemd/system/snap.certbot.renew.timer
OnCalendar=*-*-* 14:32
 ↓ 下記に変更
OnCalendar=*-*-* 23:42

# systemctl daemon-reload
変更されていることを確認します。
# systemctl cat snap.certbot.renew.timer
# /etc/systemd/system/snap.certbot.renew.timer
[Unit]
# Auto-generated, DO NOT EDIT
Description=Timer renew for snap application certbot.renew
Requires=var-lib-snapd-snap-certbot-1280.mount
After=var-lib-snapd-snap-certbot-1280.mount
X-Snappy=yes

[Timer]
Unit=snap.certbot.renew.service
OnCalendar=*-*-* 11:42
OnCalendar=*-*-* 23:42

[Install]
WantedBy=timers.target

# systemctl list-timers|grep -e NEXT -e certbot
NEXT                         LEFT          LAST                         PASSED       UNIT                         ACTIVATES
Mon 2021-07-12 23:42:00 JST  2h 15min left n/a                          n/a          snap.certbot.renew.timer     snap.certbot.renew.service
希望通りの設定となりました。
Let's Encryptからの警告メール
Let's Encrypt証明書(Snapd)期限切れ19日前に下記のようなメールが来ていました。
Hello,
Your certificate (or certificates) for the names listed below will expire in 19 days (on 06 Sep 21 17:05 +0000). \
Please make sure to renew your certificate before then, or visitors to your web site will encounter errors.
We recommend renewing certificates automatically when they have a third of their total lifetime left. \
For Let's Encrypt's current 90-day certificates, that means renewing 30 days before expiration. \
See https://letsencrypt.org/docs/integration-guide/ for details.
www.bigbang.mydns.jp
For any questions or support, please visit: https://community.letsencrypt.org/ Unfortunately, we can't provide support by email.
For details about when we send these emails, please visit: \
https://letsencrypt.org/docs/expiration-emails/ \
In particular, note that this reminder email is still sent if you've obtained a slightly different certificate by adding or removing names. \
If you've replaced this certificate with a newer one that covers more or fewer names than the list above, you may be able to ignore this message.
If you are receiving this email in error, unsubscribe at:\
http://delivery.letsencrypt.org/track/unsub.php?\
u=30850198&id=40245d7d8ca248ecae010b02ccc46efd.tgj2EJVD9gR0MxTFrhozrpUmZnw%3D&r=https%3A%2F%2Fmandrillapp.com%2Funsub%\
3Fmd_email%3Ds%252A%252A%252A%252A%2540m%252A%252A%252A%252A.%252A%252A%252A
Please note that this would also unsubscribe you from other Let's Encrypt service notices, including expiration reminders for any other certificates.
Regards,
The Let's Encrypt Team
証明書の有効期限を確認します。
$ echo | openssl s_client -connect www.bigbang.mydns.jp:443 -showcerts | openssl x509 -dates -noout
depth=2 C = US, O = Internet Security Research Group, CN = ISRG Root X1
verify return:1
depth=1 C = US, O = Let's Encrypt, CN = R3
verify return:1
depth=0 CN = www.bigbang.mydns.jp
verify return:1
notBefore=Jun  8 17:05:54 2021 GMT
notAfter=Sep  6 17:05:54 2021 GMT
上記証明書はCentOS Stream 8(Snapd)上で動作させています。このまま放置させ自動的に更新されるか確認したいと思います。
その後、手動で更新できるか確認しましたがエラーを表示し更新できませんでした。
# /etc/cron.monthly/update_sslcert.sh
===== Update SSL Certfile =====
2021年 8月 23日 月曜日 17:24:00 JST Update SSL Certfile start
Saving debug log to /var/log/letsencrypt/letsencrypt.log
- - - - - - - - - - - - - - - - - - - - - - - - - - - - - - - - - - - - - - - -
Processing /etc/letsencrypt/renewal/www.bigbang.mydns.jp.conf
- - - - - - - - - - - - - - - - - - - - - - - - - - - - - - - - - - - - - - - -
Renewing an existing certificate for www.bigbang.mydns.jp
Certbot failed to authenticate some domains (authenticator: webroot). The Certificate Authority reported these problems:
Domain: www.bigbang.mydns.jp
Type: unauthorized
Detail: Invalid response from https://www.bigbang.mydns.jp/.well-known/acme-challenge/hTJVFsxPT3ifvYdEvr9SxBwHFugZdxbjPv96iAdiJtM [***.***.***.***]: "<!DOCTYPE HTML PUBLIC \"-//IETF//DTD HTML 2.0//EN\">\n<html><head>\n<title>404 Not Found</title>\n</head><body>\n<h1>Not Found</h1>\n<p"
Hint: The Certificate Authority failed to download the temporary challenge files created by Certbot. \
Ensure that the listed domains serve their content from \
the provided --webroot-path/-w and that files created there can be downloaded from the internet.
Failed to renew certificate www.bigbang.mydns.jp with error: Some challenges have failed.
- - - - - - - - - - - - - - - - - - - - - - - - - - - - - - - - - - - - - - - -
All renewals failed. The following certificates could not be renewed:
/etc/letsencrypt/live/www.bigbang.mydns.jp/fullchain.pem (failure)
- - - - - - - - - - - - - - - - - - - - - - - - - - - - - - - - - - - - - - - -
1 renew failure(s), 0 parse failure(s)
Ask for help or search for solutions at https://community.letsencrypt.org. See the logfile /var/log/letsencrypt/letsencrypt.log or re-run Certbot with -v for more details.
2021年 8月 23日 月曜日 17:25:40 JST Update SSL Certfile end
# certbot renew --dry-run
Saving debug log to /var/log/letsencrypt/letsencrypt.log
- - - - - - - - - - - - - - - - - - - - - - - - - - - - - - - - - - - - - - - -
Processing /etc/letsencrypt/renewal/www.bigbang.mydns.jp.conf
- - - - - - - - - - - - - - - - - - - - - - - - - - - - - - - - - - - - - - - -
Simulating renewal of an existing certificate for www.bigbang.mydns.jp
Certbot failed to authenticate some domains (authenticator: webroot). The Certificate Authority reported these problems:
Domain: www.bigbang.mydns.jp
Type: unauthorized
Detail: Invalid response from https://www.bigbang.mydns.jp/.well-known/acme-challenge/ZY016QpILH05l5CQ2uwfqU9VdtbMB-Mu-2RbbLRuJSw [***.***.***.***]: "<!DOCTYPE HTML PUBLIC \"-//IETF//DTD HTML 2.0//EN\">\n<html><head>\n<title>404 Not Found</title>\n</head><body>\n<h1>Not Found</h1>\n<p"
Hint: The Certificate Authority failed to download the temporary challenge files created by Certbot. \
Ensure that the listed domains serve their content from \
the provided --webroot-path/-w and that files created there can be downloaded from the internet.
Failed to renew certificate www.bigbang.mydns.jp with error: Some challenges have failed.
- - - - - - - - - - - - - - - - - - - - - - - - - - - - - - - - - - - - - - - -
All simulated renewals failed. The following certificates could not be renewed:
/etc/letsencrypt/live/www.bigbang.mydns.jp/fullchain.pem (failure)
- - - - - - - - - - - - - - - - - - - - - - - - - - - - - - - - - - - - - - - -
1 renew failure(s), 0 parse failure(s)
Ask for help or search for solutions at https://community.letsencrypt.org. See the logfile /var/log/letsencrypt/letsencrypt.log or re-run Certbot with -v for more details.
SSL証明書が更新できない
参考URL:certbot(LetsEncrypt)でエラー/Invalid response from
結論から言うと原因は2つあったように思われます。
- 認証方法がwebrootでそのパスが/usr/share/nginx/certbot/www.bigbang.mydns.jpになっていた。
恐らく、SnapdのSSL導入時はNginxを使用し証明書を取得していたのだと思われます。
現在はApacheを使用。 - NginxからApacheに変更したことにより、Invalid response from https://www.bigbang.mydns.jp/.well-known/acme-challenge/・・・となってしまったこと。
以下は実際に作業した内容です。
今回の作業でwebrootが/usr/share/nginx/・・・となっていますが、実際にはApacheで動作させており今後Nginxを立ち上げる予定であるため、ApacheのDocumentRootを変更しています。
手動で強制的にSSL証明書を更新します。
# certbot certonly --webroot -w /usr/share/nginx -d www.bigbang.mydns.jp
Saving debug log to /var/log/letsencrypt/letsencrypt.log
Renewing an existing certificate for www.bigbang.mydns.jp
Certbot failed to authenticate some domains (authenticator: webroot). The Certificate Authority reported these problems:
Domain: www.bigbang.mydns.jp
Type: unauthorized
Detail: Invalid response from https://www.bigbang.mydns.jp/.well-known/acme-challenge/l1U-Oa_2G4NiNxtfNLZtDvrCWV8baYNq7WBiTrNeLdY [***.***.***.***]: "<!DOCTYPE HTML PUBLIC \"-//IETF//DTD HTML 2.0//EN\">\n<html><head>\n<title>404 Not Found</title>\n</head><body>\n<h1>Not Found</h1>\n<p"
Hint: The Certificate Authority failed to download the temporary challenge files created by Certbot. \
Ensure that the listed domains serve their content from \
the provided --webroot-path/-w and that files created there can be downloaded from the internet.
Some challenges have failed.
Ask for help or search for solutions at https://community.letsencrypt.org. See the logfile /var/log/letsencrypt/letsencrypt.log or re-run Certbot with -v for more details.
有効期限が30日未満でしたが、SSL証明書の更新ができませんでした。
https://www.bigbang.mydns.jp/.well-known/acme-challenge/・・・へのアクセスが「404 Not Found」だったので、ディレクトリ作成後、httpd.confも変更しました。
# mkdir -p /usr/share/nginx/html/.well-known/acme-challenge

# vi /etc/httpd/conf/httpd.conf
※末尾に追記
Alias /.well-known/acme-challenge /usr/share/nginx/html/.well-known/acme-challenge
<Directory /usr/share/nginx/html/.well-known/acme-challenge>
  Order allow,deny
  Allow from all
</Directory>

# systemctl restart httpd
このあと再度SSL証明書を更新しましたが同じようなエラーが表示され更新できませんでした。
原因が不明なので、下記を実行し強制的にSSL証明書を更新しました。
# certbot certonly --webroot -w /usr/share/nginx/html -d www.bigbang.mydns.jp
Saving debug log to /var/log/letsencrypt/letsencrypt.log
Renewing an existing certificate for www.bigbang.mydns.jp
Successfully received certificate.
Certificate is saved at: /etc/letsencrypt/live/www.bigbang.mydns.jp/fullchain.pem
Key is saved at: /etc/letsencrypt/live/www.bigbang.mydns.jp/privkey.pem
This certificate expires on 2021-11-21.
These files will be updated when the certificate renews.
Certbot has set up a scheduled task to automatically renew this certificate in the background.
- - - - - - - - - - - - - - - - - - - - - - - - - - - - - - - - - - - - - - - -
If you like Certbot, please consider supporting our work by:
* Donating to ISRG / Let's Encrypt: https://letsencrypt.org/donate
* Donating to EFF: https://eff.org/donate-le
各証明書を保存しているフォルダ内を確認します。
# ls -l /etc/letsencrypt/archive/www.bigbang.mydns.jp/
合計 100
-rw-r--r--. 1 root root 1858  6月  9 03:05 cert4.pem
-rw-r--r--. 1 root root 1854  8月 23 22:18 cert5.pem
-rw-r--r--. 1 root root 3749  6月  9 03:05 chain4.pem
-rw-r--r--. 1 root root 3749  8月 23 22:18 chain5.pem
-rw-r--r--. 1 root root 5607  6月  9 03:05 fullchain4.pem
-rw-r--r--. 1 root root 5603  8月 23 22:18 fullchain5.pem
-rw-------. 1 root root 1704  6月  9 03:05 privkey4.pem
-rw-------. 1 root root 1704  8月 23 22:18 privkey5.pem
更新されていることが分かります。
更新したSSL証明書を読み込ませるため、Apacheを再起動します。
# systemctl start httpd証明書のリンク状態を確認します。
# ls -l /etc/letsencrypt/live/www.bigbang.mydns.jp/
合計 4
-rw-r--r--. 1 root root 692  5月 15 23:55 README
lrwxrwxrwx. 1 root root  44  8月 23 22:18 cert.pem -> ../../archive/www.bigbang.mydns.jp/cert5.pem
lrwxrwxrwx. 1 root root  45  8月 23 22:18 chain.pem -> ../../archive/www.bigbang.mydns.jp/chain5.pem
lrwxrwxrwx. 1 root root  49  8月 23 22:18 fullchain.pem -> ../../archive/www.bigbang.mydns.jp/fullchain5.pem
lrwxrwxrwx. 1 root root  47  8月 23 22:18 privkey.pem -> ../../archive/www.bigbang.mydns.jp/privkey5.pem
新しい証明書にリンクが張り替えられています。
証明書の有効期限を確認します。
# certbot certificates
Saving debug log to /var/log/letsencrypt/letsencrypt.log
- - - - - - - - - - - - - - - - - - - - - - - - - - - - - - - - - - - - - - - -
Found the following certs:
Certificate Name: www.bigbang.mydns.jp
Serial Number: 49f275ea341e46bc531e374c497cca3b2a3
Key Type: RSA
Domains: www.bigbang.mydns.jp
Expiry Date: 2021-11-21 12:18:32+00:00 (VALID: 89 days)
Certificate Path: /etc/letsencrypt/live/www.bigbang.mydns.jp/fullchain.pem
Private Key Path: /etc/letsencrypt/live/www.bigbang.mydns.jp/privkey.pem
- - - - - - - - - - - - - - - - - - - - - - - - - - - - - - - - - - - - - - - -
下記はうまく更新できない時の有効期限です。
# certbot certificates
Saving debug log to /var/log/letsencrypt/letsencrypt.log
- - - - - - - - - - - - - - - - - - - - - - - - - - - - - - - - - - - - - - - -
Found the following certs:
Certificate Name: www.bigbang.mydns.jp
Serial Number: 4ce75f24474e877f5e57151f375c3d1035c
Key Type: RSA
Domains: www.bigbang.mydns.jp
Expiry Date: 2021-09-06 17:05:54+00:00 (VALID: 14 days)
Certificate Path: /etc/letsencrypt/live/www.bigbang.mydns.jp/fullchain.pem
Private Key Path: /etc/letsencrypt/live/www.bigbang.mydns.jp/privkey.pem
- - - - - - - - - - - - - - - - - - - - - - - - - - - - - - - - - - - - - - - -
LetsEncryptの自ドメインの設定ファイル(/etc/letsencrypt/renewal/<ドメイン名>.conf)を確認します。
# ls -l /etc/letsencrypt/renewal/www.bigbang.mydns.jp.conf
-rw-r--r--. 1 root root 703  8月 23 22:18 /etc/letsencrypt/renewal/www.bigbang.mydns.jp.conf
# cat /etc/letsencrypt/renewal/www.bigbang.mydns.jp.conf
# renew_before_expiry = 30 days
version = 1.18.0
archive_dir = /etc/letsencrypt/archive/www.bigbang.mydns.jp
cert = /etc/letsencrypt/live/www.bigbang.mydns.jp/cert.pem
privkey = /etc/letsencrypt/live/www.bigbang.mydns.jp/privkey.pem
chain = /etc/letsencrypt/live/www.bigbang.mydns.jp/chain.pem
fullchain = /etc/letsencrypt/live/www.bigbang.mydns.jp/fullchain.pem
# Options used in the renewal process
[renewalparams]
account = ********************************
authenticator = webroot
webroot_path = /usr/share/nginx/html,
server = https://acme-v02.api.letsencrypt.org/directory
[[webroot_map]]
www.bigbang.mydns.jp = /usr/share/nginx/html
下記はSSL証明書を正常に更新できなかった時の設定ファイルの内容です。
# cat /etc/letsencrypt/renewal/www.bigbang.mydns.jp.conf_20210823
# renew_before_expiry = 30 days
version = 1.16.0
archive_dir = /etc/letsencrypt/archive/www.bigbang.mydns.jp
cert = /etc/letsencrypt/live/www.bigbang.mydns.jp/cert.pem
privkey = /etc/letsencrypt/live/www.bigbang.mydns.jp/privkey.pem
chain = /etc/letsencrypt/live/www.bigbang.mydns.jp/chain.pem
fullchain = /etc/letsencrypt/live/www.bigbang.mydns.jp/fullchain.pem
# Options used in the renewal process
[renewalparams]
account = ********************************
pref_challs = http-01,
authenticator = webroot
webroot_path = /usr/share/nginx/certbot/www.bigbang.mydns.jp,
server = https://acme-v02.api.letsencrypt.org/directory
post_hook = systemctl restart nginx
[[webroot_map]]
www.bigbang.mydns.jp = /usr/share/nginx/certbot/www.bigbang.mydns.jp
webroot_pathと[[webroot_map]]に違いがありました。
新たに作成された設定ファイルにはpost_hookがありませんでしたので、追記しました。
更新した時のログを確認します。
# cat /var/log/letsencrypt/letsencrypt.log
2021-08-23 23:06:20,883:DEBUG:urllib3.connectionpool:http://localhost:None "GET /v2/connections?snap=certbot&interface=content HTTP/1.1" 200 97
2021-08-23 23:06:21,255:DEBUG:certbot._internal.main:certbot version: 1.18.0
2021-08-23 23:06:21,256:DEBUG:certbot._internal.main:Location of certbot entry point: /snap/certbot/1343/bin/certbot
2021-08-23 23:06:21,256:DEBUG:certbot._internal.main:Arguments: ['--preconfigured-renewal']
2021-08-23 23:06:21,256:DEBUG:certbot._internal.main:Discovered plugins: \ PluginsRegistry(PluginEntryPoint#apache,PluginEntryPoint#manual,PluginEntryPoint\ #nginx,PluginEntryPoint#null,PluginEntryPoint#standalone,PluginEntryPoint#webroot)
2021-08-23 23:06:21,269:DEBUG:certbot._internal.log:Root logging level set at 30
2021-08-23 23:06:21,339:DEBUG:urllib3.connectionpool:Starting new HTTP connection (1): r3.o.lencr.org:80
2021-08-23 23:06:21,626:DEBUG:urllib3.connectionpool:http://r3.o.lencr.org:80 "POST / HTTP/1.1" 200 503
2021-08-23 23:06:21,627:DEBUG:certbot.ocsp:OCSP response for certificate /etc/letsencrypt/live/www.bigbang.mydns.jp/cert.pem is signed by the certificate's issuer.
2021-08-23 23:06:21,632:DEBUG:certbot.ocsp:OCSP certificate status for /etc/letsencrypt/live/www.bigbang.mydns.jp/cert.pem is: OCSPCertStatus.GOOD
2021-08-23 23:06:21,637:DEBUG:certbot._internal.display.obj:Notifying user: Found the following certs:
Certificate Name: www.bigbang.mydns.jp
Serial Number: 49f275ea341e46bc531e374c497cca3b2a3
Key Type: RSA
Domains: www.bigbang.mydns.jp
Expiry Date: 2021-11-21 12:18:32+00:00 (VALID: 89 days)
Certificate Path: /etc/letsencrypt/live/www.bigbang.mydns.jp/fullchain.pem
Private Key Path: /etc/letsencrypt/live/www.bigbang.mydns.jp/privkey.pem
下記は更新がうまく行かない時のログです。
# cat /var/log/letsencrypt/letsencrypt.log.30
2021-08-22 07:32:04,860:DEBUG:urllib3.connectionpool:http://localhost:None "GET /v2/connections?snap=certbot&interface=content HTTP/1.1" 200 97
2021-08-22 07:32:05,463:DEBUG:certbot._internal.main:certbot version: 1.18.0
2021-08-22 07:32:05,464:DEBUG:certbot._internal.main:Location of certbot entry point: /snap/certbot/1343/bin/certbot
2021-08-22 07:32:05,464:DEBUG:certbot._internal.main:Arguments: ['-q', '--preconfigured-renewal']
2021-08-22 07:32:05,464:DEBUG:certbot._internal.main:Discovered plugins: \ PluginsRegistry(PluginEntryPoint#apache,PluginEntryPoint#manual,PluginEntryPoint\ #nginx,PluginEntryPoint#null,PluginEntryPoint#standalone,PluginEntryPoint#webroot)
2021-08-22 07:32:05,637:DEBUG:certbot._internal.log:Root logging level set at 40
2021-08-22 07:32:05,638:DEBUG:certbot._internal.display.obj:Notifying user: Processing /etc/letsencrypt/renewal/www.bigbang.mydns.jp.conf
2021-08-22 07:32:05,691:DEBUG:certbot._internal.plugins.selection:Requested authenticator
<certbot._internal.cli.cli_utils._Default object at 0x7f79444fee50> and installer
<certbot._internal.cli.cli_utils._Default object at 0x7f79444fee50>
2021-08-22 07:32:05,741:DEBUG:urllib3.connectionpool:Starting new HTTP connection (1): r3.o.lencr.org:80
2021-08-22 07:32:06,521:DEBUG:urllib3.connectionpool:http://r3.o.lencr.org:80 "POST / HTTP/1.1" 200 503
2021-08-22 07:32:06,522:DEBUG:certbot.ocsp:OCSP response for certificate /etc/letsencrypt/archive/www.bigbang.mydns.jp/cert4.pem is signed by the certificate's issuer.
2021-08-22 07:32:06,528:DEBUG:certbot.ocsp:OCSP certificate status for /etc/letsencrypt/archive/www.bigbang.mydns.jp/cert4.pem is: OCSPCertStatus.GOOD
2021-08-22 07:32:06,530:DEBUG:certbot._internal.storage:Should renew, less than 30 days before certificate expiry 2021-09-06 17:05:54 UTC.
2021-08-22 07:32:06,530:INFO:certbot._internal.renewal:Certificate is due for renewal, auto-renewing...
2021-08-22 07:32:06,530:INFO:certbot._internal.renewal:Non-interactive renewal: random delay of 16.783102490162044 seconds
2021-08-22 07:32:23,330:DEBUG:certbot._internal.plugins.selection:Requested authenticator webroot and installer None
2021-08-22 07:32:23,332:DEBUG:certbot._internal.plugins.selection:Single candidate plugin: * webroot Description: Place files in webroot directory
Interfaces: Authenticator, Plugin
Entry point: webroot = certbot._internal.plugins.webroot:Authenticator
Initialized: <certbot._internal.plugins.webroot.Authenticator object at 0x7f79444d0eb0>
Prep: True
2021-08-22 07:32:23,332:DEBUG:certbot._internal.plugins.selection:Selected authenticator <certbot._internal.plugins.webroot.Authenticator object at 0x7f79444d0eb0> and installer None
2021-08-22 07:32:23,332:INFO:certbot._internal.plugins.selection:Plugins selected: Authenticator webroot, Installer None;
2021-08-22 07:32:23,394:DEBUG:certbot._internal.main:Picked account: <Account(RegistrationResource(body=Registration(key=None, contact=(), agreement=None, status=None, terms_of_service_agreed=None, only_return_existing=None, external_account_binding=None), uri='https://acme-v02.api.letsencrypt.org/acme/acct/123607978', new_authzr_uri=None, terms_of_service=None), fef6cac4df77b4a5541f06b1a76a4103, Meta(creation_dt=datetime.datetime(2021, 5, 15, 14, 55, 13, tzinfo=<UTC>), creation_host='mail.bigbang.mydns.bz', register_to_eff=None))>
2021-08-22 07:32:23,395:DEBUG:acme.client:Sending GET request to https://acme-v02.api.letsencrypt.org/directory.
2021-08-22 07:32:23,396:DEBUG:urllib3.connectionpool:Starting new HTTPS connection (1): acme-v02.api.letsencrypt.org:443
2021-08-22 07:32:24,277:DEBUG:urllib3.connectionpool:https://acme-v02.api.letsencrypt.org:443 "GET /directory HTTP/1.1" 200 658
2021-08-22 07:32:24,278:DEBUG:acme.client:Received response:
HTTP 200
Server: nginx
Date: Sat, 21 Aug 2021 22:32:25 GMT
Content-Type: application/json
Content-Length: 658
Connection: keep-alive
Cache-Control: public, max-age=0, no-cache
X-Frame-Options: DENY
Strict-Transport-Security: max-age=604800
{
"HbrKH1C2jgE": "https://community.letsencrypt.org/t/adding-random-entries-to-the-directory/33417",
"keyChange": "https://acme-v02.api.letsencrypt.org/acme/key-change",
"meta": {
"caaIdentities": [
"letsencrypt.org"
],
"termsOfService": "https://letsencrypt.org/documents/LE-SA-v1.2-November-15-2017.pdf",
"website": "https://letsencrypt.org"
},
"newAccount": "https://acme-v02.api.letsencrypt.org/acme/new-acct",
"newNonce": "https://acme-v02.api.letsencrypt.org/acme/new-nonce",
"newOrder": "https://acme-v02.api.letsencrypt.org/acme/new-order",
"revokeCert": "https://acme-v02.api.letsencrypt.org/acme/revoke-cert"
}
2021-08-22 07:32:24,278:DEBUG:certbot._internal.display.obj:Notifying user: Renewing an existing certificate for www.bigbang.mydns.jp
2021-08-22 07:32:24,416:DEBUG:certbot.crypto_util:Generating RSA key (2048 bits): /etc/letsencrypt/keys/0039_key-certbot.pem
2021-08-22 07:32:24,429:DEBUG:certbot.crypto_util:Creating CSR: /etc/letsencrypt/csr/0039_csr-certbot.pem
2021-08-22 07:32:24,430:DEBUG:acme.client:Requesting fresh nonce
2021-08-22 07:32:24,430:DEBUG:acme.client:Sending HEAD request to https://acme-v02.api.letsencrypt.org/acme/new-nonce.
2021-08-22 07:32:24,641:DEBUG:urllib3.connectionpool:https://acme-v02.api.letsencrypt.org:443 "HEAD /acme/new-nonce HTTP/1.1" 200 0
2021-08-22 07:32:24,642:DEBUG:acme.client:Received response:
HTTP 200
Server: nginx
Date: Sat, 21 Aug 2021 22:32:25 GMT
Connection: keep-alive
Cache-Control: public, max-age=0, no-cache
Link: <https://acme-v02.api.letsencrypt.org/directory>;rel="index"
Replay-Nonce: 0102WlIHJPrLgMl37X6LJibeJ2F92SlMW4MSkMYuxk-I1Dw
X-Frame-Options: DENY
Strict-Transport-Security: max-age=604800
2021-08-22 07:32:24,642:DEBUG:acme.client:Storing nonce: 0102WlIHJPrLgMl37X6LJibeJ2F92SlMW4MSkMYuxk-I1Dw
2021-08-22 07:32:24,642:DEBUG:acme.client:JWS payload: b'{\n "identifiers": [\n {\n "type": "dns",\n "value": "www.bigbang.mydns.jp"\n }\n ]\n}'
2021-08-22 07:32:24,643:DEBUG:acme.client:Sending POST request to https://acme-v02.api.letsencrypt.org/acme/new-order:
{
"protected": "eyJhbGciOiAiUlMyNTYiLCAia2lkIjogImh0dHBzOi8vYWNtZS12MDIuYXBpLmxldHNlbmNyeXB0Lm9yZy9hY21lL2FjY3QvMTIzNjA3OTc4IiwgIm\
5vbmNlIjogIjAxMDJXbElISlByTGdNbDM3WDZMSmliZUoyRjkyU2xNVzRNU2tNWXV4ay1JMUR3IiwgInVybCI6ICJodHRwczovL2FjbWUtdjAyLmFwa\
S5sZXRzZW5jcnlwdC5vcmcvYWNtZS9uZXctb3JkZXIifQ", "signature": "qw3RSKZKtDUrId-es0VUJU8wiES1k-5M59CPrP__hL1cqAmv-ETPZypr1l4Tzl6aoLakHVeOTX7qUkFHI1tz4xW-rtcSYztD1DlgHU1IO6GU2tsxyn\
6mmWEt_2-bBSWUagJF84x0x1kitwz3IrTfgQo9OXDgpC4jOaNRXT9yrwts-VVJlEXgj9KbaXADcgsE_lwx6y5PU-uGdxFMtjvrLSPBViHvpOxyz2_qaB-1nwFA4z6jNkX4\
-M8T4mEkDaVt4Daw0zEI_oX-gD2MGbvKO-U3uiL_3CPiN8CsQkWroRtSIDFfpGr8cPHcSwigyCs7ogN3ldnVSR1bxoTxClZZ0g",
"payload": "ewogICJpZGVudGlmaWVycyI6IFsKICAgIHsKICAgICAgInR5cGUiOiAiZG5zIiwKICAgICAgInZhbHVlIjogInd3dy5iaWdiYW5nLm15ZG5zLmJ6IgogICAgfQogIF0KfQ" }
2021-08-22 07:32:25,106:DEBUG:urllib3.connectionpool:https://acme-v02.api.letsencrypt.org:443 "POST /acme/new-order HTTP/1.1" 201 343
2021-08-22 07:32:25,106:DEBUG:acme.client:Received response:
HTTP 201
Server: nginx
Date: Sat, 21 Aug 2021 22:32:26 GMT
Content-Type: application/json
Content-Length: 343
Connection: keep-alive
Boulder-Requester: 123607978
Cache-Control: public, max-age=0, no-cache
Link: <https://acme-v02.api.letsencrypt.org/directory>;rel="index"
Location: https://acme-v02.api.letsencrypt.org/acme/order/123607978/18641451840
Replay-Nonce: 0102jANJbAx3ZFDv7vjsdUi986BwD1Os6vmIJGnBYHa3oYk
X-Frame-Options: DENY
Strict-Transport-Security: max-age=604800
{
"status": "pending",
"expires": "2021-08-28T22:32:26Z",
"identifiers": [
{
"type": "dns",
"value": "www.bigbang.mydns.jp"
}
],
"authorizations": [
"https://acme-v02.api.letsencrypt.org/acme/authz-v3/23945652460"
],
"finalize": "https://acme-v02.api.letsencrypt.org/acme/finalize/123607978/18641451840"
}
2021-08-22 07:32:25,106:DEBUG:acme.client:Storing nonce: 0102jANJbAx3ZFDv7vjsdUi986BwD1Os6vmIJGnBYHa3oYk
2021-08-22 07:32:25,106:DEBUG:acme.client:JWS payload:
b''
2021-08-22 07:32:25,107:DEBUG:acme.client:Sending POST request to https://acme-v02.api.letsencrypt.org/acme/authz-v3/23945652460:
{
"protected": "eyJhbGciOiAiUlMyNTYiLCAia2lkIjogImh0dHBzOi8vYWNtZS12MDIuYXBpLmxldHNlbmNyeXB0Lm9yZy9hY21lL2FjY3QvMTIzNjA3OTc4IiwgIm\
5vbmNlIjogIjAxMDJqQU5KYkF4M1pGRHY3dmpzZFVpOTg2QndEMU9zNnZtSUpHbkJZSGEzb1lrIiwgInVybCI6ICJodHRwczovL2FjbWUtdjAyLmFwa\
S5sZXRzZW5jcnlwdC5vcmcvYWNtZS9hdXRoei12My8yMzk0NTY1MjQ2MCJ9",
"signature": "WdOZc268uwFgP2mnLaffvr4L4QMUoiGyS1UmJHXt-N-wAd9eHpHOJkZBcjr6x33tpwKumrJd--dBXtDe-2DJQSyD5uBVHgLQ3bDOz0iqEpG6-0o9Lj\
h1D6yoVCyOs00mnXDBugvlUcbF-3jpGA61HxKH6PZ4Zhh14SC-5TRyLxofgqVxVXmmflp2S8GlVAcJML7Sit_50-M9RvYR2yrXvEnKPHWdLjFXKgE1ZKpshyUPip4BzrVR\
16kzZzBUH8eAtKxqPaBNiO56Mlg7VKnmI1DwEdNPsIFWnR1R0lrez6jfd5Fdv9u5-DiQXHN7BRj3OvzqtFGCTfuxpqBnT3NDtA",
"payload": ""
}
2021-08-22 07:32:25,356:DEBUG:urllib3.connectionpool:https://acme-v02.api.letsencrypt.org:443 "POST /acme/authz-v3/23945652460 HTTP/1.1" 200 801
2021-08-22 07:32:25,357:DEBUG:acme.client:Received response:
HTTP 200
Server: nginx
Date: Sat, 21 Aug 2021 22:32:26 GMT
Content-Type: application/json
Content-Length: 801
Connection: keep-alive
Boulder-Requester: 123607978
Cache-Control: public, max-age=0, no-cache
Link: <https://acme-v02.api.letsencrypt.org/directory>;rel="index"
Replay-Nonce: 0102Gi9YLMYfp3Q-UwOlLynbFpnBrSRVWLQQUs3VPsq8Vt8
X-Frame-Options: DENY
Strict-Transport-Security: max-age=604800
{
"identifier": {
"type": "dns",
"value": "www.bigbang.mydns.jp"
},
"status": "pending",
"expires": "2021-08-28T22:32:26Z",
"challenges": [
{
"type": "http-01",
"status": "pending",
"url": "https://acme-v02.api.letsencrypt.org/acme/chall-v3/23945652460/EVHk_g",
"token": "qrjguKXKd7RZ8Gty5NDmwx_j3x8MkCiGlMxs4WzdtUo"
},
{
"type": "dns-01",
"status": "pending",
"url": "https://acme-v02.api.letsencrypt.org/acme/chall-v3/23945652460/t-3uow",
"token": "qrjguKXKd7RZ8Gty5NDmwx_j3x8MkCiGlMxs4WzdtUo"
},
{
"type": "tls-alpn-01",
"status": "pending",
"url": "https://acme-v02.api.letsencrypt.org/acme/chall-v3/23945652460/Yz8Y4Q",
"token": "qrjguKXKd7RZ8Gty5NDmwx_j3x8MkCiGlMxs4WzdtUo"
}
]
}
2021-08-22 07:32:25,357:DEBUG:acme.client:Storing nonce: 0102Gi9YLMYfp3Q-UwOlLynbFpnBrSRVWLQQUs3VPsq8Vt8
2021-08-22 07:32:25,357:INFO:certbot._internal.auth_handler:Performing the following challenges:
2021-08-22 07:32:25,357:INFO:certbot._internal.auth_handler:http-01 challenge for www.bigbang.mydns.jp
2021-08-22 07:32:25,358:INFO:certbot._internal.plugins.webroot:Using the webroot path /usr/share/nginx/certbot/www.bigbang.mydns.jp for all unmatched domains.
2021-08-22 07:32:25,358:DEBUG:certbot._internal.plugins.webroot:Creating root challenges validation dir at /usr/share/nginx/certbot/www.bigbang.mydns.jp/.well-known/acme-challenge
2021-08-22 07:32:25,359:DEBUG:certbot._internal.plugins.webroot:Attempting to save validation to /usr/share/nginx/certbot/www.bigbang.mydns.jp/.well-known/acme-challenge/qrjguKXKd7RZ8Gty5NDmwx_j3x8MkCiGlMxs4WzdtUo
2021-08-22 07:32:25,359:DEBUG:acme.client:JWS payload:
b'{}'
2021-08-22 07:32:25,360:DEBUG:acme.client:Sending POST request to https://acme-v02.api.letsencrypt.org/acme/chall-v3/23945652460/EVHk_g:
{
"protected": "eyJhbGciOiAiUlMyNTYiLCAia2lkIjogImh0dHBzOi8vYWNtZS12MDIuYXBpLmxldHNlbmNyeXB0Lm9yZy9hY21lL2FjY3QvMTIzNjA3OTc4IiwgIm\
5vbmNlIjogIjAxMDJHaTlZTE1ZZnAzUS1Vd09sTHluYkZwbkJyU1JWV0xRUVVzM1ZQc3E4VnQ4IiwgInVybCI6ICJodHRwczovL2FjbWUtdjAyLmFwa\
S5sZXRzZW5jcnlwdC5vcmcvYWNtZS9jaGFsbC12My8yMzk0NTY1MjQ2MC9FVkhrX2cifQ",
"signature": "tEBGe7UCSQ3XKs0Epxt9mUEjFM8BGOe2_x1ueX7DCeCqJiUS-Z65QVuEfELiLUdmYvrQPLSJChxyfOkwSBaiEexKA9IAVvqf18VH0Kyb4Uk1pF5y7q\
Xc6hBuw1SFbij8uZGNOLMuLPPAcNI4qCGFmMlRDVzmxWs3ELJYhgoGy1DepDD2YnfuHyn2Xc7YVSPWz7xgOTL8EbVKlo3h8sWGgGELxmSrksk-umyTKJj_2VA-fsfs-l0V\
UU5sKWRADTRXQZCIWb3yZ5AP5GQ9Ehoj0QydTTU5BgUDNRl-kgzu4-osisOMwD5thYZ3fRyIXmaCfB2VEnPpo3tJ5xS1cfgjzA",
"payload": "e30"
}
2021-08-22 07:32:25,614:DEBUG:urllib3.connectionpool:https://acme-v02.api.letsencrypt.org:443 "POST /acme/chall-v3/23945652460/EVHk_g HTTP/1.1" 200 186
2021-08-22 07:32:25,614:DEBUG:acme.client:Received response:
HTTP 200
Server: nginx
Date: Sat, 21 Aug 2021 22:32:26 GMT
Content-Type: application/json
Content-Length: 186
Connection: keep-alive
Boulder-Requester: 123607978
Cache-Control: public, max-age=0, no-cache
Link: <https://acme-v02.api.letsencrypt.org/directory>;rel="index", <https://acme-v02.api.letsencrypt.org/acme/authz-v3/23945652460>;rel="up"
Location: https://acme-v02.api.letsencrypt.org/acme/chall-v3/23945652460/EVHk_g
Replay-Nonce: 0102N18Iagd6LkX_bU_l3-UdGluZSeOMPJD-TVPMYkdr4O4
X-Frame-Options: DENY
Strict-Transport-Security: max-age=604800
{
"type": "http-01",
"status": "pending",
"url": "https://acme-v02.api.letsencrypt.org/acme/chall-v3/23945652460/EVHk_g",
"token": "qrjguKXKd7RZ8Gty5NDmwx_j3x8MkCiGlMxs4WzdtUo"
}
2021-08-22 07:32:25,614:DEBUG:acme.client:Storing nonce: 0102N18Iagd6LkX_bU_l3-UdGluZSeOMPJD-TVPMYkdr4O4
2021-08-22 07:32:25,615:INFO:certbot._internal.auth_handler:Waiting for verification...
2021-08-22 07:32:26,616:DEBUG:acme.client:JWS payload:
b''
2021-08-22 07:32:26,617:DEBUG:acme.client:Sending POST request to https://acme-v02.api.letsencrypt.org/acme/authz-v3/23945652460:
{
"protected": "eyJhbGciOiAiUlMyNTYiLCAia2lkIjogImh0dHBzOi8vYWNtZS12MDIuYXBpLmxldHNlbmNyeXB0Lm9yZy9hY21lL2FjY3QvMTIzNjA3OTc4IiwgIm\
5vbmNlIjogIjAxMDJOMThJYWdkNkxrWF9iVV9sMy1VZEdsdVpTZU9NUEpELVRWUE1Za2RyNE80IiwgInVybCI6ICJodHRwczovL2FjbWUtdjAyLmFwa\
S5sZXRzZW5jcnlwdC5vcmcvYWNtZS9hdXRoei12My8yMzk0NTY1MjQ2MCJ9",
"signature": "S6LDVBZIQkO5Stoe0tRSRNw6SmzUURplh23PZP3bfpRgcvHb12Uk_0K_1RmmtKSYRwUJ29oC7M7sPlLz4_ihlxArkDDKCgWir5hbfEPM8X1bvqxtrm\
jcNxA9OI0PdgRcJ0zS18STvkRa8mwA-C7bX-ocDLxEJh7JRM_YlpMn4kaYSfhX0D9IKytUUQnq6N6eO8F0isfU5_mJRYAyhyzoL45SMMlufdGudBUjIeK80jgAiqfUuMiL\
-KLgcuvyJ0lkpVPvqr9-_csW7dO2QNE3CUhHPTLY35eBa1DRQp0tyjt3j7AeL9A1WrBF04i7KPZL37I_YdTuQ3KIGAY8GodxWA",
"payload": ""
}
2021-08-22 07:32:26,845:DEBUG:urllib3.connectionpool:https://acme-v02.api.letsencrypt.org:443 "POST /acme/authz-v3/23945652460 HTTP/1.1" 200 801
2021-08-22 07:32:26,846:DEBUG:acme.client:Received response:
HTTP 200
Server: nginx
Date: Sat, 21 Aug 2021 22:32:28 GMT
Content-Type: application/json
Content-Length: 801
Connection: keep-alive
Boulder-Requester: 123607978
Cache-Control: public, max-age=0, no-cache
Link: <https://acme-v02.api.letsencrypt.org/directory>;rel="index"
Replay-Nonce: 0101AwwwC36omftCTZvMPjXGBzRi6wdke7wRWlNtaZ0o05s
X-Frame-Options: DENY
Strict-Transport-Security: max-age=604800
{
"identifier": {
"type": "dns",
"value": "www.bigbang.mydns.jp"
},
"status": "pending",
"expires": "2021-08-28T22:32:26Z",
"challenges": [
{
"type": "http-01",
"status": "pending",
"url": "https://acme-v02.api.letsencrypt.org/acme/chall-v3/23945652460/EVHk_g",
"token": "qrjguKXKd7RZ8Gty5NDmwx_j3x8MkCiGlMxs4WzdtUo"
},
{
"type": "dns-01",
"status": "pending",
"url": "https://acme-v02.api.letsencrypt.org/acme/chall-v3/23945652460/t-3uow",
"token": "qrjguKXKd7RZ8Gty5NDmwx_j3x8MkCiGlMxs4WzdtUo"
},
{
"type": "tls-alpn-01",
"status": "pending",
"url": "https://acme-v02.api.letsencrypt.org/acme/chall-v3/23945652460/Yz8Y4Q",
"token": "qrjguKXKd7RZ8Gty5NDmwx_j3x8MkCiGlMxs4WzdtUo"
}
]
}
2021-08-22 07:32:26,846:DEBUG:acme.client:Storing nonce: 0101AwwwC36omftCTZvMPjXGBzRi6wdke7wRWlNtaZ0o05s
2021-08-22 07:32:29,849:DEBUG:acme.client:JWS payload:
b''
2021-08-22 07:32:29,850:DEBUG:acme.client:Sending POST request to https://acme-v02.api.letsencrypt.org/acme/authz-v3/23945652460:
{
"protected": "eyJhbGciOiAiUlMyNTYiLCAia2lkIjogImh0dHBzOi8vYWNtZS12MDIuYXBpLmxldHNlbmNyeXB0Lm9yZy9hY21lL2FjY3QvMTIzNjA3OTc4IiwgIm\
5vbmNlIjogIjAxMDFBd3d3QzM2b21mdENUWnZNUGpYR0J6Umk2d2RrZTd3UldsTnRhWjBvMDVzIiwgInVybCI6ICJodHRwczovL2FjbWUtdjAyLmFwa\
S5sZXRzZW5jcnlwdC5vcmcvYWNtZS9hdXRoei12My8yMzk0NTY1MjQ2MCJ9",
"signature": "StN7QSK2Rvl6ZQlU9q75Z9J2G52mtbhCzkFJXKDFaUsPpyTxwfsgVG45DkbaNp_MzTON3KZwKt-bioKhNT8lnu4t4RjCykRj4kVQogT52imNVoSQkP\
JgYQXz1aNM1dFhrWed9b4ynKyJCad2k4s-hjNBE3dWmfGtPeU3JALFPYJ8sgYbf4j78Nr4zU133U_2sUxtzWpkAF2JC742_M-Hk62cWp8YVpMtAmw_-ovjmCnqSPirHAI5\
_j7lAvUaOOQ6J6WOb39GqWjoZHxY8RiBPcGMo6hCsu4tdhYkpFEgYZBnVN7yL2853p6mvtTRilZ5G-vYnNS4zT8xoUJh3nEceg",
"payload": ""
}
2021-08-22 07:32:30,099:DEBUG:urllib3.connectionpool:https://acme-v02.api.letsencrypt.org:443 "POST /acme/authz-v3/23945652460 HTTP/1.1" 200 1611
2021-08-22 07:32:30,099:DEBUG:acme.client:Received response:
HTTP 200
Server: nginx
Date: Sat, 21 Aug 2021 22:32:31 GMT
Content-Type: application/json
Content-Length: 1611
Connection: keep-alive
Boulder-Requester: 123607978
Cache-Control: public, max-age=0, no-cache
Link: <https://acme-v02.api.letsencrypt.org/directory>;rel="index"
Replay-Nonce: 01023CSUzmbiTTbOnzUvOkVhkBw-rNCTNezDZrNPhKZyr2k
X-Frame-Options: DENY
Strict-Transport-Security: max-age=604800
{
"identifier": {
"type": "dns",
"value": "www.bigbang.mydns.jp"
},
"status": "invalid",
"expires": "2021-08-28T22:32:26Z",
"challenges": [
{
"type": "http-01",
"status": "invalid",
"error": {
"type": "urn:ietf:params:acme:error:unauthorized",
"detail": "Invalid response from https://www.bigbang.mydns.jp/.well-known/acme-challenge/qrjguKXKd7RZ8Gty5NDmwx_j3x8MkCiGlMxs4WzdtUo [***.***.***.***]: \"\u003c!DOCTYPE HTML PUBLIC \\\"-//IETF//DTD HTML 2.0//EN\\\"\u003e\\n\u003chtml\u003e\u003chead\u003e\\n\u003ctitle\u003e404 Not Found\u003c/title\u003e\\n\u003c/head\u003e\u003cbody\u003e\\n\u003ch1\u003eNot Found\u003c/h1\u003e\\n\u003cp\"",
"status": 403
},
"url": "https://acme-v02.api.letsencrypt.org/acme/chall-v3/23945652460/EVHk_g",
"token": "qrjguKXKd7RZ8Gty5NDmwx_j3x8MkCiGlMxs4WzdtUo",
"validationRecord": [
{
"url": "http://www.bigbang.mydns.jp/.well-known/acme-challenge/qrjguKXKd7RZ8Gty5NDmwx_j3x8MkCiGlMxs4WzdtUo",
"hostname": "www.bigbang.mydns.jp",
"port": "80",
"addressesResolved": [
"***.***.***.***"
],
"addressUsed": "***.***.***.***"
},
{
"url": "https://www.bigbang.mydns.jp/.well-known/acme-challenge/qrjguKXKd7RZ8Gty5NDmwx_j3x8MkCiGlMxs4WzdtUo",
"hostname": "www.bigbang.mydns.jp",
"port": "443",
"addressesResolved": [
"***.***.***.***"
],
"addressUsed": "***.***.***.***"
}
],
"validated": "2021-08-21T22:32:26Z"
}
]
}
2021-08-22 07:32:30,099:DEBUG:acme.client:Storing nonce: 01023CSUzmbiTTbOnzUvOkVhkBw-rNCTNezDZrNPhKZyr2k
2021-08-22 07:32:30,099:INFO:certbot._internal.auth_handler:Challenge failed for domain www.bigbang.mydns.jp
2021-08-22 07:32:30,100:INFO:certbot._internal.auth_handler:http-01 challenge for www.bigbang.mydns.jp
2021-08-22 07:32:30,100:DEBUG:certbot._internal.display.obj:Notifying user:
Certbot failed to authenticate some domains (authenticator: webroot). The Certificate Authority reported these problems:
Domain: www.bigbang.mydns.jp
Type: unauthorized
Detail: Invalid response from https://www.bigbang.mydns.jp/.well-known/acme-challenge/qrjguKXKd7RZ8Gty5NDmwx_j3x8MkCiGlMxs4WzdtUo [***.***.***.***]: "<!DOCTYPE HTML PUBLIC \"-//IETF//DTD HTML 2.0//EN\">\n<html><head>\n<title>404 Not Found</title>\n</head><body>\n<h1>Not Found</h1>\n<p"
Hint: The Certificate Authority failed to download the temporary challenge files created by Certbot. \
Ensure that the listed domains serve their content from \
the provided --webroot-path/-w and that files created there can be downloaded from the internet.
2021-08-22 07:32:30,101:DEBUG:certbot._internal.error_handler:Encountered exception:
Traceback (most recent call last):
File "/var/lib/snapd/snap/certbot/1343/lib/python3.8/site-packages/certbot/_internal/auth_handler.py", line 90, in handle_authorizations
self._poll_authorizations(authzrs, max_retries, best_effort)
File "/var/lib/snapd/snap/certbot/1343/lib/python3.8/site-packages/certbot/_internal/auth_handler.py", line 178, in _poll_authorizations
raise errors.AuthorizationError('Some challenges have failed.')
certbot.errors.AuthorizationError: Some challenges have failed.
2021-08-22 07:32:30,101:DEBUG:certbot._internal.error_handler:Calling registered functions
2021-08-22 07:32:30,101:INFO:certbot._internal.auth_handler:Cleaning up challenges
2021-08-22 07:32:30,101:DEBUG:certbot._internal.plugins.webroot:Removing /usr/share/nginx/certbot/www.bigbang.mydns.jp/.well-known/acme-challenge/qrjguKXKd7RZ8Gty5NDmwx_j3x8MkCiGlMxs4WzdtUo
2021-08-22 07:32:30,101:DEBUG:certbot._internal.plugins.webroot:All challenges cleaned up
2021-08-22 07:32:30,101:ERROR:certbot._internal.renewal:Failed to renew certificate www.bigbang.mydns.jp with error: Some challenges have failed.
2021-08-22 07:32:30,105:DEBUG:certbot._internal.renewal:Traceback was:
Traceback (most recent call last):
File "/var/lib/snapd/snap/certbot/1343/lib/python3.8/site-packages/certbot/_internal/renewal.py", line 473, in handle_renewal_request
main.renew_cert(lineage_config, plugins, renewal_candidate)
File "/var/lib/snapd/snap/certbot/1343/lib/python3.8/site-packages/certbot/_internal/main.py", line 1378, in renew_cert
renewed_lineage = _get_and_save_cert(le_client, config, lineage=lineage)
File "/var/lib/snapd/snap/certbot/1343/lib/python3.8/site-packages/certbot/_internal/main.py", line 117, in _get_and_save_cert
renewal.renew_cert(config, domains, le_client, lineage)
File "/var/lib/snapd/snap/certbot/1343/lib/python3.8/site-packages/certbot/_internal/renewal.py", line 333, in renew_cert
new_cert, new_chain, new_key, _ = le_client.obtain_certificate(domains, new_key)
File "/var/lib/snapd/snap/certbot/1343/lib/python3.8/site-packages/certbot/_internal/client.py", line 386, in obtain_certificate
orderr = self._get_order_and_authorizations(csr.data, self.config.allow_subset_of_names)
File "/var/lib/snapd/snap/certbot/1343/lib/python3.8/site-packages/certbot/_internal/client.py", line 436, in _get_order_and_authorizations
authzr = self.auth_handler.handle_authorizations(orderr, self.config, best_effort)
File "/var/lib/snapd/snap/certbot/1343/lib/python3.8/site-packages/certbot/_internal/auth_handler.py", line 90, in handle_authorizations
self._poll_authorizations(authzrs, max_retries, best_effort)
File "/var/lib/snapd/snap/certbot/1343/lib/python3.8/site-packages/certbot/_internal/auth_handler.py", line 178, in _poll_authorizations
raise errors.AuthorizationError('Some challenges have failed.')
certbot.errors.AuthorizationError: Some challenges have failed.
2021-08-22 07:32:30,105:DEBUG:certbot._internal.display.obj:Notifying user:
- - - - - - - - - - - - - - - - - - - - - - - - - - - - - - - - - - - - - - - -
2021-08-22 07:32:30,105:ERROR:certbot._internal.renewal:All renewals failed. The following certificates could not be renewed:
2021-08-22 07:32:30,106:ERROR:certbot._internal.renewal: /etc/letsencrypt/live/www.bigbang.mydns.jp/fullchain.pem (failure)
2021-08-22 07:32:30,106:DEBUG:certbot._internal.display.obj:Notifying user: - - - - - - - - - - - - - - - - - - - - - - - - - - - - - - - - - - - - - - - -
2021-08-22 07:32:30,106:INFO:certbot.compat.misc:Running post-hook command: /etc/letsencrypt/renewal-hooks/post/web_restart.sh
2021-08-22 07:32:32,205:INFO:certbot.compat.misc:Running post-hook command: systemctl restart nginx
2021-08-22 07:32:32,334:DEBUG:certbot._internal.log:Exiting abnormally:
Traceback (most recent call last):
File "/snap/certbot/1343/bin/certbot", line 8, in <module>
sys.exit(main())
File "/var/lib/snapd/snap/certbot/1343/lib/python3.8/site-packages/certbot/main.py", line 15, in main
return internal_main.main(cli_args)
File "/var/lib/snapd/snap/certbot/1343/lib/python3.8/site-packages/certbot/_internal/main.py", line 1566, in main
return config.func(config, plugins)
File "/var/lib/snapd/snap/certbot/1343/lib/python3.8/site-packages/certbot/_internal/main.py", line 1452, in renew
renewal.handle_renewal_request(config)
File "/var/lib/snapd/snap/certbot/1343/lib/python3.8/site-packages/certbot/_internal/renewal.py", line 498, in handle_renewal_request
raise errors.Error("{0} renew failure(s), {1} parse failure(s)".format(
certbot.errors.Error: 1 renew failure(s), 0 parse failure(s)
2021-08-22 07:32:32,335:ERROR:certbot._internal.log:1 renew failure(s), 0 parse failure(s)
snapのタイマーは下記のように設定されています。
# systemctl cat snap.certbot.renew.timer
# /etc/systemd/system/snap.certbot.renew.timer
[Unit]
# Auto-generated, DO NOT EDIT
Description=Timer renew for snap application certbot.renew
Requires=var-lib-snapd-snap-certbot-1343.mount
After=var-lib-snapd-snap-certbot-1343.mount
X-Snappy=yes

[Timer]
Unit=snap.certbot.renew.service
OnCalendar=*-*-* 07:32
OnCalendar=*-*-* 18:01

[Install]
WantedBy=timers.target
SSL証明書更新後、snapのタイマーで最初に更新動作したときのログです。
# cat /var/log/letsencrypt/letsencrypt.log
2021-08-24 07:32:07,602:DEBUG:urllib3.connectionpool:http://localhost:None "GET /v2/connections?snap=certbot&interface=content HTTP/1.1" 200 97
2021-08-24 07:32:09,061:DEBUG:certbot._internal.main:certbot version: 1.18.0
2021-08-24 07:32:09,061:DEBUG:certbot._internal.main:Location of certbot entry point: /snap/certbot/1343/bin/certbot
2021-08-24 07:32:09,061:DEBUG:certbot._internal.main:Arguments: ['-q', '--preconfigured-renewal']
2021-08-24 07:32:09,061:DEBUG:certbot._internal.main:Discovered plugins: \ PluginsRegistry(PluginEntryPoint#apache,PluginEntryPoint#manual,PluginEntryPoint\ #nginx,PluginEntryPoint#null,PluginEntryPoint#standalone,PluginEntryPoint#webroot)
2021-08-24 07:32:09,075:DEBUG:certbot._internal.log:Root logging level set at 40
2021-08-24 07:32:09,076:DEBUG:certbot._internal.display.obj:Notifying user: Processing /etc/letsencrypt/renewal/www.bigbang.mydns.jp.conf
2021-08-24 07:32:09,095:DEBUG:certbot._internal.plugins.selection:Requested authenticator <certbot._internal.cli.cli_utils._Default object at 0x7f2b69623eb0> and installer <certbot._internal.cli.cli_utils._Default object at 0x7f2b69623eb0>
2021-08-24 07:32:09,140:DEBUG:urllib3.connectionpool:Starting new HTTP connection (1): r3.o.lencr.org:80
2021-08-24 07:32:09,942:DEBUG:urllib3.connectionpool:http://r3.o.lencr.org:80 "POST / HTTP/1.1" 200 503
2021-08-24 07:32:09,942:DEBUG:certbot.ocsp:OCSP response for certificate /etc/letsencrypt/archive/www.bigbang.mydns.jp/cert5.pem is signed by the certificate's issuer.
2021-08-24 07:32:09,948:DEBUG:certbot.ocsp:OCSP certificate status for /etc/letsencrypt/archive/www.bigbang.mydns.jp/cert5.pem is: OCSPCertStatus.GOOD
2021-08-24 07:32:09,950:DEBUG:certbot._internal.display.obj:Notifying user: Certificate not yet due for renewal
2021-08-24 07:32:09,950:DEBUG:certbot._internal.plugins.selection:Requested authenticator webroot and installer None
2021-08-24 07:32:09,950:DEBUG:certbot._internal.display.obj:Notifying user:
- - - - - - - - - - - - - - - - - - - - - - - - - - - - - - - - - - - - - - - -
2021-08-24 07:32:09,950:DEBUG:certbot._internal.display.obj:Notifying user: The following certificates are not due for renewal yet:
2021-08-24 07:32:09,950:DEBUG:certbot._internal.display.obj:Notifying user: /etc/letsencrypt/live/www.bigbang.mydns.jp/fullchain.pem expires on 2021-11-21 (skipped)
2021-08-24 07:32:09,950:DEBUG:certbot._internal.display.obj:Notifying user: No renewals were attempted.
2021-08-24 07:32:09,950:DEBUG:certbot._internal.display.obj:Notifying user: - - - - - - - - - - - - - - - - - - - - - - - - - - - - - - - - - - - - - - - -
2021-08-24 07:32:09,950:DEBUG:certbot._internal.renewal:no renewal failures
明らかに更新動作が異常だった時と違っています。
手動更新できるかどうかも確認してみます。
# certbot renew --dry-run
Saving debug log to /var/log/letsencrypt/letsencrypt.log

- - - - - - - - - - - - - - - - - - - - - - - - - - - - - - - - - - - - - - - -
Processing /etc/letsencrypt/renewal/www.bigbang.mydns.jp.conf
- - - - - - - - - - - - - - - - - - - - - - - - - - - - - - - - - - - - - - - -
Simulating renewal of an existing certificate for www.bigbang.mydns.jp

- - - - - - - - - - - - - - - - - - - - - - - - - - - - - - - - - - - - - - - -
Congratulations, all simulated renewals succeeded:
  /etc/letsencrypt/live/www.bigbang.mydns.jp/fullchain.pem (success)
- - - - - - - - - - - - - - - - - - - - - - - - - - - - - - - - - - - - - - - -
問題ないようです。
SSLサーバの移行
Certbotのインストール後、下記フォルダを旧サーバから新サーバにコピーします。
# scp /etc/letsencrypt/archive/* new_server:/etc/letsencrypt/archive/
# scp /etc/letsencrypt/live/* new_server:/etc/letsencrypt/live/
# scp /etc/letsencrypt/renewal/* new_server:/etc/letsencrypt/renewal/
新サーバ上で下記コマンドを実行します。
[root@new_server ~]# certbot renew --dry-run
Saving debug log to /var/log/letsencrypt/letsencrypt.log

- - - - - - - - - - - - - - - - - - - - - - - - - - - - - - - - - - - - - - - -
Processing /etc/letsencrypt/renewal/www.bigbang.mydns.jp.conf
- - - - - - - - - - - - - - - - - - - - - - - - - - - - - - - - - - - - - - - -
Simulating renewal of an existing certificate for www.bigbang.mydns.jp

- - - - - - - - - - - - - - - - - - - - - - - - - - - - - - - - - - - - - - - -
Congratulations, all simulated renewals succeeded:
  /etc/letsencrypt/live/www.bigbang.mydns.jp/fullchain.pem (success)
- - - - - - - - - - - - - - - - - - - - - - - - - - - - - - - - - - - - - - - -
問題ないようです。
CentOS Stream 8からRocky Linux 9への移行時にエラーに関する事項を追加 ---ここから---
CentOS Stream 8からRocky Linux 9への移行時にエラー
下記のようなエラーとなりました。
# certbot renew --dry-run
Saving debug log to /var/log/letsencrypt/letsencrypt.log

- - - - - - - - - - - - - - - - - - - - - - - - - - - - - - - - - - - - - - - -
Processing /etc/letsencrypt/renewal/www.bigbang.mydns.jp.conf
- - - - - - - - - - - - - - - - - - - - - - - - - - - - - - - - - - - - - - - -
Failed to renew certificate www.bigbang.mydns.bz with error: \
    You should register before running non-interactively, or provide --agree-tos and --email <email_address> flags.

- - - - - - - - - - - - - - - - - - - - - - - - - - - - - - - - - - - - - - - -
All simulated renewals failed. The following certificates could not be renewed:
  /etc/letsencrypt/live/www.bigbang.mydns.jp/fullchain.pem (failure)
- - - - - - - - - - - - - - - - - - - - - - - - - - - - - - - - - - - - - - - -
1 renew failure(s), 0 parse failure(s)
Ask for help or search for solutions at https://community.letsencrypt.org. \
    See the logfile /var/log/letsencrypt/letsencrypt.log or re-run Certbot with -v for more details.
次は「--dry-run」オプション無しで実行してみました。
# certbot renew
Saving debug log to /var/log/letsencrypt/letsencrypt.log

- - - - - - - - - - - - - - - - - - - - - - - - - - - - - - - - - - - - - - - -
Processing /etc/letsencrypt/renewal/www.bigbang.mydns.jp.conf
- - - - - - - - - - - - - - - - - - - - - - - - - - - - - - - - - - - - - - - -
Failed to renew certificate www.bigbang.mydns.jp with error: /
    Account at /etc/letsencrypt/accounts/acme-v01.api.letsencrypt.org/directory/fef6***********************4103 does not exist

- - - - - - - - - - - - - - - - - - - - - - - - - - - - - - - - - - - - - - - -
All renewals failed. The following certificates could not be renewed:
  /etc/letsencrypt/live/www.bigbang.mydns.bz/fullchain.pem (failure)
- - - - - - - - - - - - - - - - - - - - - - - - - - - - - - - - - - - - - - - -
1 renew failure(s), 0 parse failure(s)
Ask for help or search for solutions at https://community.letsencrypt.org. \
    See the logfile /var/log/letsencrypt/letsencrypt.log or re-run Certbot with -v for more details.
/etc/letsencrypt/accounts/acme-v01.api.letsencrypt.org/directory/を調べてみると、ディレクトリ内は空でした。
他方のディレクトリも可らでしたので、旧サーバからコピーしました。
 ls -l /etc/letsencrypt/accounts
合計 0
drwx------ 3 root root 23  9月 23 23:02 acme-staging-v02.api.letsencrypt.org
drwx------ 3 root root 23  9月 23 23:03 acme-v02.api.letsencrypt.org

# ls -l /etc/letsencrypt/accounts/acme-*/directory
/etc/letsencrypt/accounts/acme-staging-v02.api.letsencrypt.org/directory:
合計 0

/etc/letsencrypt/accounts/acme-v02.api.letsencrypt.org/directory:
合計 0

# rsync -avz /etc/letsencrypt/accounts/acme-staging-v02.api.letsencrypt.org/directory/* \
    new_server:/etc/letsencrypt/accounts/acme-staging-v02.api.letsencrypt.org//directory/
# rsync -avz /etc/letsencrypt/accounts/acme-v02.api.letsencrypt.org/directory/* new_server:/etc/letsencrypt/accounts/acme-v02.api.letsencrypt.org/directory/
その後、実行すると正常に処理できました。
# certbot renew --dry-run
Saving debug log to /var/log/letsencrypt/letsencrypt.log

- - - - - - - - - - - - - - - - - - - - - - - - - - - - - - - - - - - - - - - -
Processing /etc/letsencrypt/renewal/www.bigbang.mydns.bz.conf
- - - - - - - - - - - - - - - - - - - - - - - - - - - - - - - - - - - - - - - -
Simulating renewal of an existing certificate for www.bigbang.mydns.bz

- - - - - - - - - - - - - - - - - - - - - - - - - - - - - - - - - - - - - - - -
Congratulations, all simulated renewals succeeded:
  /etc/letsencrypt/live/www.bigbang.mydns.bz/fullchain.pem (success)
- - - - - - - - - - - - - - - - - - - - - - - - - - - - - - - - - - - - - - - -
CentOS Stream 8からRocky Linux 9への移行時にエラーに関する事項を追加 ---ここまで---
証明書の有効期限が30日以上ある場合、renewサブコマンドでは更新できません。
[root@new_server ~]# certbot renew
Saving debug log to /var/log/letsencrypt/letsencrypt.log

- - - - - - - - - - - - - - - - - - - - - - - - - - - - - - - - - - - - - - - -
Processing /etc/letsencrypt/renewal/www.bigbang.mydns.jp.conf
- - - - - - - - - - - - - - - - - - - - - - - - - - - - - - - - - - - - - - - -
Certificate not yet due for renewal

- - - - - - - - - - - - - - - - - - - - - - - - - - - - - - - - - - - - - - - -
The following certificates are not due for renewal yet:
  /etc/letsencrypt/live/www.bigbang.mydns.jp/fullchain.pem expires on 2022-01-25 (skipped)
No renewals were attempted.
- - - - - - - - - - - - - - - - - - - - - - - - - - - - - - - - - - - - - - - -
同様に、--force-renewオプションを付加しても更新できません。
[root@new_server ~]# certbot renew --force-renew
Saving debug log to /var/log/letsencrypt/letsencrypt.log

- - - - - - - - - - - - - - - - - - - - - - - - - - - - - - - - - - - - - - - -
Processing /etc/letsencrypt/renewal/www.bigbang.mydns.jp.conf
- - - - - - - - - - - - - - - - - - - - - - - - - - - - - - - - - - - - - - - -
Failed to renew certificate www.bigbang.mydns.jp with error: \
 Account at /etc/letsencrypt/accounts/acme-v01.api.letsencrypt.org/directory/f9963706d349d1e0349a78********** does not exist

- - - - - - - - - - - - - - - - - - - - - - - - - - - - - - - - - - - - - - - -
All renewals failed. The following certificates could not be renewed:
  /etc/letsencrypt/live/www.bigbang.mydns.jp/fullchain.pem (failure)
- - - - - - - - - - - - - - - - - - - - - - - - - - - - - - - - - - - - - - - -
1 renew failure(s), 0 parse failure(s)
下記コマンドで手動更新しました。
[root@new_server ~]# certbot certonly --webroot -w /var/www/html -d www.bigbang.mydns.jp
Saving debug log to /var/log/letsencrypt/letsencrypt.log
Certificate not yet due for renewal

You have an existing certificate that has exactly the same domains or certificate name you requested and isn't close to expiry.
(ref: /etc/letsencrypt/renewal/www.bigbang.mydns.jp.conf)

What would you like to do?
- - - - - - - - - - - - - - - - - - - - - - - - - - - - - - - - - - - - - - - -
1: Keep the existing certificate for now
2: Renew & replace the certificate (may be subject to CA rate limits)
- - - - - - - - - - - - - - - - - - - - - - - - - - - - - - - - - - - - - - - -
Select the appropriate number [1-2] then [enter] (press 'c' to cancel): 2
Renewing an existing certificate for www.bigbang.mydns.jp

Successfully received certificate.
Certificate is saved at: /etc/letsencrypt/live/www.bigbang.mydns.jp/fullchain.pem
Key is saved at:         /etc/letsencrypt/live/www.bigbang.mydns.jp/privkey.pem
This certificate expires on 2022-02-20.
These files will be updated when the certificate renews.
Certbot has set up a scheduled task to automatically renew this certificate in the background.

- - - - - - - - - - - - - - - - - - - - - - - - - - - - - - - - - - - - - - - -
If you like Certbot, please consider supporting our work by:
 * Donating to ISRG / Let's Encrypt:   https://letsencrypt.org/donate
 * Donating to EFF:                    https://eff.org/donate-le
- - - - - - - - - - - - - - - - - - - - - - - - - - - - - - - - - - - - - - - -
archiveフォルダの各証明書が最新版になっていることを確認します。
root@ew_server~]# ll /etc/letsencrypt/archive/www.bigbang.mydns.jp/
 :
-rw-r--r-- 1 root root 1854 10月 28 04:48 cert7.pem
-rw-r--r-- 1 root root 1854 11月 22 15:49 cert8.pem
 :
-rw-r--r-- 1 root root 3749 10月 28 04:48 chain7.pem
-rw-r--r-- 1 root root 3749 11月 22 15:49 chain8.pem
 :
-rw-r--r-- 1 root root 5603 10月 28 04:48 fullchain7.pem
-rw-r--r-- 1 root root 5603 11月 22 15:49 fullchain8.pem
 :
-rw------- 1 root root 1704 10月 28 04:48 privkey7.pem
-rw------- 1 root root 1708 11月 22 15:49 privkey8.pem
httpdサービスを再起動します。
[root@sew_server ~]# systemctl restart httpd証明書の日付を確認します。
[root@sew_server ~]# echo | openssl s_client -connect www.bigbang.mydns.jp:443 -showcerts | openssl x509 -dates -noout
depth=2 C = US, O = Internet Security Research Group, CN = ISRG Root X1
verify return:1
depth=1 C = US, O = Let's Encrypt, CN = R3
verify return:1
depth=0 CN = www.bigbang.mydns.jp
verify return:1
DONE
notBefore=Nov 22 05:49:38 2021 GMT
notAfter=Feb 20 05:49:37 2022 GMT
今後は、新サーバの方でSSL証明書を自動更新するようにして、作業終了です。
/ not root-owned 1000:1000
月に一度、SSL証明書を自動的に更新するようにcron monthlyで動作させています。
ところが、下記のようなエラーメールが届いていました。
件名:Anacron job 'cron.monthly' on ホスト名

内容:/etc/cron.monthly/update_sslcert.sh:

===== Update SSL Certfile =====
2023年  8月 25日 金曜日 04:07:01 JST Update SSL Certfile start
/ not root-owned 1000:1000
2023年  8月 25日 金曜日 04:07:01 JST Update SSL Certfile end
調査します。
# grep "1000:1000" /etc/passwd hoge:x:1000:1000:hoge:/home/hoge:/bin/bash # ls -alh / 合計 1.3M drwxr-xr-x. 27 hoge hoge 4.0K 8月 1 18:37 . drwxr-xr-x. 27 hoge hoge 4.0K 8月 1 18:37 .. lrwxrwxrwx. 1 root root 7 6月 22 2021 bin -> usr/bin dr-xr-xr-x. 5 root root 4.0K 8月 24 23:52 boot drwxr-xr-x 22 root root 3.7K 8月 24 23:52 dev .と..のアクセス権を変更 # chown root. /. # chown root. /.. # ls -alh / 合計 1.3M drwxr-xr-x. 27 root root 4.0K 8月 1 18:37 . drwxr-xr-x. 27 root root 4.0K 8月 1 18:37 .. 手動で更新できるか試してみます。証明書の期限を確認します。# bash -x /etc/cron.monthly/update_sslcert.sh + CERTBOT_CMD=/usr/bin/certbot + WEBSERVER_RESTART_CMD='systemctl restart httpd' + MAILTO=hoge@mail.bigbang.mydns.bz + echo '===== Update SSL Certfile =====' ===== Update SSL Certfile ===== ++ date + echo '2023年 8月 25日 金曜日 07:55:39 JST Update SSL Certfile start' 2023年 8月 25日 金曜日 07:55:39 JST Update SSL Certfile start + /usr/bin/certbot renew --post-hook 'systemctl restart httpd' --force-renewal Saving debug log to /var/log/letsencrypt/letsencrypt.log - - - - - - - - - - - - - - - - - - - - - - - - - - - - - - - - - - - - - - - - Processing /etc/letsencrypt/renewal/www.bigbang.mydns.bz.conf - - - - - - - - - - - - - - - - - - - - - - - - - - - - - - - - - - - - - - - - Failed to renew certificate www.bigbang.mydns.bz with error: HTTPSConnectionPool(host='acme-v02.api.letsencrypt.org', port=443): Max retries exceeded with \ url: /directory (Caused by ProxyError('Your proxy appears to only use HTTP and not HTTPS, try changing your proxy URL to be HTTP. \ See: https://urllib3.readthedocs.io/en/1.26.x/advanced-usage.html#https-proxy-error-http-proxy', SSLError(SSLError(1, \ '[SSL: WRONG_VERSION_NUMBER] wrong version number (_ssl.c:1131)')))) - - - - - - - - - - - - - - - - - - - - - - - - - - - - - - - - - - - - - - - - All renewals failed. The following certificates could not be renewed: /etc/letsencrypt/live/www.bigbang.mydns.bz/fullchain.pem (failure) - - - - - - - - - - - - - - - - - - - - - - - - - - - - - - - - - - - - - - - - 1 renew failure(s), 0 parse failure(s) Ask for help or search for solutions at https://community.letsencrypt.org. See the logfile /var/log/letsencrypt/letsencrypt.log or re-run Certbot with -v for more details. + LE_STATUS=1 + '[' 1 '!=' 0 ']' + echo 'Update SSL Certfile failed' ++ hostname + mail -s 'Update SSL Certfile in ホスト名' hoge@mail.bigbang.mydns.bz ++ date + echo '2023年 8月 25日 金曜日 07:55:41 JST Update SSL Certfile end' 2023年 8月 25日 金曜日 07:55:41 JST Update SSL Certfile end
# certbot certificates
Saving debug log to /var/log/letsencrypt/letsencrypt.log

- - - - - - - - - - - - - - - - - - - - - - - - - - - - - - - - - - - - - - - -
Found the following certs:
  Certificate Name: www.bigbang.mydns.bz
    Serial Number: ***********************************
    Key Type: RSA
    Domains: www.bigbang.mydns.bz
    Expiry Date: 2023-10-22 18:29:52+00:00 (VALID: 58 days)
    Certificate Path: /etc/letsencrypt/live/www.bigbang.mydns.bz/fullchain.pem
    Private Key Path: /etc/letsencrypt/live/www.bigbang.mydns.bz/privkey.pem
- - - - - - - - - - - - - - - - - - - - - - - - - - - - - - - - - - - - - - - -
有効期限は、2023-10-22 18:29:52までなので、暫く様子を見たいと思います。
●Let's Encrypt証明書の設定
参考URL:CentOS 7 + Apache 2.4 に Let's Encrypt の証明書を導入する手順
Certbotクライアントのインストール
CentOS 7用のCertbotクライアントは、EPELリポジトリからインストールできます。
EPELリポジトリのインストールについてはこちらを参照してください。
# yum install epel-release
# yum install certbot python-certbot-apache

下記のように、一度にインストールすることもできます。
# yum -y epel-release && yum -y install certbot{,-apache}
依存の関係で他のパッケージもインストールされる場合があります。
SSL/TLS証明書の作成
Apache httpdのDocumentRootが/var/www/htmlに設定されていると仮定して話を進めます。
下記のようにオプションを指定してcertbotコマンドを実行します。-dオプションには、証明書を発行するサーバーのドメインを、-wにはDocumentRootのパスを指定します。
# certbot certonly --webroot -w /var/www/html/ -d www.bigbang.mydns.jpすると、まずは次のようにメールアドレスを入力するように求められます。このメールアドレスは、後に証明書の有効期限が近づいた際にお知らせしてくれたりすることなどに利用されます。有効なメールアドレスを入力しておきます。
Saving debug log to /var/log/letsencrypt/letsencrypt.log
Enter email address (used for urgent renewal and security notices) (Enter 'c' to
cancel): メールアドレスを入力
次に規約に同意するかを問われます。 同意するために A と入力します。
Starting new HTTPS connection (1): acme-v01.api.letsencrypt.org

-------------------------------------------------------------------------------
Please read the Terms of Service at
https://letsencrypt.org/documents/LE-SA-v1.1.1-August-1-2016.pdf. You must agree
in order to register with the ACME server at
https://acme-v01.api.letsencrypt.org/directory
-------------------------------------------------------------------------------
(A)gree/(C)ancel: A
次にElectronic Frontier Foundationにメールアドレスを共有するかを問われます。メールアドレスを共有すると、EFFや証明書のことなどについてのメールを送ると書かれています。メーリングリストのようなものです。メールを受け取りたければYを、受け取りたくなければNと入力します。
-------------------------------------------------------------------------------
Would you be willing to share your email address with the Electronic Frontier
Foundation, a founding partner of the Let's Encrypt project and the non-profit
organization that develops Certbot? We'd like to send you email about EFF and
our work to encrypt the web, protect its users and defend digital rights.
-------------------------------------------------------------------------------
(Y)es/(N)o: N
これで証明書の作成が開始されます。正しく証明書の作成が行われた場合は、下記のように出力されます。
Obtaining a new certificate
Performing the following challenges:
http-01 challenge for www.bigbang.mydns.jp
Using the webroot path /var/www/www.bigbang.mydns.jp for all unmatched domains.
Waiting for verification...
Cleaning up challenges
Generating key (2048 bits): /etc/letsencrypt/keys/0000_key-certbot.pem
Creating CSR: /etc/letsencrypt/csr/0000_csr-certbot.pem

IMPORTANT NOTES:
- Congratulations! Your certificate and chain have been saved at
/etc/letsencrypt/live/www.bigbang.mydns.jp/fullchain.pem. Your cert
will expire on 2017-07-16. To obtain a new or tweaked version of
this certificate in the future, simply run certbot again. To
non-interactively renew *all* of your certificates, run "certbot
renew"
- Your account credentials have been saved in your Certbot
configuration directory at /etc/letsencrypt. You should make a
secure backup of this dir now. This configuration directory will
also contain certificates and private keys obtained by Certbot so
making regular backups of this dir is ideal.
- If you like Certbot, please consider supporting our work by:

Donating to ISRG / Let's Encrypt: https://letsencrypt.org/donate
Donating to EFF: https://eff.org/donate-le
これにて証明書の発行は終了です。作成されたサーバー証明書は、次のように/etc/letsencrypt/live/[発行したサーバーのドメイン]/内に作成されます。
# ls -l /etc/letsencrypt/live/www.bigbang.mydns.jp/
合計 4
-rw-r--r--. 1 root root 692 10月 25 17:33 README
lrwxrwxrwx. 1 root root  44 10月 25 17:33 cert.pem -> ../../archive/www.bigbang.mydns.jp/cert1.pem
lrwxrwxrwx. 1 root root  45 10月 25 17:33 chain.pem -> ../../archive/www.bigbang.mydns.jp/chain1.pem
lrwxrwxrwx. 1 root root  49 10月 25 17:33 fullchain.pem -> ../../archive/www.bigbang.mydns.jp/fullchain1.pem
lrwxrwxrwx. 1 root root  47 10月 25 17:33 privkey.pem -> ../../archive/www.bigbang.mydns.jp/privkey1.pem
各証明書の意味は下記のとおりです。
cert.pem         SSLCertificateFile         サーバ証明書
chain.pem        SSLCertificateChainFile    中間CA証明書
fullchain.pem    SSLCertificateFile         サーバ証明書+中間CA証明書を結合したもの
privkey.pem      SLCertificateKeyFile       サーバ証明書の秘密鍵
Apache 2.4の設定
SSL/TLSサーバー証明書が作成できましたので、Apache 2.4に設定を追加します。ssl.confのSSLCertificateFile、SSLCertificateKeyFile、SLCertificateChainFileにそれぞれ設定します。
# vi /etc/httpd/conf.d/ssl.conf
...
SSLCertificateFile /etc/letsencrypt/live/[サーバーのドメイン]/cert.pem
SSLCertificateKeyFile /etc/letsencrypt/live/[サーバーのドメイン]/privkey.pem
SSLCertificateChainFile /etc/letsencrypt/live/[サーバーのドメイン]/chain.pem
...
これで Apache httpd を再起動して完了です。
# systemctl start httpdそれではさっそくhttps://[サーバーのドメイン]/ にアクセスしてみましょう。もし、接続できない場合、SELinuxやfirewalldなどによりアクセスが遮断されていないかを確認してください。firewalldによってアクセスが遮断されてしまっている場合は、下記のコマンドでHTTPS(443)ポートを開放することができます。
# firewall-cmd --add-service=https --zone=public --permanent
# firewall-cmd --reload
ブラウザで証明書の情報を確認してみると Let's Encrypt で発行したものだということがわかると思います。
これで Let's Encrypt での証明書の設定は終了です。
SSL Server TestでA+評価となることを確認します。
証明書の更新設定
※その3を推奨
※その2を推奨
Let's Encryptが発行する証明書の有効期限は90日間と短いので、自動更新されるように設定します。
# vi /etc/letsencrypt/letsencrypt-renew.sh
#!/bin/sh
certbot renew -q --no-self-upgrade --post-hook "systemctl restat httpd.service"
上記のスクリプトに実行権限を付与し、crontabを設定しましょう。
# chmod 0700 /etc/letsencrypt/letsencrypt-renew.sh
# crontab -e
以下の例では、毎日3時に更新チェックが実行されます。
0 3 * * * /etc/letsencrypt/letsencrypt-renew.sh
証明書の更新設定(その2)
参考URL:Webサーバー間通信内容暗号化(Apache+mod_SSL+Certbot)
Let's Encryptが発行する証明書の有効期限は90日間と短いので、自動更新されるように設定します。
SMTPサーバー及びIMAPサーバーで証明書を利用していない場合、下記スクリプトの「SMTPサーバー設定再読込み」及び「IMAPサーバー設定再読込み」は削除して問題ありません。
こちらのスクリプトは certbot でのSSL証明書自動更新用です。
Snapd用は下にあります。
テキスト表示
# vi /etc/cron.monthly/certbot
#!/bin/bash
log=`mktemp`
code=0

which certbot > /dev/null 2>&1
if [ $? -eq 0 ]; then
    CERTBOT=`which certbot`
else
    CERTBOT=`which certbot-auto`
fi

#
# 証明書更新
#
for conf in `ls /etc/letsencrypt/renewal/`
do
    # ドメイン名取得
    domain=`echo ${conf}|sed -e 's/\([^ ]*\)\.conf/\1/p' -e d`

    # 認証方式取得
    authenticator=`grep authenticator /etc/letsencrypt/renewal/${conf}|awk '{print $3}'`

    if [ ${authenticator} = 'webroot' ]; then
        # Web認証の場合

        # ドキュメントルート取得
        webroot=`grep webroot_path /etc/letsencrypt/renewal/${conf}|grep =|awk '{print $3}'|awk -F '[,]' '{print $1}'`

        # 証明書更新
        ${CERTBOT} certonly --webroot \
        -w ${webroot} -d ${domain} --renew-by-default >> ${log} 2>&1
        [ $? -ne 0 ] && cat ${log}
    else
        # スタンドアロン認証の場合

        # 証明書更新
        lsof -i:80 > /dev/null 2>&1
        if [ $? -eq 0 ]; then
            echo 'Webサーバー稼働中のためスタンドアロン認証不可'
        else
            ${CERTBOT} certonly -a standalone \
            -d ${domain} --renew-by-default >> ${log} 2>&1
            [ $? -ne 0 ] && cat ${log}
        fi
    fi

    # 古い証明書を削除
    find /etc/letsencrypt/archive/${domain}/ -mtime +30 -delete

done

#
# 証明書更新反映
#

# Webサーバー設定再読込み
lsof -i:443 > /dev/null 2>&1
if [ $? -eq 0 ]; then
    rpm -q systemd > /dev/null 2>&1
    if [ $? -eq 0 ]; then
        systemctl reload httpd
    else
        /etc/rc.d/init.d/httpd reload > /dev/null 2>&1
    fi
fi

# SMTPサーバー設定再読込み
lsof -i:465 > /dev/null 2>&1
if [ $? -eq 0 ]; then
    rpm -q systemd > /dev/null 2>&1
    if [ $? -eq 0 ]; then
        systemctl reload postfix
    else
        /etc/rc.d/init.d/postfix reload > /dev/null 2>&1
    fi
fi

# IMAPサーバー設定再読込み
lsof -i:995 > /dev/null 2>&1
if [ $? -eq 0 ]; then
    rpm -q systemd > /dev/null 2>&1
    if [ $? -eq 0 ]; then
        systemctl reload dovecot
    else
        /etc/rc.d/init.d/dovecot reload > /dev/null 2>&1
    fi
fi

#
# ログをsyslogへ出力後削除
#
cat ${log}|logger -t `basename ${0}` ; rm -f ${log}
実行権限を付与します。
# chmod +x /etc/cron.monthly/certbotこれで月一回自動的に証明書の期限を確認し、必要に応じて更新するようになります。
こちらのスクリプトは Snapd でのSSL証明書自動更新用です。
# vi /etc/cron.monthly/update_sslcert.sh
#!/bin/bash
#
CERTBOT_CMD=/usr/bin/certbot
WEBSERVER_RESTART_CMD="systemctl restart httpd"

MAILTO=root@mail.bigbang.mydns.jp

echo "===== Update SSL Certfile ====="
echo "`date` Update SSL Certfile start"

# 証明書の更新
${CERTBOT_CMD} renew --post-hook "${WEBSERVER_RESTART_CMD}" --force-renewal

LE_STATUS=$?

# 証明書の取得に失敗したときはメールで通知
if [ "$LE_STATUS" != 0 ]; then
    echo "Update SSL Certfile failed" |mail -s "Update SSL Certfile in `hostname`" ${MAILTO}
fi

echo "`date` Update SSL Certfile end"

# EOF
実行権限を付与します。
# chmod +x /etc/cron.monthly/update_sslcert.shこれで月一回自動的に証明書の期限を確認し、必要に応じて更新するようになります。
証明書の更新設定(その3)
参考URL:let's Encryptの証明書更新 CentOS7編
これまでCentOS 7上でcertbotを利用し、更新用スクリプトをcronで起動する方法でSSL証明書を月に一度更新するようにしてきました。
CentOS 7をはじめとして、パッケージでcertbotをインストールするようなディストリビューションでは、certbotと一緒に証明書を更新するための設定ファイルが一緒に配布されている、そうです。
中途半端な設定をスクリプトで記載することなく、証明書を更新する仕組みが用意されていました。
インストールされているcertbotのパッケージを確認します。
# rpm -ql certbot
/etc/letsencrypt
/etc/sysconfig/certbot
/usr/bin/certbot
/usr/bin/letsencrypt
/usr/lib/systemd/system/certbot-renew.service
/usr/lib/systemd/system/certbot-renew.timer
/usr/share/doc/certbot-1.11.0
/usr/share/doc/certbot-1.11.0/CHANGELOG.md
/usr/share/doc/certbot-1.11.0/README.fedora
/usr/share/doc/certbot-1.11.0/README.rst
/usr/share/licenses/certbot-1.11.0
/usr/share/licenses/certbot-1.11.0/LICENSE.txt
/var/lib/letsencrypt
systemdの起動ファイルと、timerファイルがあることが分かります。
.timerは、crontabではなく、systemctlの機構を使ってサービスを定期実行するための設定ファイルです。
この設定ファイルを有効することにより証明書が自動更新されるようになります。
# systemctl enable --now certbot-renew.timer
Created symlink from /etc/systemd/system/timers.target.wants/certbot-renew.timer to /usr/lib/systemd/system/certbot-renew.timer.

# systemctl list-timers
NEXT                         LEFT          LAST                         PASSED    UNIT                         ACTIVATES
月 2021-07-12 22:03:09 JST  3min 16s left n/a                          n/a       systemd-tmpfiles-clean.timer systemd-tmpfiles-clean
火 2021-07-13 00:00:00 JST  2h 0min left  月 2021-07-12 21:48:24 JST  11min ago unbound-anchor.timer         unbound-anchor.service
火 2021-07-13 08:15:55 JST  10h left      n/a                          n/a       certbot-renew.timer          certbot-renew.service

3 timers listed.
2021-07-13 08:15:55 JSTに起動することが分かります。
証明書更新後にApacheを再起動するには下記のようにします。
# vi /etc/sysconfig/certbot
POST_HOOK="--post-hook 'systemctl reload nginx'"
仮想IP構成によるWebサーバ冗長構成の対応
Webサーバが仮想IPにより冗長構成されている場合、他方にSSL証明書をコピーし、証明書の最新版に対しリンクを張っておく必要があります。
これに対処するため、コピーはlsyncd及びrsyncにより、リンクの張り直しはcron.weeklyで対応しました。
lsyncd、rsync及びcron.weeklyの内容は下記の通りです。
例:lsyncd.conf
sync{
        default.rsync,
        source="/etc/letsencrypt/archive/www.bigbang.mydns.jp",
        target="***.***.***.***::letsencrypt_archive",
        delay = 5,
        rsync = {
            perms = true,
            owner = true,
            group = true,
            verbose = true,
        },
}

※***.***.***.***は送り先側のIPアドレス

例:rsync.conf
[letsencrypt_archive]
        comment = Web証明書(Let's Encrypt)
        path = /etc/letsencrypt/archive/www.bigbang.mydns.jp/
        hosts allow = ***.***.***.***/**
        read only = no

※:受け入れる送信元のIPアドレス、または、ネットワークアドレス

例:cron.weekly
certbot_ln.sh
# certbot_ln.sh

# Let's EncryptのSSL証明書を別サーバの更新後実施しているため、
# 証明書最新版に正常にリンクが張られないための処置。

# 証明書各ファイルのアーカイブフォルダ、「*」付き
ARCH_DIR=/etc/letsencrypt/archive/www.bigbang.mydns.jp/*
# 各証明書の最新版へのリンク先を示すフォルダ、「*」付き
LIVE_DIR=/etc/letsencrypt/live/www.bigbang.mydns.jp/*
# cronでの起動間隔(日)
DAY=7    # cron.weekly(7日間に1回)で動かして、証明書が更新されていればリンクを張り直す
# 出力ファイル
OUTPUT=/tmp/certbot_ln.txt
# 証明書各ファイルのアーカイブフォルダ
ARCHIVE=/etc/letsencrypt/archive/www.bigbang.mydns.jp/
# 各証明書の最新版へのリンク先を示すフォルダ
LIVE=/etc/letsencrypt/live/www.bigbang.mydns.jp/

# 現在から7日(144時間)前までに更新された証明書があれば、それを抜き出す
find $ARCH_DIR -mtime -$DAY -ls|awk '{print $11}' > $OUTPUT

# 条件分岐
if [ -s $OUTPUT ]; then
    rm -f $OUTPUT
    logger -i -t crond Let's Encryptの証明書は更新されませんでした。
    exit
  else
    rm -f $LIVE_DIR
    while read line
    do
      BASENAME_ARCH=`basename $line`
      BASENAME_LIVE=`basename $line|sed -e "s/[0-9]//g"`
      ln -s $ARCHIVE$BASENAME_ARCH $LIVE$BASENAME_LIVE
      logger -i -t crond "ln -s $ARCHIVE$BASENAME_ARCH $LIVE$BASENAME_LIVE"
    done < $OUTPUT
    rm -f $OUTPUT
    logger -i -t crond Let's Encryptの証明書が更新されたため、リンクを更新しました。
fi

# Webサーバー設定再読込み
lsof -i:443 > /dev/null 2>&1
if [ $? -eq 0 ]; then
    rpm -q systemd > /dev/null 2>&1
  if [ $? -eq 0 ]; then
    systemctl reload httpd
  else
    /etc/rc.d/init.d/httpd reload > /dev/null 2>&1
  fi
fi
以上の設定により、他方のWebサーバでも最新版のSSL証明書を利用してWebサービスを提供できるようになりました。
●Let's Encrypt証明書のunauthorized
下記のようなメールが来ていました。
/etc/cron.monthly/certbot:

Saving debug log to /var/log/letsencrypt/letsencrypt.log
Plugins selected: Authenticator webroot, Installer None
Starting new HTTPS connection (1): acme-v02.api.letsencrypt.org
Renewing an existing certificate for www.bigbang.mydns.jp
Performing the following challenges:
http-01 challenge for www.bigbang.mydns.jp
Using the webroot path /var/www/html for all unmatched domains.
Waiting for verification...
Challenge failed for domain www.bigbang.mydns.jp
http-01 challenge for www.bigbang.mydns.jp
Cleaning up challenges
Some challenges have failed.
IMPORTANT NOTES:
 - The following errors were reported by the server:

   Domain: www.bigbang.mydns.jp
   Type:   unauthorized
   Detail: Invalid response from
   http://www.bigbang.mydns.jp/.well-known/acme-challenge/3aMlO3dIun9S2b-dG1BFBMGRA2bWKEUO0SrLiekBBHQ
   [***.***.***.136]: "<!DOCTYPE HTML PUBLIC \"-//IETF//DTD HTML
   2.0//EN\">\n<html><head>\n<title>404 Not
   Found</title>\n</head><body>\n<h1>Not Found</h1>\n<p"

   To fix these errors, please make sure that your domain name was
   entered correctly and the DNS A/AAAA record(s) for that domain
   contain(s) the right IP address.
調べてみるといろいろ見つかりました。
参考URL:certbot(LetsEncrypt)でエラー/Invalid response from
参考URL:自宅サーバを作ろう
参考URL:Let's Encrypt certbot renewで躓いた話
# /etc/cron.monthly/certbot ← 2回実行
# certbot certonly -w /var/www/html/ -d www.bigbang.mydns.jp 1回実行
# certbot certonly --apache -d www.bigbang.mydns.jp -d www.bigbang.mydns.jp ← 1回実行
# /etc/cron.monthly/certbot ← 1回実行
# certbot certonly --apache -d www.bigbang.mydns.jp -d www.bigbang.mydns.jp ← 1回実行

cronの実行1回を含め、下記の5回目で発行数制限に引っかかってしまったようです。
# /etc/cron.monthly/certbot ← 1回実行
Saving debug log to /var/log/letsencrypt/letsencrypt.log
Plugins selected: Authenticator webroot, Installer None
Starting new HTTPS connection (1): acme-v02.api.letsencrypt.org
Renewing an existing certificate for www.bigbang.mydns.jp
An unexpected error occurred:
There were too many requests of a given type :: Error creating new order \
    :: too many failed authorizations recently: see https://letsencrypt.org/docs/rate-limits/
Please see the logfiles in /var/log/letsencrypt for more details.

# certbot certonly --apache -d www.bigbang.mydns.jp -d www.bigbang.mydns.jp
Saving debug log to /var/log/letsencrypt/letsencrypt.log
Plugins selected: Authenticator apache, Installer apache
Starting new HTTPS connection (1): acme-v02.api.letsencrypt.org
Cert not yet due for renewal

You have an existing certificate that has exactly the same domains or certificate name you requested and isn't close to expiry.
(ref: /etc/letsencrypt/renewal/www.bigbang.mydns.jp.conf)

What would you like to do?
- - - - - - - - - - - - - - - - - - - - - - - - - - - - - - - - - - - - - - - -
1: Keep the existing certificate for now
2: Renew & replace the certificate (may be subject to CA rate limits)
- - - - - - - - - - - - - - - - - - - - - - - - - - - - - - - - - - - - - - - -
Select the appropriate number [1-2] then [enter] (press 'c' to cancel): 2
Renewing an existing certificate for www.bigbang.mydns.jp
An unexpected error occurred:
There were too many requests of a given type :: Error creating new order \
    :: too many failed authorizations recently: see https://letsencrypt.org/docs/rate-limits/
Please see the logfiles in /var/log/letsencrypt for more details.
しばらくして気がついたのですが、インターネット側からのHTTPアクセスが別サーバに到達していることがわかりました。
もしかしたら、この影響のため証明書の更新が出来なかったのかもしれません。
1週間後に再確認したいと思います。
問題が発生した当日の夜にインターネット側からのHTTPアクセスを証明書の更新cronが動作するサーバに変更したところ、正常に更新されました。
●サーバ証明書のインストール方法
上記の「セキュリティの警告」が表示される前に証明書をインストールする方法を紹介します。
まず、証明書をderファイルにしてダウンロードできる場所に保存します。
# cp /etc/pki/tls/certs/server.key /var/www/html/server.der次に、「server.der」をダウンロードするスクリプトを作成します。
# vi /var/www/cgi-bin/certificate.cgi #!/bin/sh echo "Content-type: application/x-x509-ca-cert" echo "Content-Disposition: attachment; filename=server.der" echo cat /var/www/html/server. # chown +x /var/www/cgi-bin/certificate.cgiそうすると、server.der、または、server.crtからダウンロード出きるようになります。
IEの場合、下記のようなウィンドウが表示されるので「保存」をクリックします。
「全般タブ」で「証明書のインストール」をクリックします。
「次へ」をクリックします。
デフォルトで選択されている状態のまま「次へ」をクリックします。
「完了」をクリックします。
「OK」をクリックします。
●サーバ証明書のインストール方法(Windows 7 IE10編)
自己証明書だとセキュリティが向上したIE 10やIE 11等にインストールすることが出来ません。
その対応策が分かりましたので、記載します。
まず、IEを起動します。
[ツール]ー[インターネットオプション]ー[セキュリティ]タブを選択します。
[インターネット]ゾーンを選択し、[保護モードを有効にする]のチェックを外します。
「現在のセキュリティ設定では、コンピュータが危険にさらされます。」というウィンドウが表示されますが、[OK]をクリックします。
[インターネットオプション]の[OK]をクリックします。
IEを再起動します(うまくいかない場合は、OSを再起動)。
IEを起動すると「保護モードはインターネットのゾーンで無効になっています」とウィンドウが表示されますが、「×」を押して消します(放っておいても消えます)。
webdavで接続したい、URL(例:https://www.bigbang.mydns.jp/)を記載して接続します。
「この Web サイトのセキュリティ証明書には問題があります。」と表示されますのが、「このサイトの閲覧を続行する (推奨されません)。 」をクリックします。
すると、下記のように証明書が信頼されていない場合に赤くなる箇所の「×」をクリックします。
「証明書は信頼できません」のウィンドウ下部の「証明書の表示」をクリックします。
すると、証明書の情報を示すウィンドウが表示されます。[証明書]ウィンドウー[全般]タブー[証明書のインストール]をクリックします。
[証明書のインストールウィザード]ウィンドウで[証明書のインストールウィザードの開始]で[次へ]をクリック、[証明書ストア]で[証明書をすべての次のストアへ配置する]を選択し、[信頼されたルート証明書]を選択、[次へ]をクリック、[証明書のインストールウィザードの完了]で[次へ]をクリック、[セキュリティ警告]が表示されますが[はい]をクリックして証明書をインストールします。[正しくインポートされました]と表示されます。[証明書]ウィンドウの[OK]をクリックし、ウィンドウ閉じます。
該当ページを一旦閉じて、再度開いても証明書の問題は発生しなくなります。
Windows 7で[コンピュータ]を開きます。[ネットワークドライブの割り当て]をクリック、ドライブレター(下図では「V:」)を選択、フォルダにwebdavとして接続するフォルダを記載(例:https://www.bigbang.mydns.jp/webdav/)します。[別の資格情報を使用して接続する]にチェックを入れ[完了]をクリックします。
webdavにアクセスするための、ユーザ名とパスワードを聞いていきますので入力します。問題なく接続できれば、ネットワークドライブを割り当てたアイコンが表示されます。
以上で設定は完了です。OS再起動後も問題なく接続できるようになりました。
最後に[保護モードを有効にする]をクリックして、IEの状態を元に戻します。
●webdavの設定
今回はSSL経由でのwebdavを構築します。
また、webdavへのアクセスはBASIC認証を用いることとします。
「https://www.bigbang.mydns.jp/webdav/」というURIでアクセス出来るようにします。この際、LocationディレクティブとDAVディレクティブを使用します。アクセス時には「davaccount」を使用します。
また、webdav用のホームディレクトリ(/home/test)を作成し、さらにwebdavディレクトリを作成します。
# useradd test
# ls -ld /home/test
drwx------ 4 test test 4096  9月 17 13:26 /home/test
# chmod 701 /home/test
# su - test
$ mkdir /home/test/webdav
$ chmod 777 webdav
$ ls -ld webdav
drwxrwxrwx 2 test test 4096  9月 17 15:00 webdav
下記設定ファイル中のOrder部分の記載はバージョン2.2用なので注意が必要です。
バーチャルホストの設定を参照してください。
# vi /etc/httpd/conf.d/ssl.conf
Alias /webdav /home/test/webdav
  <Location "/webdav">
    DAV On ← webdav機能の有効
    SSLRequireSSL
    AuthType Basic ← BASIC認証の有効化
    AuthName WebDAV
    AuthUserFile /var/www/.davpasswd ← BASIC認証用パスワードの保存場所
      <LimitExcept OPTIONS PROPFIND>
      Require user davaccount ← 記載されているユーザのみ接続可
      #Require valid-user
      </LimitExcept>
    Header add MS-Author-Via "DAV"
    Order deny,allow
    Deny from all
    Allow from 192.168.0.0/255.255.255.0 ← 192.168.0.0./24のネットワークからアクセス可
    Allow from 100.145.43 ← 100.145.43.0のネットワークからアクセス可
    Allow from 100.145.49 ← 100.145.49.0のネットワークからアクセス可
  </Location>
LimitExceptディレクティブは下記エラーログ対処のために追加
192.168.0.100 - - [06/Aug/2015:16:36:54 +0900] "OPTIONS /webdav/ HTTP/1.1" 401 401
192.168.0.100 - - [06/Aug/2015:16:40:55 +0900] "PROPFIND /webdav/ HTTP/1.1" 401 401
ただし、LimitExceptディレクティブにPROPFINDを設定すると該当フォルダは読み取り専用となります。
次に、BASIC認証用の設定を行います。BASIC認証に必要なパスワードファイルを作成します。次のようにhtpasswdコマンドへ「-c」オプションを指定して実行すれば良い。ユーザを追加するだけの場合は「-c」オプションはつけないで実行します。作成したパスワードファイルは、apacheユーザのみ参照できるようにファイルのパーミッションを変更します。
# htpasswd -c -m /var/www/.davpasswd davaccount ← 「davaccount」の作成:作成されるファイルのアクセス権及び所有者注意
New password: ← パスワードの入力
Re-type new password: ← パスワードの入力(再確認用)
Adding password for user davaccount
# chmod 600 /var/www/.davpasswd
# chown apache /var/www/.davpasswd

補足:アカウント削除方法
# htpasswd -D /etc/httpd/conf/.davpasswd davaccount
Deleting password for user davaccount
設定が完了したら、httpdを再起動してssl.confを読み込ませます。
# service httpd restartHTTPSでwebdavが動作している事を確認します。cadaverではHTTPSでアクセスしますので、自己認証局による場合はブラウザからの場合と同様セキュリティ証明書に関する警告が表示されるが受け入れて先に進みます。cadaverではftpコマンドのようにputやgetでファイルのアップロード、ダウンロードができます。接続を切るにはexitと入力します。
cadaverは、ここからダウンロード出来ます。
configure: Configured to build cadaver 0.23.3:Fedora 14だと問題なく接続確認できるのだけど、CentOS 6だと「SSL is not enabled」と表示されて接続確認ができない。コンパイル時に何のオプションをつけると解決するのだろうか・・。
Install prefix: /usr/local
Compiler: gcc
Neon library: included libneon (0.29.1)
XML Parser: expat
SSL library: SSL support is not enabled
Internationalization: Built using native support
GNU readline support: enabled
# ./configure --with-ssl=openssl
$ cadaver https://www.bigbang.mydns.jp/webdav/ ← cadaverを使用して確認
WARNING: Untrusted server certificate presented for `www.bigbang.mydns.jp':
Issued to: bigbang, Chiyoda-Ku, Tokyo-To, JP
Issued by: bigbang, Chiyoda-Ku, Tokyo-To, JP
Certificate is valid from Thu, 30 Oct 2008 07:51:29 GMT to Wed, 30 Oct 2013 07:51:29 GMT
Do you wish to accept the certificate? (y/n) ← 「y」を入力
Authentication required for webdav on server `www.bigbang.mydns.jp':
Username: ← パスワードファイルに設定されているユーザを入力
Password: ← 上記ユーザのパスワードを入力
dav:/webdav/> ← 右のように表示されればOK
プロキシサーバが途中にある場合は、下記のようにします。
$ cadaver -p, --proxy=PROXY[:PORT] https://サーバ名/フォルダ
curlコマンドを使用した手動によるwebdav接続の確認方法は下記のとおりです。
参考URL:webdav by hand
こういう方法があるとは知りませんでした。
ファイルのアップロード
$ curl --digest --user 'user:pass' -T SomeFile.html 'http://uwiki.net/uwiki/SomeFile.html'
ディレクトリの作成
$ curl --digest --user 'user:pass' -X MKCOL http://uwiki.net/uwiki/
ファイルの移動及びリネーム
$curl --digest --user 'user:pass' -X MOVE --header 'Destination: http://uwiki.net/uwiki/curl_dav.html' http://quad/svn/SomeFile.html
ディレクトリ内のリスト表示
$ curl -i -X PROPFIND http://uwiki.org/uwiki/ --upload-file - -H "Depth: 1" <<end
<?xml version="1.0"?>
<a:propfind xmlns:a="DAV:">
<a:prop><a:resourcetype/></a:prop>
</a:propfind>
end
ついでにcurlコマンドによhttps接続の確認方法を記載しておきます。
参考URL:curl コマンド
SSL接続
$ curl --tlsv1 https://<URL>/
SSL接続(証明書の検証なし)
$ curl -k --tlsv1 https://<URL>/
または
$ curl --insecure --tlsv1 https://<URL>/
SSLかつBASIC認証限定接続のサイト
$ curl --user user:password --tlsv1 https://<URL>/
SSLかつBASIC認証に限らない(Digest認証、NTLM認証)サイト
$ curl --user user:password --tlsv1 https://<URL>/
リクエストヘッダやレスポンスヘッダを表示する
$ curl -v --tlsv1 https://<URL>/
クライアントからアクセスできるかも動作確認しよう。Windows XPの場合は、[マイネットワーク]−[ネットワークプレースを追加]をクリックし表示される[ネットワークプレースの追加ウィザード]でWebフォルダを作成してアクセスします。サービスプロバイダの指定では[別のネットワークの場所を選択]を選び、インターネットのアドレスとしては「https://www.bigbang.mydns.jp/webdav」を入力します。認証ダイアログが表示されたら、登録したアカウント名とパスワードを指定します。[このネットワークプレースの名前を入力してください]では初期値をそのまま使っても良いし、わかりやすいものに変更しても良いです。
●PROPFIND /webdav/ HTTP/1.1" 405
WebDAVが動作しているサーバからの接続は問題ありません。
イントラにある別端末から接続できない、インターネットから接続できない状態で、接続失敗時には下記のようなログが記録されます。
# tail -f /var/log/httpd/ssl_access_log
192.168.0.1 - - [26/Aug/2016:17:59:24 +0900] "PROPFIND /webdav/ HTTP/1.1" 405 233
原因がやっと判明しました。ssl.confの問題ではありませんでした。
クラスタの設定で仮想IPを割り当てており、そのIPアドレスに対しWebDAVを接続させるように設定していました。
hostsの設定を実IPアドレスに変更したところ問題なく接続できるようになりました。
# vi /etc/hosts
192.168.0.1(仮想IP)      www.bigbang.mydns.jp
 ↓
10.0.0.1(実IP)      www.bigbang.mydns.jp
インターネットからの接続はルータで静的NATにより仮想IPに紐づけていたのを実IPに変更したところ、正常に接続できるようになりました。
まさか、仮想IPが原因だとは全く思いませんでした。
●ApacheとPHPの連携(CentOS Stream 8)
参考URL:CentOS 8のApache環境にPHP 7.2をインストールして使えるようにする手順
概要
CentOS 8ではApache httpdのバージョンがCentOS 7の「2.4.6」から大きく変更されて「http/2」が利用できる「2.4.37」が採用されています。
Apache HTTP Server 2.4.37では、mod_sslに「OpenSSL 1.1.1」および「TLS 1.3」のサポートが追加されました。
「TLS 1.3」は「1.2」と取り扱い方が異なる部分があり、設定やクライアントの変更が必要になる場合があるといわれています。
その他にもHTTP/2関連の機能強化、安定性の向上などが施されています。
また、PHPでもCentOS 7まで利用されていた5.4系ではなく7.2系が採用されています。
インストールに関連する違いとしてはApache httpdがデフォルトで「eventMPM」に対応していることです。
そのため、PHPのインストールと設定手順がCentOS 7とは大きく異なります。
MPM
参考URL:Apache2.4のMPM prefork/worker/eventの違いを理解する
RHEL 8.0(CentOS 8.0)からは、Apache HTTP Server(以下Apache)のデフォルトマルチプロセッシングモジュール(以下、MPM)がpreforkからeventに変更になったようです。
ApacheではMPMを使用することで、同時の複数リクエストに対処するようになりました。
Apache 2.4系で選択できるMPMには以下の通りです。
- prefork
安定した通信が可能ですが、アクセスが多い場合CPUとメモリを多く使用します。 - worker
マルチスレッドとマルチプロセスのハイブリッド型。preforkに比べてメモリとCPU使用量が少ない。 - event
Apache2.4系から導入されたマルチスレッドとマルチプロセスのモジュール。CPUとメモリの使用量が少ない。
CentOS 8ではApache httpdをパッケージでインストールした場合、デフォルトではeventMPMモジュールが読み込まれるように設定されています。
eventMPMでPHPを導入するためにはCGIモードで動作する「php-fpm」のインストールと設定が必要になります。
PHPのインストール
現在、有効になっている PHP のバージョンを確認します。
# dnf module list php
メタデータの期限切れの最終確認: 2:23:26 時間前の 2021年06月07日 13時11分58秒 に実施しました。
CentOS Stream 8 - AppStream
Name                  Stream                   Profiles                                       Summary
php                   7.2 [d]                  common [d], devel, minimal                     PHP scripting language
php                   7.3                      common [d], devel, minimal                     PHP scripting language
php                   7.4 [e]                  common [d] [i], devel, minimal                 PHP scripting language

Remi's Modular repository for Enterprise Linux 8 - x86_64
Name                  Stream                   Profiles                                       Summary
php                   remi-7.2                 common [d], devel, minimal                     PHP scripting language
php                   remi-7.3                 common [d], devel, minimal                     PHP scripting language
php                   remi-7.4                 common [d], devel, minimal                     PHP scripting language
php                   remi-8.0                 common [d], devel, minimal                     PHP scripting language

ヒント: [d]efault, [e]nabled, [x]disabled, [i]nstalled
PHP 7.4をインストールします。
# dnf module -y install php:7.4必要に応じて下記もインストールします。
# dnf -y install php-gd php-intl php-mysqlnd php-opcache php-pdo php-process
php:8.0インストール時の状況は下記のようです。
# dnf module list php
メタデータの期限切れの最終確認: 0:30:03 時間前の 2021年12月19日 12時20分26秒 に実施しました。
CentOS Stream 8 - AppStream
Name                   Stream                    Profiles                                    Summary
php                    7.2 [d]                   common [d], devel, minimal                  PHP scripting language
php                    7.3                       common [d], devel, minimal                  PHP scripting language
php                    7.4                       common [d], devel, minimal                  PHP scripting language

Remi's Modular repository for Enterprise Linux 8 - x86_64
Name                   Stream                    Profiles                                    Summary
php                    remi-7.2                  common [d], devel, minimal                  PHP scripting language
php                    remi-7.3                  common [d], devel, minimal                  PHP scripting language
php                    remi-7.4                  common [d], devel, minimal                  PHP scripting language
php                    remi-8.0                  common [d], devel, minimal                  PHP scripting language
php                    remi-8.1                  common [d], devel, minimal                  PHP scripting language

ヒント: [d]efault, [e]nabled, [x]disabled, [i]nstalled


# dnf module install php:remi-8.0

# dnf module list php
メタデータの期限切れの最終確認: 0:37:06 時間前の 2021年12月19日 12時20分26秒 に実施しました。
CentOS Stream 8 - AppStream
Name                 Stream                      Profiles                                      Summary
php                  7.2 [d]                     common [d], devel, minimal                    PHP scripting language
php                  7.3                         common [d], devel, minimal                    PHP scripting language
php                  7.4                         common [d], devel, minimal                    PHP scripting language

Remi's Modular repository for Enterprise Linux 8 - x86_64
Name                 Stream                      Profiles                                      Summary
php                  remi-7.2                    common [d], devel, minimal                    PHP scripting language
php                  remi-7.3                    common [d], devel, minimal                    PHP scripting language
php                  remi-7.4                    common [d], devel, minimal                    PHP scripting language
php                  remi-8.0 [e]                common [d] [i], devel, minimal                PHP scripting language
php                  remi-8.1                    common [d], devel, minimal                    PHP scripting language

ヒント: [d]efault, [e]nabled, [x]disabled, [i]nstalled

# php -v
PHP 8.0.14 (cli) (built: Dec 16 2021 03:01:07) ( NTS gcc x86_64 )
Copyright (c) The PHP Group
Zend Engine v4.0.14, Copyright (c) Zend Technologies
php74 clientの動作確認
PHPはウェブサーバー以外に「CLI」(Command Line Interface:コマンド入力用インターフェイス)から動作させることも可能です。CLI用に用意された"php"コマンドを使ってPHPのバージョンを確認してみます。"-v"オプションを付けて以下のように実行します。
$ php -v
php-fpmの設定
php-fpm(FastCGI Process Manager)はPHPスクリプトをCGIとして動作させるためのパッケージです。
PHPには「モジュール版」と「CGI版」があり、古いバージョンのApacheで利用されるものはモジュール版になります。「php-fpm」はCGI版で、FastCGIは通常のCGIよりパフォーマンスの向上が見込めるものになります。モジュール版と比較して、高負荷なサイトでのパフォーマンスアップを期待できます・・・、ということです。
php-fpmの設定は/etc/php-fpm.d/以下にある「www.conf」ファイルで行います。www.confの設定変更前に、ファイルをバックアップしておきます。
# cp -p /etc/php-fpm.d/www.conf /etc/php-fpm.d/www.conf.org

# vi /etc/php-fpm.d/www.conf
※変更しそうな箇所を列挙します。
;ユーザ、グループ
user = apache
group = apache
;ソケット接続用
listen.owner = apache
listen.group = apache
listen.mode = 0660
;パフォーマンスに関するパラメータ
;デフォルトでの設定だとメモリを多く使い過ぎてしまうことがありますので、数値を低めにすると防止できます。
pm.max_children = 50
;php-fpmのサービス開始時に起動される子プロセスの数になります。
pm.start_servers = 10
;待ち状態にあるphp-fpm子プロセスの最小の数値になります。
pm.min_spare_servers = 10
;待ち状態にあるphp-fpm子プロセスの最大の数値になります。
pm.max_spare_servers = 35
;子プロセスが再起動するまでに実行するリクエスト数です。
pm.max_requests = 500
php-fpmの自動起動するように設定します。
# systemctl enable --now php-fpmエラーが出力されなければ、自動起動の設定は正常に完了しています。
php.iniの変更
PHPの設定は/etc/以下にあるphp.iniファイルで行います。php.iniの設定変更前に、既存のファイルをバックアップしておきます。
# cp -p /etc/php.ini /etc/php.ini.orgphp.iniの変更を行います。
# vi /etc/php.ini
※変更しそうな箇所を列挙します。
;PHPのバージョンを非表示にします。
expose_php = Off
;アップロードサイズの変更
post_max_size = 400M
;「post_max_size」パラメータの変更だけでは、ファイルのアップロード容量を増やせないため、あわせて「upload_max_filesize」パラメータを変更します。
upload_max_filesize = 512M
;タイムゾーンの設定
date.timezone = "Asia/Tokyo"
;マルチバイト対応(日本語対応)設定
mbstring.language = Japanese
;内部文字エンコーディングのデフォルト値
mbstring.internal_encoding = UTF-8
;HTTP通信の時のインプット文字コードを指定
mbstring.http_input = UTF-8
;HTTP 出力文字コードを指定
mbstring.http_output = pass
;HTTP 入力変換を有効にするmbstring.encoding_translationをOnにします。文字化けが発生した場合はOffにします。
mbstring.encoding_translation = On
;文字コード自動検出の優先順位を定義
mbstring.detect_order = auto
;コードとして変換できない文字がある場合に、代替の文字を出力しないようにします。
mbstring.substitute_character = none
php.ini設定ファイルの反映とhttpdを再起動します。
# systemctl restart php-fpm
# systemctl restart httpd
動作確認
コマンドラインからphpコマンドを利用してPHPの動作を確認します。
# php -r 'phpinfo();'実行結果(PHPの設定情報)が表示されれば、PHPは正常に設定されています。
System => Linux nezumi.bigbang.dyndns.org 4.18.0-305.3.1.el8.x86_64 #1 SMP Tue Jun 1 16:14:33 UTC 2021 x86_64
Build Date => May  4 2021 11:06:37
Server API => Command Line Interface
Virtual Directory Support => disabled
Configuration File (php.ini) Path => /etc
Loaded Configuration File => /etc/php.ini
Scan this dir for additional .ini files => /etc/php.d
Additional .ini files parsed => /etc/php.d/10-opcache.ini,
/etc/php.d/20-bz2.ini,
/etc/php.d/20-calendar.ini,
/etc/php.d/20-ctype.ini,
 :
 :
 :
PHP License
This program is free software; you can redistribute it and/or modify
it under the terms of the PHP License as published by the PHP Group
and included in the distribution in the file:  LICENSE

This program is distributed in the hope that it will be useful,
but WITHOUT ANY WARRANTY; without even the implied warranty of
MERCHANTABILITY or FITNESS FOR A PARTICULAR PURPOSE.

If you did not receive a copy of the PHP license, or have any
questions about PHP licensing, please contact license@php.net.
ブラウザでのPHP動作確認
ブラウザでPHPの動作を確認するために利用するファイルを作成します。
# vi /var/www/html/test.php
<?php
  phpinfo();
?>
ウェブブラウザからテストファイルへアクセスし、表示されることを確認します。
http://www.bigbang.mydns.jp/test.php確認後、削除します。
# rm -f /var/www/html/test.php
●Apacheの動作確認
Webページ表示確認
# vi /var/www/html/index.html ← テストページ作成
<html>
<head>
<meta http-equiv="Content-Type" content="text/html; charset=UTF-8">
 ↑ システムの文字コードがUTF-8の場合
<meta http-equiv="Content-Type" content="text/html; charset=euc-jp">
 ↑ システムの文字コードがEUCの場合
<title>テスト</title>
<body>
テスト
</body>
</html>
確認後、削除します。
# rm -f /var/www/html/index.html
CGI確認
CGIで簡単なテストページを表示してみます。
# vi /var/www/cgi-bin/test.cgi ← テスト用CGI作成
#!/usr/bin/perl
print "Content-type: text/html\n\n";
print "<html>\n";
print "<head>\n";
print "<meta http-equiv=\"Content-Type\" content=\"text/html; charset=UTF-8\">\n";
 ↑ システムの文字コードがUTF-8の場合
print "<meta http-equiv=\"Content-Type\" content=\"text/html; charset=euc-jp\">\n";
 ↑ システムの文字コードがEUCの場合
print "<title>テスト</title>\n";
print "</head>\n";
print "<body>\n";
print "CGIテスト\n";
print "</body>\n";
print "</html>\n";
# chmod 755 /var/www/cgi-bin/test.cgi ← テスト用CGIパーミッション変更
http://localhost/cgi-bin/test.cgiにアクセスして、CGIテストページが表示されればOKです。
もし、内容が表示されてしまう場合は/etc/httpd/conf/httpd.confのAddHandler cgi-script .cgiがコメントアウトされているか確認してください。
確認後、削除します。
# rm -f /var/www/cgi-bin/test.cgi
SSI確認
SSIで現在日時を表示してみる。
# vi /var/www/html/test.shtml ← SSIテスト用ページ作成 <html> <head> <meta http-equiv="Content-Type" content="text/html; charset=UTF-8"> ↑ システムの文字コードがUTF-8の場合 <meta http-equiv="Content-Type" content="text/html; charset=euc-jp"> ↑ システムの文字コードがEUCの場合 <title>テスト</title> <body> SSIテスト <!--#config timefmt="%Y/%m/%d %H:%M:%S" --> <!--#echo var="DATE_LOCAL" --> </body> </html>http://localhost/test.shtmlにアクセスして、現在日時を表示するSSIテストページが表示されればOKです。
SSIテストページが表示されない場合は、●SSIが有効にならないを参照してください。
.htaccess確認
.htaccessでDirectoryIndex(ファイル名を省略した場合に表示されるページ)をindex.htmlからindex.shtmlに変更してみます。
# vi /var/www/html/.htaccess ← .htaccessファイル作成
DirectoryIndex index.shtml
# vi /var/www/html/index.shtml ← .htaccessテスト用ページ作成
<html>
<head>
<meta http-equiv="Content-Type" content="text/html; charset=UTF-8">
 ↑ システムの文字コードがUTF-8の場合
&<meta http-equiv="Content-Type" content="text/html; charset=euc-jp">
 ↑ システムの文字コードがEUCの場合
<title>テスト</title>
<body>
<p>.htaccessによるWebサーバ設定(例としてDirectoryIndex)の変更テスト</p>
このページのファイル名は<!--#echo var="DOCUMENT_NAME" -->
</body>
</html>
確認後、削除します。
# rm -f /var/www/html/.htaccess
# rm -f /var/www/html/index.shtml
PHP確認
PHPで簡単なテストページを表示してみます。
# vi /var/www/html/test.php ← PHPテスト用ページ作成
<?php
  phpinfo();
?>
http://localhost/test.phpにアクセスして、phpinfoページが表示されればOKです。
表示されない場合は、/etc/httpd/conf.d/php.confの下記の行が有効になっているか確認してください。
AddHandler php5-script .php
AddType application/x-httpd-php .php
AddType application/x-httpd-php-source .phps
Webサーバの確認後始末
上記の確認で作成したテスト用ページ等を全て削除します。
# rm -f /var/www/cgi-bin/test.cgi ← 作成したテスト用CGIファイルを削除
# rm -f /var/www/html/index.html ← 作成したテスト用HTMLファイルを削除
# rm -f /var/www/html/test.shtml ← 作成したテスト用SSIファイルを削除
# rm -f /var/www/html/.htaccess ← 作成したテスト用.htaccessファイルを削除
# rm -f /var/www/html/test.php ← 作成したテスト用PHPファイルを削除
●PostgreSQLとの連携確認
PostgreSQLデータベース設定を参照してください。
●MySQLとの連携確認
MySQLデータベース設定を参照してください。
●Webサーバのログファイル
通常は/var/log/httpd/access_logと/var/log/httpd/error_logに出力されます。
SSL経由の場合は、/var/log/httpd/ssl_access_logと/var/log/httpd/ssl_error_logに出力されます。
●ユーザごとのWebディレクトリ公開
参考URL:ユーザ毎のウェブディレクトリ
参考URL:Apache httpd : ユーザのホーム領域を有効にする
ユーザごとのWebの公開
userdir.confを下記のように変更します。
# vi /etc/httpd/conf.d/userdir.conf
<IfModule mod_userdir.c>
    #
    # UserDir is disabled by default since it can confirm the presence
    # of a username on the system (depending on home directory
    # permissions).
    #
    #UserDir disabled ← 「#」を付加

    #
    # To enable requests to /~user/ to serve the user's public_html
    # directory, remove the "UserDir disabled" line above, and uncomment
    # the following line instead:
    #
    UserDir public_html ← 「#」を削除して有効化
    # user1ユーザのみ、http://www.bigbang.mydns.jp/user1/のように~(チルダ)なしでアクセスできるようにする
    AliasMatch ^/user1(.*) /home/user1/public_html/$1
    # 全てのユーザでhttp://www.bigbang.mydns.jp/userdir/ユーザ名/でアクセスできるようにする
    AliasMatch ^/userdir/([^/]+)/(.*) /home/$1/public_html/$2
</IfModule>

<Directory "/home/*/public_html">
    DirectoryIndex index.html ← 正常に表示されない場合、追記
    # .htaccessの許可
    AllowOverride All
    # CGI,SSI(Exec命令以外)の許可
    Options IncludesNoExec ExecCGI FollowSymLinks
    # .cgi及び .plで終わるすべてのファイルに対してCGIプログラムの実行を許可するには下記のようにする
    # AddHandler cgi-script .cgi .pl
    # ユーザディレクトリのpublic_htmlディレクトリのすべてのファイルをCGIプログラムとして指定したい場合には下記のようにする
    SetHandler cgi-script
    Require method GET POST OPTIONS
</Directory>

# systemctl restart httpd
上記の場合、「/home/user1/public_html」が公開ルートディレクトリになります。
apacheでユーザのホームページを公開するには、ユーザのホームディレクトリのアクセス権をあらかじめ下記のように変更しておく必要があります。
$ chmod 711 /home/user1
$ mkdir /home/user1/public_html
$ chmod 755 /home/user1/public_html
$ vi ./public_html/index.html
<html>
<head>
<meta http-equiv="Content-Type" content="text/html; charset=UTF-8">
<title>テスト</title>
<body>
<div style="width: 100%; font-size: 30px; font-weight: bold; text-align: center;">
UserDir Test Page
</div>
</body>
</html>
http://www.bigbang.mydns.jp/~user1/にアクセスし表示されれば作業完了です。
<Directory "/home/*/public_html"> 〜 </Directory> の記載方法を間違えると、ブラウザでindex.htmlを表示させた時に「Internal Server Error」と表示されることがありますので注意が必要です。
ユーザディレクトリ追加
既存ユーザの場合、スクリプトで一括してユーザディレクトリを作成するようにします。
# ユーザディレクトリ一括作成スクリプト作成
# vi userdirmake
#!/bin/bash

for user in `ls /home`
do
    id $user > /dev/null 2>&1
    if [ $? -eq 0 ] && [ ! -d /home/$user/public_html ]; then
        mkdir -p /home/$user/public_html
        chown $user. /home/$user/public_html
        chmod 711 /home/$user
        echo $user
    fi
done

# ユーザディレクトリ一括作成スクリプト実行
# sh userdirmake
user1
・
・
・
usern

# ユーザディレクトリ一括作成スクリプト削除
# rm -f userdirmake
新規ユーザ追加時にユーザディレクトリ(~/public_htmlディレクトリ)を自動で作成されるようにします。
# ユーザ追加時に~/public_htmlディレクトリを自動作成
# mkdir /etc/skel/public_html
Webを公開するユーザの追加。ただし、SSHによるリモート接続はできないようにする場合。
# 一般ユーザ追加
# useradd -s /sbin/nologin user2

# 一般ユーザパスワード設定
# passwd user2
Changing password for user user2.
New password:
Retype new password:
passwd: all authentication tokens updated successfully.

# 一般ユーザのホームディレクトリのパーミッション変更
# chmod 711 /home/user2/

chrootユーザの場合
# 一般ユーザ追加
# chroot-useradd user2 /sbin/nologin
Changing password for user user2.
New UNIX password:
Retype new UNIX password:
passwd: all authentication tokens updated successfully.

# 一般ユーザのホームディレクトリのパーミッション変更
# chmod 711 /home/user2/
Webを公開するユーザの追加。ただし、SSHによるリモート接続をできるようにする場合。
# 一般ユーザ追加
# useradd user3

# 一般ユーザパスワード設定
# passwd user3
Changing password for user user3.
New password:
Retype new password:
passwd: all authentication tokens updated successfully.

# 一般ユーザのホームディレクトリのパーミッション変更
# chmod 711 /home/user3/

chrootユーザの場合
# 一般ユーザ追加
# chroot-useradd user3
Changing password for user user3.
New UNIX password
Retype new UNIX password:
passwd: all authentication tokens updated successfully.

# 一般ユーザのホームディレクトリのパーミッション変更
# chmod 711 /home/user3/
ユーザごとのCGIの確認
Perlの設定
ユーザディレクトリでCGIが動作するか確認します。
# vi test.cgi
#!/usr/bin/perl
print "Content-type: text/html\n\n";
print "<html>\n";
print "<head>\n";
print "<meta http-equiv=\"Content-Type\" content=\"text/html; charset=UTF-8\">\n";
print "<title>テスト</title>\n";
print "</head>\n";
print "<body>\n";
print "<div style=\"width: 100%; font-size: 30px; font-weight: bold; text-align: center;\">\n";
print "UserDir Test Page\n";
print "</div>\n";
print "</body>\n";
print "</html>\n";

# chown user1. test.cgi
# chmod 755 test.cgi
# mv test.cgi /home/user1/public_html/
作成したCGIプログラムを確認します。
http://www.bigbang.mydns.jp/~user1/cgi-bin/test.cgi表示できれば完了です。
もし、内容が表示されてしまう場合は/etc/httpd/conf/httpd.confのAddHandler cgi-script .cgiがコメントアウトされているか確認してください。
SSIの確認
現在時刻を表示させます。
# vi test.shtml
<html>
<head>
<meta http-equiv="Content-Type" content="text/html; charset=UTF-8">
<title>テスト</title>
<body>
SSIテスト
<!--#config timefmt="%Y/%m/%d %H:%M:%S" -->
<!--#echo var="DATE_LOCAL" -->
</body>
</html>

# mv test.shtml /home/user1/public_html/
作成したshtmlを確認します。
http://www.bigbang.mydns.jp/~user1/test.shtml現在時刻が表示されれば完了です。
.htaccessの確認
.htaccessでDirectoryIndex(ファイル名を省略した場合に表示されるページ)をindex.htmlからindex.shtmlに変更してみます。
# vi .htaccess
DirectoryIndex index.shtml

# mv .htaccess /home/user1/public_html/
# vi index.shtml
<html>
<head>
<meta http-equiv="Content-Type" content="text/html; charset=UTF-8">
<title>テスト</title>
<body>
<p>.htaccessによるWebサーバー設定(例としてDirectoryIndex)の変更テスト</p>
このページのファイル名は<!--#echo var="DOCUMENT_NAME" -->
</body>
</html>
# mv index.shtml /home/user1/public_html/
作成したshtmlを確認します。
http://www.bigbang.mydns.jp/~user1/にアクセスしてindex.shtmlが表示されれば完了です。
PHPの確認
PHPで簡単なテストページを作成して表示してみます。
# vi test.php
<?php
  phpinfo();
?>

# mv test.php /home/user1/public_html/
http://www.bigbang.mydns.jp/~user1/test.phpにアクセスしてPHPINFOが表示されれば完了です。
最後に上記で作成したファイルを削除します。
●特定ディレクトリにアクセス時のみhttpsにリダイレクトする設定
参考URL:特定ディレクトリのみ共有SSL化する.htaccess設定
http://www.bigbang.mydns.jp/redmine/とアクセスすると、https://www.bigbang.mydns.jp/redmine/にリダイレクトさせるための設定方法です。
# vi /etc/httpd/conf.d/redmine.conf
※追記した箇所のみ記載
<IfModule mod_rewrite.c>
  RewriteEngine on
  RewriteCond %{HTTPS} off
  RewriteCond %{REQUEST_URI} ^/redmine/
  RewriteRule ^(.*)$ https://www.bigbang.mydns.jp%{REQUEST_URI} [R,L]
</IfModule>

# systemctl restart httpd
以上で設定完了です。
●常時SSL化の設定準備
参考URL:How to enable mod_rewrite on Apache on CentOS
モジュールが存在しているかどうか確認します。
# httpd -V
Server version: Apache/2.4.37 (centos)
Server built:   May 20 2021 04:33:06
Server's Module Magic Number: 20120211:83
Server loaded:  APR 1.6.3, APR-UTIL 1.6.1
Compiled using: APR 1.6.3, APR-UTIL 1.6.1
Architecture:   64-bit
Server MPM:     event
  threaded:     yes (fixed thread count)
    forked:     yes (variable process count)
Server compiled with....
 -D APR_HAS_SENDFILE
 -D APR_HAS_MMAP
 -D APR_HAVE_IPV6 (IPv4-mapped addresses enabled)
 -D APR_USE_SYSVSEM_SERIALIZE
 -D APR_USE_PTHREAD_SERIALIZE
 -D SINGLE_LISTEN_UNSERIALIZED_ACCEPT
 -D APR_HAS_OTHER_CHILD
 -D AP_HAVE_RELIABLE_PIPED_LOGS
 -D DYNAMIC_MODULE_LIMIT=256
 -D HTTPD_ROOT="/etc/httpd"
 -D SUEXEC_BIN="/usr/sbin/suexec"
 -D DEFAULT_PIDLOG="run/httpd.pid"
 -D DEFAULT_SCOREBOARD="logs/apache_runtime_status"
 -D DEFAULT_ERRORLOG="logs/error_log"
 -D AP_TYPES_CONFIG_FILE="conf/mime.types"
 -D SERVER_CONFIG_FILE="conf/httpd.conf"
rewriteモジュールが存在しているか確認します。
# ls /etc/httpd/modules | grep mod_rewrite
mod_rewrite.so
モジュールがロードされているかどうか確認します。
# httpd -M|grep rewrite

or

# grep -i LoadModule /etc/httpd/conf/httpd.conf | grep rewrite

or

# grep -i LoadModule /etc/httpd/conf.modules.d/00-base.conf | grep rewrite
何も表示されませんのでロードされていないようです。
モジュールの設定場所を確認します。
# vi /etc/httpd/conf/httpd.conf
 :
(省略)
 :
#
Include conf.modules.d/*.conf
 :
(省略)
 :
再確認します。
# grep rewrite_module /etc/httpd/conf.modules.d/00-base.conf
LoadModule rewrite_module modules/mod_rewrite.so
rewriteモジュールを読み込むように設定されています。
●常時SSL化の設定
参考URL:よく使うhtaccess
Googleカスタム検索での設定がよくわからないためhttp://www.bigbang.mydns.jp/、http(s)://bigbang.mydns.jp/となってしまう対策としてリダイレクト機能を使用することにしました。
インターネット上では.htaccessの設定でhttpsへのリダイレクトができるらしいとの記載がありましたので早速試してみました。
<IfModule mod_rewrite.c>
    #Options +FollowSymLinks
    # httpアクセスをhttpsアクセスにリダイレクト
    RewriteEngine on
    RewriteCond %{HTTPS} off
    #RewriteRule ^(.*)$ https://bigbang.mydns.jp/$1 [R=301]
    RewriteRule ^(.*)$ https://www.bigbang.mydns.jp/$1 [R=301,L]
    #RewriteRule ^(.*)$ https://%{HTTP_HOST}%{REQUEST_URI} [R,L]
</IfModule>
しかし、いろいろ試してみましたがhttpsにはリダイレクトされませんでした。
.htaccessが利用不可なのかと思い、.htaccess確認を実施したところ設定したindex.htmlにリダイレクトしました。
いろいろ調べてみるとrewrite.confを設定することによりリダイレクトできる記事を見つけました。
参考URL:apacheでhttpへのアクセスをhttpsへ自動リダイレクトする
参考URL:Apacheのmod_rewriteモジュールの使い方を徹底的に解説
下記のように設定したところ、リダイレクトされるようになりました。
# vi /etc/httpd/conf.d/rewrite.conf
<IfModule mod_rewrite.c>
    RewriteEngine on
    RewriteCond %{HTTPS} off
    RewriteRule ^(.*)$ https://www.bigbang.mydns.jp%{REQUEST_URI} [R=301,L]
</IfModule>
# systemctl reload httpd
リダイレクトの確認はリダイレクトチェックで可能です。
正常にリダイレクトされていれば下記のような結果になります。
インターネットからの接続時のURLとイントラネットからの接続時のURLが異なるため、上記の設定だけでは切り分けができず全て上記で設定したURLでの接続となってしまいました。
これでは内部での監視状態で異常となってしまう(Xymonでhttpへのアクセスが「http://serverA.bigbang.dyndns.org/ - Moved Permanently」の警告表示)ため実施し、下記のような設定に変更しました。
<IfModule mod_rewrite.c>
    # Rewriteエンジン有効化
    RewriteEngine on
    # HTTPでアクセスされた場合
    RewriteCond %{HTTPS} off
    # 下記URLでの接続の場合(インターネットからの接続を想定)
    RewriteCond %{HTTP_HOST} ^www.bigbang.mydns.jp [OR]
    RewriteCond %{HTTP_HOST} ^bigbang.mydns.jp
    # 下記URLでの接続ではない場合(イントラネットからの接続を想定)
    RewriteCond %{HTTP_HOST} !^serverA.bigbang.dyndns.org
    # 下記URLはhttpsにリダイレクトする
    RewriteRule ^(.*)$ https://www.bigbang.mydns.jp%{REQUEST_URI} [R=301,L]
</IfModule>
インターネット側からのアクセスでhttps://www.bigbang.mydns.jp/とhttps://bigbang.mydns.jp/の接続があるようで、www有りでの接続となるように変更しました。
    # HTTPSでアクセスされた場合
    RewriteCond %{HTTPS} on
    # www無しをwww有りにリダイレクト
    RewriteCond %{HTTP_HOST} ^bigbang.mydns.jp
    RewriteRule ^(.*)$ https://www.bigbang.mydns.jp%{REQUEST_URI} [R=301,L]
インターネット側からのアクセスでhttps://www.bigbang.mydns.jp/とhttps://bigbang.mydns.jp/の接続があるようで、後者の対策をしようと下記のように設定しましたがうまく動作しませんでした。この原因は、どちらのアクセスであろうとルータでポート転送しているためとも思われます。アクセスログを見ても、どちらも「/」となっており区別が出来ないようでした。
    # HTTPSでアクセスされた場合
    #RewriteCond %{HTTPS} on
    # 下記URLでの接続以外の場合
    #RewriteCond %{HTTP_HOST} !^serverA.bigbang.dyndns.org
    # 下記URLで接続の場合
    #RewriteCond %{HTTP_HOST} ^(.*)$bigbang.mydns.jp
    # リダイレクトする
    #RewriteRule ^(.*)$ https://www.bigbang.mydns.jp%{REQUEST_URI} [R=301,L]
●HSTSの設定
参考URL:HSTS (HTTP Strict Transport Security) の導入
参考URL:HSTSとは?推奨される理由とプリロードリスト登録方法
TLS暗号設定ガイドラインを参照して、HTTP Strict Transport Security(HSTS)を設定します。
現在のWebサーバの設定では、HSTSの設定が可能である場合、有効にすることを推奨しています。
HSTSの詳細は、TLS暗号設定ガイドラインの「7.4.1 HTTP Strict Transport Security(HSTS)の設定有効化」を参照してください。
Webサーバを常時SSL化しても、常時SSL化未対応だった頃のリンクからの接続は、そのURLへのアクセスをhttpからhttpsに変更してもらわない限りhttpでの接続となります。
また、URL直打ちでもhttp接続の可能性があります。したがって、常時SSL化設定をすることによりhttp接続を全てhttpsへリダイレクトすることができます。
しかし、常時SSL化の設定でも最初に一度はhttp接続してしまいます。
一方、HSTSは一度サイトを閲覧すれば、2回目以降はhttpsに直接接続するようになりセキュリティが高まります。
それでもなお、1回目の接続は残念ながら一旦http接続されてしまいます。
そこで、初回訪問時からhttpsに直接アクセスさせるための機能が、HSTS preload(HSTSプリロード)です。
それでは、まず、ApacheでHSTSを設定します。
各サーバの設定方法は、TLS暗号設定 サーバ設定編に記載されています。Apacheの場合、「5. HTTP Strict Transport Security 5.1. Apacheの場合 (HSTS)の設定方法例」に記載されています。
# vi /etc/httpd/conf.d/ssl.conf
SSLEngine on
Header always set Strict-Transport-Security "max-age=31536000; includeSubDomains"
※max-age:有効期間秒数、includeSubDomains:サブドメインにもHSTSを有効化

# systemctl restart httpd
以上で、作業完了です。
HSTS preloadの対応方法
参考URL:3分で出来るHSTSプリロードの設定方法 – 常時SSL化後に必ず行うべき設定
HSTSプリロード設定は、対象のサイトが既に常時SSL化されていることが前提となります。
# vi .htaccess ※下記行を追記 Header set Strict-Transport-Security "max-age=31536000; includeSubDomains; preload"hstspreload.orgに登録します。
登録条件を記載しておきます。
- Serve a valid certificate.
- Redirect from HTTP to HTTPS on the same host, if you are listening on port 80.
- Serve all subdomains over HTTPS.
- In particular, you must support HTTPS for the
wwwsubdomain if a DNS record for that subdomain exists.
- In particular, you must support HTTPS for the
- Serve an HSTS header on the base domain for HTTPS requests:
- The
max-agemust be at least31536000seconds (1 year). - The
includeSubDomainsdirective must be specified. - The
preloaddirective must be specified. - If you are serving an additional redirect from your HTTPS site, that redirect must still have the HSTS header (rather than the page it redirects to).
- The
HSTSが設定されたサイトの不具合でhttps接続できない場合の対応方法
参考URL:HSTS が原因で、ウェブサイトが勝手にhttps接続しないようにする
上記のサイトを見て、ナルホドなって思いましたのでメモしておきます。
- インターネット上のブラウザでhttps://www.bigbang.mydns.jp/にアクセスする。
- ブラウザは、WebサーバからのレスポンスヘッダStrict-Transport-Securityを受け取る。
- 同じドメインにhttpでアクセスした場合、Webサーバは「強制的にhttpsで接続し直しなさい」とブラウザに返答する。
- ブラウザはHSTS適用ドメインにwww.bigbang.mydns.jpを追加する。
- ブラウザはmax-ageで設定された有効期限が切れるまで、http://www.bigbang.mydns.jp/にアクセスしてもブラウザ側でhttps://www.bigbang.mydns.jp/にアクセスし直すようになる。
- ある期間、bigbang.mydns.jpというドメインを運営しているWebサーバでStrict-Transport-Securityレスポンスヘッダを返すよう設定されていたとする。
- その期間中、上記ドメインににアクセスしたブラウザは、ブラウザ内のHSTS適用ドメインにbigbang.mydns.jpを追加する。
- しばらくして、このウェブサイトにおいて「httpsアクセスで何らかの問題が発生する」ことがわかったとします。
- サイト運営者はhttpでもアクセスできるように、bigbang.mydns.jpのWebサーバの設定を変更し、Strict-Transport-Securityレスポンスヘッダの応答を停止します(これが間違った対応です)。
- しかし、ブラウザの「HSTS適用ドメイン」にはbigbang.mydns.jpが登録されたままであるため、相変わらずhttpsでしかアクセスできない。
これを解消するためにHSTSを停止させるためには、WebサーバでStrict-Transport-Securityヘッダのmax-age=0を指定します。上記のように Strict-Transport-Securityヘッダそのものを削除すると、ユーザがブラウザでbigbang.mydns.jpドメインへのアクセスをHSTSを使わないように設定変更する以外は方法がありません。
chromeで特定のドメインのHSTS設定を削除する方法
アドレスバーに「chrome://net-internals/#hsts」と入力します。
まず「Query HSTS/PKP domain」で、目的のドメインがHSTSを使うドメインとして登録されているか確認します。
www.cpan.orgを例に示します。
Domain:の箇所に「www.cpan.org」を入力し、Queryをクリックします。
登録されている場合、下記のように表示されます。
登録されていない場合、Not foundと表示されます。
登録されているドメインを削除します。「Delete domain security policies」で、目的のドメインを入力し削除します。
再度、確認し削除されていることを確認します。
Webサーバで常時SSL化の設定がされていなければHTTPでアクセスできるはずです。
Firefoxで特定のドメインのHSTS設定を削除する方法
Ctrl + Shift + Hを押下します。
ブラウジングライブラリーで該当ドメインを削除します。
Webサーバで常時SSL化の設定がされていなければHTTPでアクセスできるはずです。
●mod_securityの有効化
こちらを参照してください。
●ApacheをTLS1.2、TLS1.3に対応させる方法(CentOS 8標準Apacheを使用)
参考URL:ApacheのSSLCipherSuiteで!RC4が効かない(解決済み)
CentOS 8標準のApache(2.4.37)でTLS1.2、TLS1.3に対応させるには下記のように設定します。
# vi /etc/httpd/conf.d/ssl.conf
(途中、省略)
SSLProtocol all -SSLv2 -SSLv3 -TLSv1
SSLCipherSuite TLSv1.3 TLS_AES_128_GCM_SHA256:TLS_AES_256_GCM_SHA384:TLS_CHACHA20_POLY1305_SHA256
SSLCipherSuite ECDHE-ECDSA-AES128-GCM-SHA256:ECDHE-ECDSA-CHACHA20-POLY1305:ECDHE-RSA-AES128-GCM-SHA256:ECDHE-RSA-CHACHA20-POLY1305
SSLHonorCipherOrder
<VirtualHost _default_:443>
(途中、省略)

# systemctl restart httpd
VirtualHostディレクティブの外側に、SSLProtocol、SSLCipherSuiteを記載することにより、期待通り動作するようになりました。
Qualys SSL Labs SSL Server TestでスキャンするとA評価に変わりました。
サポートしているTLSのバージョンの確認方法
参考URL:SSL/TLSの暗号化通信をTLS1.2 のみに制限する
opensslコマンドでサポートしているTLSを確認することができます。
サポートしていないTLS1.1を確認してみます。
# openssl s_client -connect www.bigbang.mydns.jp:443 -tls1_1
(途中、省略)
no peer certificate available
---
No client certificate CA names sent
---
SSL handshake has read 7 bytes and written 133 bytes
Verification: OK
---
New, (NONE), Cipher is (NONE)
Secure Renegotiation IS NOT supported
Compression: NONE
Expansion: NONE
No ALPN negotiated
SSL-Session:
    Protocol  : TLSv1.1
(途中、省略)
---
サポートしているTLS1.2及び1.3を確認してみます。
# openssl s_client -connect www.bigbang.mydns.jp:443 -tls1_2
(途中、省略)
No client certificate CA names sent
Peer signing digest: SHA256
Peer signature type: RSA-PSS
Server Temp Key: X25519, 253 bits
---
SSL handshake has read 4716 bytes and written 314 bytes
Verification: OK
---
New, TLSv1.2, Cipher is ECDHE-RSA-AES128-GCM-SHA256
Server public key is 2048 bit
Secure Renegotiation IS supported
Compression: NONE
Expansion: NONE
No ALPN negotiated
SSL-Session:
    Protocol  : TLSv1.2
(途中、省略)
---
closed


# openssl s_client -connect www.bigbang.mydns.jp:443 -tls1_3
(途中、省略)
No client certificate CA names sent
Peer signing digest: SHA256
Peer signature type: RSA-PSS
Server Temp Key: X25519, 253 bits
---
SSL handshake has read 4571 bytes and written 310 bytes
Verification: OK
---
New, TLSv1.3, Cipher is TLS_AES_128_GCM_SHA256
Server public key is 2048 bit
Secure Renegotiation IS NOT supported
Compression: NONE
Expansion: NONE
No ALPN negotiated
Early data was not sent
Verify return code: 0 (ok)
---
---
Post-Handshake New Session Ticket arrived:
SSL-Session:
    Protocol  : TLSv1.3
(途中、省略)
---
read R BLOCK


closed
●ApacheをOpenSSL 3.0に対応させる方法(Apache等ソースからインストール)
参考URL:Apache httpd 2.4.52(TLS1.3対応)+ HTTP/2 + Brotli インストールメモ
4回目のトライでようやくバージョン2.4.52でHTTP(80)、HTTPS(443)が動作するようになりました。
ことの顛末
動作確認のため(Apacheが起動しない)OpenSSL 1.1.1l、OpenSSL 3.0.2及httpd 2.4.50、httpd 2.4.52を別フォルダにインストールすることにしました。
2.4.52をmakeすると2.4.50(のフォルダが残っている場合)にMAKEFILEが作成されたため、2.4.50フォルダを一時的に別フォルダ名に変更しました。
その後、httpd 2.4.52をmake、make installしたところ、(デフォルトの設定ファイルの状態で)正常に起動するようになりました。
ただし、起動するのはHTTP(80)だけで、HTTPS(443)を有効にしようとるすと(古いバージョンのOpenSSLを読み込もうとして)エラーとなり起動しませんでした。
# systemctl start httpd2452
Job for httpd2452.service failed because the control process exited with error code. See "systemctl status httpd2452.service" and "journalctl -xe" for details.
# systemctl status -l httpd2452
httpd: Syntax error on line 146 of /opt/httpd/conf/httpd.conf: Cannot load modules/mod_ssl.so into server: libssl.so.1.1: cannot open shared object file: No such file or directory
# /opt/httpd2452/bin/httpd -M|grep ssl
httpd: Syntax error on line 115 of /opt/httpd2452/conf/httpd.conf: Cannot load modules/mod_ssl.so into server: libssl.so.1.1: cannot open shared object file: No such file or directory
そこで、展開後のソースファイル(Apache 2.4.50、Apache 2.4.51、Apache 2.4.52、OpenSSL 1.1.1l、OpenSSL 3.0.2)及びインストール済みのディレクトリ(Apache 2.4.50、Apache 2.4.51、Apache 2.4.52、OpenSSL 1.1.1l、OpenSSL 3.0.2)を一度全て削除しました。
削除したインストール済みディレクトリ:/opt/openssl、/opt/openssl3、/opt/httpd、/opt/httpd2450、/opt/httpd2451、/opt/httpd2452
その後、OpenSSL 3.0.2、Apache 2.4.52を再インストールし、Apacheを起動したところ、正常に起動しました(HTTP(80)、HTTPS(443)も正常)。
インストール先
OpenSSL 3.0.2のインストール先:/opt/openssl3
Nghttp2 のインストール先:/opt/nghttp2
httpd 2.4.52のインストール先:/opt/httpd2452
OpenSSL 3.0.2のインストール
OpenSSL 3.0.2をインストールします。
# wget https://www.openssl.org/source/openssl-3.0.2.tar.gz
# wget https://www.openssl.org/source/openssl-3.0.2.tar.gz.sha256
# sha256sum openssl-3.0.2.tar.gz

# tar fxz openssl-3.0.2.tar.gz
# rm -f openssl-3.0.2.tar.gz
# cd openssl-3.0.2
# ./config --prefix=/opt/openssl3 shared zlib
Configuring OpenSSL version 3.0.2 for target linux-x86_64
Using os-specific seed configuration
Creating configdata.pm
Running configdata.pm
Creating Makefile.in
Creating Makefile

**********************************************************************
***                                                                ***
***   OpenSSL has been successfully configured                     ***
***                                                                ***
***   If you encounter a problem while building, please open an    ***
***   issue on GitHub <https://github.com/openssl/openssl/issues>  ***
***   and include the output from the following command:           ***
***                                                                ***
***       perl configdata.pm --dump                                ***
***                                                                ***
***   (If you are new to OpenSSL, you might want to consult the    ***
***   'Troubleshooting' section in the INSTALL.md file first)      ***
***                                                                ***
**********************************************************************
OpenSSL 3のライブラリにパスを通します。
# vi /etc/ld.so.conf.d/openssl.conf
以下の内容を保存する
/opt/openssl3/lib64

# /opt/openssl3/bin/openssl version
OpenSSL 3.0.2 15 Mar 2022 (Library: OpenSSL 3.0.2 15 Mar 2022)
このように表示されれば、OpenSSL 3.0.2のインストールは正常です。
Nghttp2のインストール
Nghttp2 1.47.0をインストールします。
# cd /usr/local/src
# wget https://github.com/nghttp2/nghttp2/releases/download/v1.47.0/nghttp2-1.47.0.tar.gz
# tar xvzf nghttp2-1.47.0.tar.gz
# cd nghttp2-1.47.0
# ./configure --prefix=/opt/nghttp2
# make
# make install
HTTP/2のライブラリ「libnghttp2」が /opt/nghttp2/lib/ 以下にインストールされます。
HTTP/2のライブラリにパスを通します。
# vi /etc/ld.so.conf.d/nghttp2.conf
以下の内容を保存する
/opt/nghttp2/lib

設定を反映
# ldconfig
Apache 2.4.52のインストール
あらかじめ、APR及びAPR-utilをインストールしておきます。
Apache 2.4.52をインストールします。
# cd /usr/local/src
# wget https://ftp.kddilabs.jp/infosystems/apache/httpd/httpd-2.4.52.tar.gz
# tar fxz httpd-2.4.52.tar.gz
# rm -f fxz httpd-2.4.52.tar.gz
# cd httpd-2.4.52
# ./configure --prefix=/opt/httpd2452 --enable-http2 --enable-ssl --with-ssl=/opt/openssl3 --with-nghttp2=/opt/nghttp2 \
 --enable-so --enable-mpms-shared=all --enable-mods-shared=all --with-apr=/opt/apr --with-apr-util=/opt/apr-util
# make
# make install
systemdサービスファイルを作成します。
# vi /etc/systemd/system/httpd2452.service
[Unit]
Description=The Apache HTTP Server
After=network.target remote-fs.target nss-lookup.target

[Service]
Type=forking
ExecStart=/opt/httpd2452/bin/apachectl -k start
ExecReload=/opt/httpd2452/bin/apachectl -k graceful
ExecStop=/opt/httpd2452/bin/apachectl -k stop
PrivateTmp=true

[Install]
WantedBy=multi-user.target
作成したサービスファイルをsystemdに反映させます。
# systemctl daemon-reload

# systemctl list-unit-files | grep httpd
httpd2452.service                             disabled
上記のように表示されればOKです。
旧バージョンのApacheが起動していなことを確認してから、Apache 2.4.52を起動します。
# systemctl start httpd2452
# systemctl enable httpd2452
エラーが表示されなければ、作業完了です。
●ApacheをTLS1.2、TLS1.3に対応させる方法(Apache等ソースからインストール)
参考URL:TLS1.3に対応したApache(httpd)のインストール・設定方法
参考URL:ApacheのTLS設定を2020年向けに更新する
参考URL:Apache httpd 2.4.49(TLS1.3対応)+ HTTP/2 + Brotli インストールメモ
CentOS 7上のApache及びOpenSSLのバージョンは
# openssl version
OpenSSL 1.0.2k-fips  26 Jan 2017

# httpd -V
AH00548: NameVirtualHost has no effect and will be removed in the next release /etc/httpd/conf/httpd.conf:97
Server version: Apache/2.4.6 (CentOS)
Server built:   Nov 16 2020 16:18:20
Server's Module Magic Number: 20120211:24
Server loaded:  APR 1.4.8, APR-UTIL 1.5.2
Compiled using: APR 1.4.8, APR-UTIL 1.5.2
Architecture:   64-bit
Server MPM:     prefork
  threaded:     no
    forked:     yes (variable process count)
Server compiled with....
(以下、省略)
Qualys SSL Labs SSL Server Testでスキャンしたところ、脆弱性だらけでした。
結果は下記のとおりでした。
そこで、Apache及びOpenSSLをyumからではなく、ソースから最新版をインストールします(これまで使用してきたApacheは、自動起動無効及びサービス停止とし、インストールしたままとします)。
最新のApacheをインストールするには、下記ライブラリが必要になります。
- OpenSSL 1.1.1 以降
- APR
- APR-util
- ビルドに必要なライブラリ・ツール類(perl、gcc、zlib-devel、expat-devel、pcre-devel)
OpenSSLのインストール
OpenSSLの最新版をダウンロードし、インストールします。
# curl -O https://www.openssl.org/source/openssl-1.1.1l.tar.gz
# tar fxz openssl-1.1.1l.tar.gz
# rm -f openssl-1.1.1l.tar.gz
# yum install perl gcc zlib-devel
# cd openssl-1.1.1l
# ./config --prefix=/opt/openssl shared zlib
# make
# make install

# vi /etc/ld.so.conf.d/openssl.conf
以下の内容を保存する
/opt/openssl/lib

設定を反映
# ldconfig

動作の確認
# /opt/openssl/bin/openssl version
OpenSSL 1.1.1l  24 Aug 2021

モジュールの確認
# /opt/httpd/bin/httpd -M|grep ssl
 ssl_module (shared)
APRのインストール
APRの最新版をダウンロードし、インストールします。
APR(Apache Portable Runtime)は、Apacheを様々なプラットフォームで動作させるためのライブラリです。
# cd /usr/local/src
# curl -O http://ftp.kddilabs.jp/infosystems/apache/apr/apr-1.7.0.tar.gz
# tar fxz apr-1.7.0.tar.gz
# rm -f apr-1.7.0.tar.gz
# cd apr-1.7.0
# ./configure --prefix=/opt/apr
# make
# make install
APR-utilのインストール
expat-develはビルドに必要ですので、インストールしていない場合インストールします。
# yum install expat-devel

# cd /usr/local/src
# curl -O http://ftp.kddilabs.jp/infosystems/apache/apr/apr-util-1.6.1.tar.gz
# tar fxz apr-util-1.6.1.tar.gz
# cd apr-util-1.6.1
# ./configure --prefix=/opt/apr-util --with-apr=/opt/apr
# make
# make install
Apacheのインストール
Apacheの最新版をダウンロードし、インストールします。
# cd /usr/local/src
# curl -O http://ftp.kddilabs.jp/infosystems/apache/httpd/httpd-2.4.50.tar.gz
# tar fxz httpd-2.4.50.tar.gz
# rm -f httpd-2.4.50.tar.gz

ビルドに必要です。インストールされていない場合インストールします。
# yum install pcre-deve

# cd httpd-2.4.50
# ./configure --prefix=/opt/httpd --enable-ssl --with-ssl=/opt/openssl \
              --enable-mpms-shared=all --enable-mods-shared=all --with-apr=/opt/apr --with-apr-util=/opt/apr-util
# make
# make install
configureで指定するビルドオプションは、環境に合わせて変更してください。
| オプション | 説明 |
|---|---|
| –prefix | Apacheのインストール先 |
| –enable-ssl | mod_sslをインストールする |
| –with-ssl | SSL/TLS の処理(mod_ssl)に使うライブラリを指定する |
| –enable-mpms-shared | マルチプロセッシングモジュールを動的モジュールとしてインストールする(allを指定することで、prefork、worker、eventのすべてをインストールする) |
| –enable-mods-shared | モジュールを動的モジュールとしてインストールする(allを指定することで、ほとんどのモジュールがインストールされる) |
| –with-apr | APRのディレクトリを指定する |
| –with-apr-util | APR-utilのディレクトリを指定する |
動作確認
# /opt/httpd/bin/httpd -V
Server version: Apache/2.4.50 (Unix)
Server built:   Oct  6 2021 08:31:38
Server's Module Magic Number: 20120211:117
Server loaded:  APR 1.7.0, APR-UTIL 1.6.1
Compiled using: APR 1.7.0, APR-UTIL 1.6.1
Architecture:   64-bit
Server MPM:     event
  threaded:     yes (fixed thread count)
    forked:     yes (variable process count)
Server compiled with....
(以下、省略)
Apacheの設定
SSL及びTLS関連の設定に限って説明します。
httpd.configの設定
httpd.confを編集します。
# vi /opt/httpd/conf/httpd.conf

#それぞれアンコメントして有効化
LoadModule socache_shmcb_module modules/mod_socache_shmcb.so
LoadModule ssl_module modules/mod_ssl.so
Include conf/extra/httpd-ssl.conf
httpd-ssl.confの設定
必要最低限の設定です。
httpd-ssl.confファイル後半の、VirtualHost コンテキスト内を少し修正します。
# vi /opt/httpd/conf/extra/httpd-ssl.conf

#変更が必要な項目のみ抜粋
<VirtualHost _default_:443>
ServerName [サーバのURL]:443
SSLCertificateFile "[サーバ証明書のファイルパス]"
SSLCertificateKeyFile "[サーバ秘密鍵のファイルパス]"
</VirtualHost>
TLS1.2及びTLS1.3に対応させる
下記を有効化すると、これまで接続できていたクライアントから接続できなくなることがあるため注意してください。
# vi /opt/httpd/conf/extra/httpd-ssl.conf

#TLS1.3の暗号スイートの設定
SSLCipherSuite TLSv1.3 TLS_AES_128_GCM_SHA256:TLS_AES_256_GCM_SHA384:TLS_CHACHA20_POLY1305_SHA256

#TLS1.2以下の暗号スイートの設定(コピペ注意)
SSLCipherSuite ECDHE-ECDSA-AES128-GCM-SHA256:ECDHE-ECDSA-CHACHA20-POLY1305:ECDHE-RSA-AES128-GCM-SHA256:ECDHE-RSA-CHACHA20-POLY1305

#利用可能なプロトコルの設定(コピペ注意)
SSLProtocol +TLSv1.3 +TLSv1.2

#サーバ側の暗号スイート優先順位を使用
SSLHonorCipherOrder

#PFSを重視するならTLSセッションチケットはオフに
SSLSessionTickets off
SSLCipherSuite ディレクティブで暗号スイートを設定できます。
TLS1.3では、暗号スイートの種類と表記が変更になりました(公開鍵アルゴリズムは、サーバ証明書から自動的に判定してくれるようになったので表記しません)。
TLS1.2以下の暗号スイートとは別に設定します。
第一パラメータにTLSv1.3を指定することで、TLS1.3の暗号スイートを設定することができます。
現状利用できるのは、設定例に書いてある3つのみです。
基本的にはAESを優先的に利用することになるのではないでしょうが。鍵長が128ビットと256ビットから選べますが、上記設定では128ビットを優先しています。
SSLProtocolィレクティブで利用可能なプロトコルを設定できます。
デフォルト設定では、TLSv1.0~TLSv1.3が有効になります。
SSLSessionTickets ディレクティブでは、TLSセッションチケットのオンオフを設定できます。
Apacheの実装だとセッションチケットの秘密鍵が定期的に更新しないため、Perfect Forward Security(前方秘匿性)が保たれません(ちなみにこれはnginxでも同様)。
PFSを保つには、①定期的にApacheを再起動する、②定期的にセッションチケットの秘密鍵を更新する、③セッションチケットを使わない、のいずれかが必要です。
設定が完了したら、Apacheを起動します(yumでインストールしていたApacheは自動起動を無効化し、停止させます)。
Apacheを起動
# /opt/httpd/bin/httpd -k start

Apacheが起動しているかの確認
# ps aux|grep -v grep|grep httpd
(表示されれば正常に起動しています)

or

# lsof -i -P|egrep '*:80 \(LISTEN\)|*:443 \(LISTEN\)'
(設定したポートが表示されれば正常に起動しています)
TLS1.3の暗号スイートの設定及びTLS1.2の暗号スイートの設定が完了しましたので、Qualys SSL Labs SSL Server Testでスキャンを実施します。
結果は下記のとおりでした。
Systemdへの登録
旧バージョン(2.4.6)の設定が残っていることもあり、新バージョン(2.4.50)用のユニットファイルを作成します。
# vi /etc/systemd/system/httpd2450.service
[Unit]
Description=The Apache HTTP Server
After=network.target remote-fs.target nss-lookup.target

[Service]
Type=forking
ExecStart=/opt/httpd/bin/apachectl -k start
ExecReload=/opt/httpd/bin/apachectl -k graceful
ExecStop=/opt/httpd/bin/apachectl -k stop
PrivateTmp=true

[Install]
WantedBy=multi-user.target
Systemdをリロードして、登録されていることを確認します。
# systemctl daemon-reload
# systemctl list-unit-files --type=service | grep http
httpd.service                                 disabled ← これまで利用していたユニットファイル
httpd2450.service                             disabled ← 正常に登録された
あとはこれまでとおり、enableしてstartします。
# systemctl enable httpd2450
# systemctl start httpd2450

# systemctl status httpd2450
● httpd2450.service - The Apache HTTP Server
   Loaded: loaded (/etc/systemd/system/httpd2450.service; enabled; vendor preset: disabled)
   Active: active (running) since 木 2021-10-07 21:06:43 JST; 50min ago
  Process: 11506 ExecStop=/opt/httpd/bin/apachectl -k stop (code=exited, status=0/SUCCESS)
  Process: 11584 ExecStart=/opt/httpd/bin/apachectl -k start (code=exited, status=0/SUCCESS)
 Main PID: 11593 (httpd)
    Tasks: 13
   CGroup: /system.slice/httpd2450.service
           ├─10555 /opt/httpd/bin/httpd -k start
           ├─10556 /opt/httpd/bin/httpd -k start
           ├─10564 /opt/httpd/bin/httpd -k start
(以下、省略)
以上で、作業完了です。
ログローテションの変更
ローテンション後、Webでアクセスしてもログに記録されなくなりました。
# ls -l /etc/httpd/logs/{access_log,error_log,ssl_access_log,ssl_error_log}
-rw-r--r-- 1 root root 0 10月  7 03:58 /etc/httpd/logs/access_log
-rw-r--r-- 1 root root 0 10月  7 03:58 /etc/httpd/logs/error_log
-rw-r--r-- 1 root root 0 10月  7 03:58 /etc/httpd/logs/ssl_access_log
-rw-r--r-- 1 root root 0 10月  7 03:58 /etc/httpd/logs/ssl_error_log

# ps aux|grep httpd
root     17659  0.0  0.0  98760  5272 ?        Ss   10月06   0:03 /opt/httpd/bin/httpd -k start
apache   22771  0.0  0.0 2041084 6256 ?        Sl   10月06   0:02 /opt/httpd/bin/httpd -k start
apache   25216  0.0  0.0 113720  2716 ?        S    10月06   0:00 /opt/httpd/bin/httpd -k start
apache   25217  0.0  0.0 2041084 5220 ?        Sl   10月06   0:00 /opt/httpd/bin/httpd -k start
apache   25218  0.0  0.0 2041084 5236 ?        Sl   10月06   0:00 /opt/httpd/bin/httpd -k start
apache   25219  0.0  0.0 2041084 5188 ?        Sl   10月06   0:00 /opt/httpd/bin/httpd -k start

# /opt/httpd/bin/httpd -k restart ← 手動で再起動を実施
ページにはアクセスできるので、サービスは正常に起動しています。
Apacheの手動再起動後、ページにアクセスすると記録されるようになりました。
/etc/logrotate.dにあるhttpログのローテンションコマンドを変更します。
# vi /etc/logrotate.d/httpd
(変更箇所のみ)
/bin/systemctl reload httpd.service > /dev/null 2>/dev/null || true
 ↓
/opt/httpd/bin/httpd -k restart > /dev/null 2>/dev/null || true
以上で、作業完了です。
常時SSL化の設定
リダイレクト設定を引き継ぎます。
rewriteモジュールを読み込んでいることを確認します。
# grep -i LoadModule /opt/httpd/conf/httpd.conf | grep rewrite
LoadModule rewrite_module modules/mod_rewrite.so
読み込んでいない場合、読み込むように設定してください。
# vi /opt/httpd/conf/extra/httpd-rewrite.conf
<IfModule mod_rewrite.c>
    # Rewriteエンジン有効化
    RewriteEngine on

    # HTTPでアクセスされた場合
    RewriteCond %{HTTPS} off
    # 下記URLでの接続の場合(インターネットからの接続を想定)
    RewriteCond %{HTTP_HOST} ^www.bigbang.mydns.jp [OR]
    RewriteCond %{HTTP_HOST} ^bigbang.mydns.jp
    # 下記URLはhttpsにリダイレクトする
    RewriteRule ^(.*)$ https://www.bigbang.mydns.jp%{REQUEST_URI} [R=301,L]
</IfModule>

# systemctl restart httpd2450
リダイレクトの確認はリダイレクトチェックで可能です。
正常にリダイレクトされていれば下記のような結果になります。
HSTSの設定
参考URL:HSTS (HTTP Strict Transport Security) の導入
参考URL:HSTSとは?推奨される理由とプリロードリスト登録方法
TLS暗号設定ガイドラインを参照して、HTTP Strict Transport Security(HSTS)を設定します。
現在のWebサーバの設定では、HSTSの設定が可能である場合、有効にすることを推奨しています。
HSTSの詳細は、TLS暗号設定ガイドラインの「7.4.1 HTTP Strict Transport Security(HSTS)の設定有効化」を参照してください。
それでは、Apacheで実際に設定します。
各サーバの設定方法は、TLS暗号設定 サーバ設定編に記載れています。Apacheの場合、「5. HTTP Strict Transport Security 5.1. Apacheの場合 (HSTS)の設定方法例」に記載されています。
# vi /etc/httpd/conf.d/ssl.conf
SSLEngine on
Header always set Strict-Transport-Security "max-age=31536000; includeSubDomains"
※max-age:有効期間秒数、includeSubDomains:サブドメインにもHSTSを有効化

# systemctl restart httpd
以上で、作業完了です。
SSIの有効化
/opt/httpd/conf/httpd.confを編集します。
# vi /opt/httpd/conf/httpd.conf
(変更箇所のみ)
#LoadModule include_module modules/mod_include.so
 ↓
LoadModule include_module modules/mod_include.so

# /opt/httpd/bin/httpd -k restart ← 設定変更を反映
以上で、作業完了です。
PHP 5.4の有効化(以前の環境からの移行)
参考URL:Apacheのhttpd.confにPHPを設定する方法
参考URL:PHPインストール時のMPMのエラーを手っ取り早く解消する
もともとCentOS 7上で動作していたPHPのバージョンは5.4でしたので、これを動作するように設定します。
/opt/httpd/conf/extra/httpd-php.confを作成します。
# vi /opt/httpd/conf/extra/httpd-php.conf
# httpd.confにをincludeする設定ファイル
#
# PHPの場所 : /usr/bin/php
# 対象バージョン : PHP 5.4.16 (cli) (built: Apr  1 2020 04:07:17)
#
# これ↓をhttpd.confに追記する
#Include /opt/httpd/conf/extra/httpd-php.conf

#
# AddType allows you to add to or override the MIME configuration
# file specified in TypesConfig for specific file types.
#
AddType application/x-httpd-php .php

#
# Dynamic Shared Object (DSO) Support
#
# To be able to use the functionality of a module which was built as a DSO you
# have to place corresponding `LoadModule' lines at this location so the
# directives contained in it are actually available _before_ they are used.
# Statically compiled modules (those listed by `httpd -l') do not need
# to be loaded here.
#
LoadModule php5_module "/usr/lib64/httpd/modules/libphp5.so"

#
# DirectoryIndex: sets the file that Apache will serve if a directory
# is requested.
#
<IfModule dir_module>
    DirectoryIndex index.php
</IfModule>

#
# php.iniの場所
#
PHPIniDir "/etc/php.ini"
これだけでは動作しません。
# /opt/httpd/bin/httpd -k restart
[Thu Oct 07 14:21:29.579972 2021] [:crit] [pid 8143:tid 139623391147904] Apache is running a threaded MPM, \
but your PHP Module is not compiled to be threadsafe.  You need to recompile PHP.
AH00013: Pre-configuration failed
原因は、
Apacehがマルチスレッド(worker)で動作しているのに対して、CentOS付属のPHPはマルチスレッド処理に対応していないため、PHPが「マルチスレッドには対応していません。」
とエラーを吐いています。
これに対応するため、/opt/httpd/conf/extra/httpd-mpm.confを修正します(Apacheがシングルスレッドとして動作しますので、マシンスペックによってはパフォーマンスを生かしきれません。)。
# vi /opt/httpd/conf/httpd.conf
(途中、省略)
LoadModule mpm_event_module modules/mod_mpm_event.so
#LoadModule mpm_prefork_module modules/mod_mpm_prefork.so
#LoadModule mpm_worker_module modules/mod_mpm_worker.so
(途中、省略)

 ↓

(途中、省略)
#LoadModule mpm_event_module modules/mod_mpm_event.so
LoadModule mpm_prefork_module modules/mod_mpm_prefork.so
#LoadModule mpm_worker_module modules/mod_mpm_worker.so
(途中、省略)

# /opt/httpd/bin/httpd -k restart
これでPHPが動作するようになりました。
PHP 8.0の有効化のための事前作業
参考URL:AlmaLinux + Apache2.4 + MySQL8.0 + PHP8.0をソースインストール縛りで構築しWordPressを動かす
pcre及びexpatのインストール
pcre及びexpatのソース最新版をダウンロードし、インストールします。
# cd /usr/local/src/
# curl -O https://ftp.pcre.org/pub/pcre/pcre-8.45.tar.gz
# tar fxz pcre-8.45.tar.gz
# rm -f pcre-8.45.tar.gz
# cd tar fxz pcre-8.45
# ./configure --prefix=/opt/pcre
# make
# make install

# cd ..
# curl -O https://github.com/libexpat/libexpat/releases/download/R_2_4_1/expat-2.4.1.tar.gz
# tar fxz expat-2.4.1.tar.gz
# rm -f expat-2.4.1.tar.gz
# cd expat-2.4.1
# ./configure --prefix=/opt/expat
# make
# make install
これでpcre及びexpatのインストール作業が完了しました。
libxml2のインストール
libxml2のソース最新版をインストールします。
# cd /usr/local/src
# curl -O ftp://xmlsoft.org/libxml2/libxml2-2.9.12.tar.gz
# tar fxz libxml2-2.9.12.tar.gz
# rm -f libxml2-2.9.12.tar.gz
# cd libxml2-2.9.12
# ./configure --prefix=/opt/libxml2 --without-python
これでlibxml2のインストール作業が完了しました。
SQLiteのインストール
SQLiteのソース最新版をインストールします。
参考URL:(Amazon Linux2(ec2),CentOS7)SQLite3の最新バージョンをインストールする
# cd /usr/local/src
# curl -O https://www.sqlite.org/2021/sqlite-autoconf-3360000.tar.gz
# tar fxz sqlite-autoconf-3360000.tar.gz
# rm -f sqlite-autoconf-3360000.tar.gz
# cd sqlite-autoconf-3360000
# ./configure
# make
# make install

# /opt/sqlite3/bin/sqlite3 --version
3.36.0 2021-06-18 18:36:39 5c9a6c06871cb9fe42814af9c039eb6da5427a6ec28f187af7ebfb62eafa66e5
sqlite3のインストールが完了しました。
onigurumaのインストール
onigurumaのソース最新版をインストールします。
# cd /usr/local/src
# curl -O https://github.com/kkos/oniguruma/releases/download/v6.9.7/onig-6.9.7.tar.gz
# tar fxz onig-6.9.7.tar.gz
# rm -f onig-6.9.7.tar.gz
# cd onig-6.9.7
# ./configure --prefix=/opt/oniguruma
# make
# make install
onigurumaのインストールが完了しました。
zlibのインストール
zlibのソース最新版をインストールします。
# cd /usr/local/src
# curl -O https://zlib.net/zlib-1.2.11.tar.gz
# tar fxz zlib-1.2.11.tar.gz
# rm -f zlib-1.2.11.tar.gz
# cd zlib-1.2.11
# ./configure --prefix=/opt/zlib
# make
# make install
zlibのインストールが完了しました。
ようやくこれでPHP 8.0のソースインストールの準備が完了しました。
PHP 8.0の有効化
PHP 8.0の最新版をインストールします。
# curl -O https://www.php.net/distributions/php-8.0.11.tar.gz
# tar fxz php-8.0.11.tar.gz
# rm -f php-8.0.11.tar.gz
# cd php-8.0.11
# ./configure \
--prefix=/opt/php80 \
--with-apxs2=/opt/httpd/bin/apxs \
--with-mysqli \
--with-pdo-mysql \
--enable-mbstring \
--with-zlib \
PKG_CONFIG_PATH="/opt/libxml2/lib/pkgconfig\
:/opt/sqlite3/lib/pkgconfig\
:/opt/oniguruma/lib/pkgconfig\
:/opt/zlib/lib/pkgconfig"
# make test ← かなり時間がかかります
=====================================================================
TEST RESULT SUMMARY
---------------------------------------------------------------------
Exts skipped : 41
Exts tested : 31
---------------------------------------------------------------------
Number of tests : 16326 11587
Tests skipped : 4739 ( 29.0%) --------
Tests warned : 1 ( 0.0%) ( 0.0%)
Tests failed : 44 ( 0.3%) ( 0.4%)
Expected fail : 30 ( 0.2%) ( 0.3%)
Tests passed : 11512 ( 70.5%) ( 99.4%)
---------------------------------------------------------------------
Time taken : 378 seconds
=====================================================================
=====================================================================
EXPECTED FAILED TEST SUMMARY
---------------------------------------------------------------------
Test open_basedir configuration [tests/security/open_basedir_linkinfo.phpt] XFAIL REASON: BUG: open_basedir cannot delete symlink to prohibited file. See also bugs 48111 and 52176.
Inconsistencies when accessing protected members [Zend/tests/access_modifiers_008.phpt] XFAIL REASON: Discussion: http://marc.info/?l=php-internals&m=120221184420957&w=2
Inconsistencies when accessing protected members - 2 [Zend/tests/access_modifiers_009.phpt] XFAIL REASON: Discussion: http://marc.info/?l=php-internals&m=120221184420957&w=2
DateTime::add() -- fall type2 type3 [ext/date/tests/DateTime_add-fall-type2-type3.phpt] XFAIL REASON: Various bugs exist
DateTime::add() -- fall type3 type2 [ext/date/tests/DateTime_add-fall-type3-type2.phpt] XFAIL REASON: Various bugs exist
DateTime::add() -- fall type3 type3 [ext/date/tests/DateTime_add-fall-type3-type3.phpt] XFAIL REASON: Various bugs exist
DateTime::add() -- spring type2 type3 [ext/date/tests/DateTime_add-spring-type2-type3.phpt] XFAIL REASON: Various bugs exist
DateTime::add() -- spring type3 type2 [ext/date/tests/DateTime_add-spring-type3-type2.phpt] XFAIL REASON: Various bugs exist\
DateTime::add() -- spring type3 type3 [ext/date/tests/DateTime_add-spring-type3-type3.phpt] XFAIL REASON: Various bugs exist
DateTime::diff() -- fall type2 type3 [ext/date/tests/DateTime_diff-fall-type2-type3.phpt] XFAIL REASON: Various bugs exist
DateTime::diff() -- fall type3 type2 [ext/date/tests/DateTime_diff-fall-type3-type2.phpt] XFAIL REASON: Various bugs exist
DateTime::diff() -- fall type3 type3 [ext/date/tests/DateTime_diff-fall-type3-type3.phpt] XFAIL REASON: Various bugs exist
DateTime::diff() -- spring type2 type3 [ext/date/tests/DateTime_diff-spring-type2-type3.phpt] XFAIL REASON: Various bugs exist
DateTime::diff() -- spring type3 type2 [ext/date/tests/DateTime_diff-spring-type3-type2.phpt] XFAIL REASON: Various bugs exist
DateTime::diff() -- spring type3 type3 [ext/date/tests/DateTime_diff-spring-type3-type3.phpt] XFAIL REASON: Various bugs exist
DateTime::sub() -- fall type2 type3 [ext/date/tests/DateTime_sub-fall-type2-type3.phpt] XFAIL REASON: Various bugs exist
DateTime::sub() -- fall type3 type2 [ext/date/tests/DateTime_sub-fall-type3-type2.phpt] XFAIL REASON: Various bugs exist
DateTime::sub() -- fall type3 type3 [ext/date/tests/DateTime_sub-fall-type3-type3.phpt] XFAIL REASON: Various bugs exist
DateTime::sub() -- spring type2 type3 [ext/date/tests/DateTime_sub-spring-type2-type3.phpt] XFAIL REASON: Various bugs exist
DateTime::sub() -- spring type3 type2 [ext/date/tests/DateTime_sub-spring-type3-type2.phpt] XFAIL REASON: Various bugs exist
DateTime::sub() -- spring type3 type3 [ext/date/tests/DateTime_sub-spring-type3-type3.phpt] XFAIL REASON: Various bugs exist
Bug #52480 (Incorrect difference using DateInterval) [ext/date/tests/bug52480.phpt] XFAIL REASON: See https://bugs.php.net/bug.php?id=52480
RFC: DateTime and Daylight Saving Time Transitions (zone type 3, bd2) [ext/date/tests/rfc-datetime_and_daylight_saving_time-type3-bd2.phpt] XFAIL REASON: Still not quite right
RFC: DateTime and Daylight Saving Time Transitions (zone type 3, fs) [ext/date/tests/rfc-datetime_and_daylight_saving_time-type3-fs.phpt] XFAIL REASON: Still not quite right
Bug #42718 (unsafe_raw filter not applied when configured as default filter) [ext/filter/tests/bug42718.phpt] \
XFAIL REASON: FILTER_UNSAFE_RAW not applied when configured as default filter, even with flags
Bug #67296 (filter_input doesn't validate variables) [ext/filter/tests/bug49184.phpt] XFAIL REASON: See Bug #49184
Bug #67167: filter_var(null,FILTER_VALIDATE_BOOLEAN,FILTER_NULL_ON_FAILURE) returns null [ext/filter/tests/bug67167.02.phpt] \
XFAIL REASON: Requires php_zval_filter to not use convert_to_string for all filters.
via [ext/pdo_sqlite/tests/common.phpt]
SQLite PDO Common: PDOStatement::getColumnMeta [ext/pdo_sqlite/tests/pdo_022.phpt] XFAIL REASON: This feature is not yet finalized, no test makes sense
Phar web-based phar with fatal error [ext/phar/tests/fatal_error_webphar.phpt] XFAIL REASON: Uses no longer supported __autoload() function, new phar needed
updateTimestamp never called when session data is empty [ext/session/tests/bug71162.phpt] XFAIL REASON: Current session module is designed to write empty session always. \
In addition, current session module only supports SessionHandlerInterface only from PHP 7.0.
=====================================================================
=====================================================================
FAILED TEST SUMMARY
---------------------------------------------------------------------
Bug #78014 (Preloaded classes may depend on non-preloaded classes due to unresolved consts) [ext/opcache/tests/bug78014.phpt]
Bug #78175 (Preloading segfaults at preload time and at runtime) [ext/opcache/tests/bug78175.phpt]
Bug #78175.2 (Preloading segfaults at preload time and at runtime) [ext/opcache/tests/bug78175_2.phpt]
Bug #78376 (Incorrect preloading of constant static properties) [ext/opcache/tests/bug78376.phpt]
Bug #78937.1 (Preloading unlinkable anonymous class can segfault) [ext/opcache/tests/bug78937_1.phpt]
Bug #78937.2 (Preloading unlinkable anonymous class can segfault) [ext/opcache/tests/bug78937_2.phpt]
Bug #78937.3 (Preloading unlinkable anonymous class can segfault) [ext/opcache/tests/bug78937_3.phpt]
Bug #78937.4 (Preloading unlinkable anonymous class can segfault) [ext/opcache/tests/bug78937_4.phpt]
Bug #78937.5 (Preloading unlinkable anonymous class can segfault) [ext/opcache/tests/bug78937_5.phpt]
Bug #78937.6 (Preloading unlinkable anonymous class can segfault) [ext/opcache/tests/bug78937_6.phpt]
Bug #80634 (write_property handler of internal classes is skipped on preloaded JITted code) [ext/opcache/tests/jit/bug80634.phpt]
Preloading basic test [ext/opcache/tests/preload_001.phpt]
Preloading prototypes [ext/opcache/tests/preload_002.phpt]
Preloading classes linked with traits [ext/opcache/tests/preload_003.phpt]
Preloading class with undefined class constant access [ext/opcache/tests/preload_004.phpt]
Handling of auto globals during preloading [ext/opcache/tests/preload_005.phpt]
Handling of errors during linking [ext/opcache/tests/preload_006.phpt]
Handling of includes that were not executed [ext/opcache/tests/preload_007.phpt]
Preloading of anonymous class [ext/opcache/tests/preload_008.phpt]
Preloading class using trait with undefined class constant access [ext/opcache/tests/preload_009.phpt]
Initializer of overwritten property should be resolved against the correct class [ext/opcache/tests/preload_010.phpt]
Argument/return types must be available for preloading [ext/opcache/tests/preload_011.phpt]
No autoloading during constant resolution [ext/opcache/tests/preload_012.phpt]
Nested function definition [ext/opcache/tests/preload_013.phpt]
Bug #79114 (Eval class during preload causes class to be only half available) [ext/opcache/tests/preload_bug79114.phpt]
Bug #78918: Class alias during preloading causes assertion failure [ext/opcache/tests/preload_class_alias.phpt]
Bug #78918.2: Class alias during preloading causes assertion failure [ext/opcache/tests/preload_class_alias_2.phpt]
Defining a dynamic function inside the preload script [ext/opcache/tests/preload_dynamic_function.phpt]
Early binding should work fine inside the preload script [ext/opcache/tests/preload_early_binding.phpt]
Bug #81353: Segfault with preloading and error handler using static variables [ext/opcache/tests/preload_error_handler.phpt]
Various tests that need an opcache_compile_file() indirected preload file [ext/opcache/tests/preload_ind.phpt]
Preloading: Loadable class checking (1) [ext/opcache/tests/preload_loadable_classes_1.phpt]
Preloading: Loadable class checking (2) [ext/opcache/tests/preload_loadable_classes_2.phpt]
Preloading: Loadable class checking (3) [ext/opcache/tests/preload_loadable_classes_3.phpt]
Preloading inherited method with separated static vars [ext/opcache/tests/preload_method_static_vars.phpt]
Parse error in preload script [ext/opcache/tests/preload_parse_error.phpt]
Preloading of the property info table with internal parent [ext/opcache/tests/preload_prop_info_table.phpt]
Bug #79548: Preloading segfault with inherited method using static variable [ext/opcache/tests/preload_static_var_inheritance.phpt]
Preloading trait uses with aliased names [ext/opcache/tests/preload_trait_alias.phpt]
Op array fixed up multiple times during preloading [ext/opcache/tests/preload_trait_multiple_fixup.phpt]
Preload trait with static variables in method [ext/opcache/tests/preload_trait_static.phpt]
Preload: Unresolved property type [ext/opcache/tests/preload_unresolved_prop_type.phpt]
PDO SQLite Feature Request #42589 (getColumnMeta() should also return table name) [ext/pdo_sqlite/tests/bug_42589.phpt]
Bug #73594 (dns_get_record() does not populate $additional out parameter) [ext/standard/tests/network/bug73594.phpt]
=====================================================================
=====================================================================
WARNED TEST SUMMARY
---------------------------------------------------------------------
Phar: bug #69958: Segfault in Phar::convertToData on invalid file [ext/phar/tests/bug69958.phpt] (warn: XFAIL section but test passes)
=====================================================================
You may have found a problem in PHP.
This report can be automatically sent to the PHP QA team at
http://qa.php.net/reports and http://news.php.net/php.qa.reports
This gives us a better understanding of PHP's behavior.
If you don't want to send the report immediately you can choose
option "s" to save it. You can then email it to qa-reports@lists.php.net later.
以下は一般ユーザでmake testを実行した時の結果。
かなりFailedの数が減っています。
rootユーザでの実行はセキリティ上の理由から禁止されているため、Failedになるのもあるそうです。
=====================================================================
TEST RESULT SUMMARY
---------------------------------------------------------------------
Exts skipped : 41
Exts tested : 31
---------------------------------------------------------------------
Number of tests : 16326 11626
Tests skipped : 4700 ( 28.8%) --------
Tests warned : 1 ( 0.0%) ( 0.0%)
Tests failed : 21 ( 0.1%) ( 0.2%)
Expected fail : 30 ( 0.2%) ( 0.3%)
Tests passed : 11574 ( 70.9%) ( 99.6%)
---------------------------------------------------------------------
Time taken : 376 seconds
=====================================================================
=====================================================================
EXPECTED FAILED TEST SUMMARY
---------------------------------------------------------------------
Test open_basedir configuration [tests/security/open_basedir_linkinfo.phpt] XFAIL REASON: BUG: open_basedir cannot delete symlink to prohibited file. See also bugs 48111 and 52176.
Inconsistencies when accessing protected members [Zend/tests/access_modifiers_008.phpt] XFAIL REASON: Discussion: http://marc.info/?l=php-internals&m=120221184420957&w=2
Inconsistencies when accessing protected members - 2 [Zend/tests/access_modifiers_009.phpt] XFAIL REASON: Discussion: http://marc.info/?l=php-internals&m=120221184420957&w=2
DateTime::add() -- fall type2 type3 [ext/date/tests/DateTime_add-fall-type2-type3.phpt] XFAIL REASON: Various bugs exist
DateTime::add() -- fall type3 type2 [ext/date/tests/DateTime_add-fall-type3-type2.phpt] XFAIL REASON: Various bugs exist
DateTime::add() -- fall type3 type3 [ext/date/tests/DateTime_add-fall-type3-type3.phpt] XFAIL REASON: Various bugs exist
DateTime::add() -- spring type2 type3 [ext/date/tests/DateTime_add-spring-type2-type3.phpt] XFAIL REASON: Various bugs exist
DateTime::add() -- spring type3 type2 [ext/date/tests/DateTime_add-spring-type3-type2.phpt] XFAIL REASON: Various bugs exist
DateTime::add() -- spring type3 type3 [ext/date/tests/DateTime_add-spring-type3-type3.phpt] XFAIL REASON: Various bugs exist
DateTime::diff() -- fall type2 type3 [ext/date/tests/DateTime_diff-fall-type2-type3.phpt] XFAIL REASON: Various bugs exist
DateTime::diff() -- fall type3 type2 [ext/date/tests/DateTime_diff-fall-type3-type2.phpt] XFAIL REASON: Various bugs exist
DateTime::diff() -- fall type3 type3 [ext/date/tests/DateTime_diff-fall-type3-type3.phpt] XFAIL REASON: Various bugs exist
DateTime::diff() -- spring type2 type3 [ext/date/tests/DateTime_diff-spring-type2-type3.phpt] XFAIL REASON: Various bugs exist
DateTime::diff() -- spring type3 type2 [ext/date/tests/DateTime_diff-spring-type3-type2.phpt] XFAIL REASON: Various bugs exist
DateTime::diff() -- spring type3 type3 [ext/date/tests/DateTime_diff-spring-type3-type3.phpt] XFAIL REASON: Various bugs exist
DateTime::sub() -- fall type2 type3 [ext/date/tests/DateTime_sub-fall-type2-type3.phpt] XFAIL REASON: Various bugs exist
DateTime::sub() -- fall type3 type2 [ext/date/tests/DateTime_sub-fall-type3-type2.phpt] XFAIL REASON: Various bugs exist
DateTime::sub() -- fall type3 type3 [ext/date/tests/DateTime_sub-fall-type3-type3.phpt] XFAIL REASON: Various bugs exist
DateTime::sub() -- spring type2 type3 [ext/date/tests/DateTime_sub-spring-type2-type3.phpt] XFAIL REASON: Various bugs exist
DateTime::sub() -- spring type3 type2 [ext/date/tests/DateTime_sub-spring-type3-type2.phpt] XFAIL REASON: Various bugs exist
DateTime::sub() -- spring type3 type3 [ext/date/tests/DateTime_sub-spring-type3-type3.phpt] XFAIL REASON: Various bugs exist
Bug #52480 (Incorrect difference using DateInterval) [ext/date/tests/bug52480.phpt] XFAIL REASON: See https://bugs.php.net/bug.php?id=52480
RFC: DateTime and Daylight Saving Time Transitions (zone type 3, bd2) [ext/date/tests/rfc-datetime_and_daylight_saving_time-type3-bd2.phpt] XFAIL REASON: Still not quite right
RFC: DateTime and Daylight Saving Time Transitions (zone type 3, fs) [ext/date/tests/rfc-datetime_and_daylight_saving_time-type3-fs.phpt] XFAIL REASON: Still not quite right
Bug #42718 (unsafe_raw filter not applied when configured as default filter) [ext/filter/tests/bug42718.phpt] \
XFAIL REASON: FILTER_UNSAFE_RAW not applied when configured as default filter, even with flags
Bug #67296 (filter_input doesn't validate variables) [ext/filter/tests/bug49184.phpt] XFAIL REASON: See Bug #49184
Bug #67167: filter_var(null,FILTER_VALIDATE_BOOLEAN,FILTER_NULL_ON_FAILURE) returns null [ext/filter/tests/bug67167.02.phpt] \
XFAIL REASON: Requires php_zval_filter to not use convert_to_string for all filters.
via [ext/pdo_sqlite/tests/common.phpt]
SQLite PDO Common: PDOStatement::getColumnMeta [ext/pdo_sqlite/tests/pdo_022.phpt] XFAIL REASON: This feature is not yet finalized, no test makes sense
Phar web-based phar with fatal error [ext/phar/tests/fatal_error_webphar.phpt] XFAIL REASON: Uses no longer supported __autoload() function, new phar needed
updateTimestamp never called when session data is empty [ext/session/tests/bug71162.phpt] XFAIL REASON: Current session module is designed to write empty session always. \
In addition, current session module only supports SessionHandlerInterface only from PHP 7.0.
=====================================================================
=====================================================================
FAILED TEST SUMMARY
---------------------------------------------------------------------
PDO SQLite Feature Request #42589 (getColumnMeta() should also return table name) [ext/pdo_sqlite/tests/bug_42589.phpt]
Phar: Bug #79082: Files added to tar with Phar::buildFromIterator have all-access permissions [ext/phar/tests/bug79082.phpt]
Bug #70133 (Extended SessionHandler::read is ignoring $session_id when calling parent) [ext/session/tests/bug70133.phpt]
Bug #71974 Trans sid will always be send, even if cookies are available [ext/session/tests/bug71974.phpt]
Bug #74892 Url Rewriting (trans_sid) not working on urls that start with # [ext/session/tests/bug74892.phpt]
Bug #74941 session_start() triggers a warning after headers have been sent but cookies are not used [ext/session/tests/bug74941.phpt]
Bug #80774 (session_name() problem with backslash) [ext/session/tests/bug80774.phpt]
session rfc1867 sid only cookie 2 [ext/session/tests/rfc1867_sid_only_cookie_2.phpt]
Test basic function : variation3 use_trans_sid [ext/session/tests/session_basic3.phpt]
Test basic function : variation4 use_trans_sid [ext/session/tests/session_basic4.phpt]
Test basic function : variation5 use_trans_sid [ext/session/tests/session_basic5.phpt]
Test session_set_save_handler() function: class with create_sid [ext/session/tests/session_set_save_handler_class_017.phpt]
Test session_set_save_handler() function: class with validate_sid [ext/session/tests/session_set_save_handler_class_018.phpt]
Test session_set_save_handler() function: id interface [ext/session/tests/session_set_save_handler_iface_003.phpt]
Test session_set_save_handler() function: create_sid [ext/session/tests/session_set_save_handler_sid_001.phpt]
Directory class behaviour. [ext/standard/tests/directory/DirectoryClass_error_001-mb.phpt]
Test output_add_rewrite_var() function basic feature [ext/standard/tests/general_functions/output_add_rewrite_var_basic1.phpt]
Test output_add_rewrite_var() function basic feature [ext/standard/tests/general_functions/output_add_rewrite_var_basic2.phpt]
Test output_add_rewrite_var() function basic feature [ext/standard/tests/general_functions/output_add_rewrite_var_basic3.phpt]
Test output_add_rewrite_var() function basic feature [ext/standard/tests/general_functions/output_add_rewrite_var_basic4.phpt]
Bug #73594 (dns_get_record() does not populate $additional out parameter) [ext/standard/tests/network/bug73594.phpt]
=====================================================================
=====================================================================
WARNED TEST SUMMARY
---------------------------------------------------------------------
Phar: bug #69958: Segfault in Phar::convertToData on invalid file [ext/phar/tests/bug69958.phpt] (warn: XFAIL section but test passes)
=====================================================================
You may have found a problem in PHP.
This report can be automatically sent to the PHP QA team at
http://qa.php.net/reports and http://news.php.net/php.qa.reports
This gives us a better understanding of PHP's behavior.
If you don't want to send the report immediately you can choose
option "s" to save it. You can then email it to qa-reports@lists.php.net later.
「FAILED」がありますが、とりあえずインストールします。
# make install
バージョンを確認します。
# /opt/php80/bin/php -vresion
PHP 8.0.11 (cli) (built: Oct 11 2021 17:40:59) ( NTS )
Copyright (c) The PHP Group
Zend Engine v4.0.11, Copyright (c) Zend Technologies
設定ファイルの雛形をコピーします。
# cp -p php-8.0.11/php.ini-development /opt/php80/php.inihttpd-php80.confを新規作成します。
# vi /opt/httpd/conf/extra/httpd-php80.conf
#
# AddType allows you to add to or override the MIME configuration
# file specified in TypesConfig for specific file types.
#
AddType application/x-httpd-php .php

#
# DirectoryIndex: sets the file that Apache will serve if a directory
# is requested.
#
<IfModule dir_module>
    DirectoryIndex index.php
</IfModule>

#
# php.iniの場所
#
PHPIniDir "/opt/php80/php.ini"
以上でPHP 8.0の有効化に関する設定は完了です。
php.iniの初期設定
参考URL:PHPインストール時のMPMのエラーを手っ取り早く解消する
php.iniファイルを編集します。
# vi /opt/php80/php.iniエラー表示の設定を変更
- error_reportingの設定を変更
error_reporting = E_ALL | E_STRICT(開発環境においてはSTRICTを含めたすべてのレポートをさせる) - display_errorsの設定を変更
display_errors = On(エラーがあった際にブラウザなどにエラー内容を表示するように設定) - log_errorsの設定を変更
log_errors = On(エラーログを吐く設定を有効にしておく) - error_logの設定を変更
error_log = /var/log/php.log(phpに関連するエラーログを/var/log/php.logに吐くように設定)
- default_charset = "UTF-8"
- mbstring.language = Japanese
- mbstring.internal_encoding = UTF-8 ← PHP 8 で非推奨
- mbstring.encoding_translation = Off
- mbstring.http_input = pass ← PHP 8 で非推奨
- mbstring.http_output = pass ← PHP 8 で非推奨
- mbstring.detect_order = utf-8,sjis,euc-jp,jis,ascii
- mbstring.substitute_character = none
- memory_limit = 32MB
PHPの1プロセスが利用可能なメモリー容量の設定。 - post_max_size = 16M
POSTのリクエストを受け付ける際の、最大のPOSTリクエストサイズを設定 - upload_max_filesize = 8M
ファイルアップロードを受け付ける際の、最大のファイル受付サイズを設定
- expose_php = Off
これがOnだとレスポンスヘッダにPHPのバージョン情報などが露呈してしまう - session.hash_function = 1
セッションID発行のハッシュアルゴリズムをSHA-1(160bit)へ変更, 0だとMD5(128bit)。生成されたハッシュを32桁にしたい場合は、併せてsession.hash_bits_per_character = 5とする - session.entropy_file = /dev/urandom
/dev/urandomが存在するときのみ - session.entropy_length = 32
- short_open_tag = Off
PHPファイルのタグを<?php ?>のみ利用可能と制限(<? ?>などを使用不可にする) - register_argc_argv = On
バッチのようなコマンドラインプログラムを書く場合は必須の設定 - max_execution_time = 30
PHPプログラムの1つの最大実行時間の設定。これも大きなファイルアップロードや大きいバッチ処理がある場合はプログラム側のini_set()などで随時設定する
# systemctl restart httpd2450以上でphp.iniの設定は完了です。
上記の設定は、開発環境として利用する上での最小限の設定です。
Webdavの有効化
/opt/httpd/conf/httpd.confに記載されているWebdav関連のモジュールを有効化します。
# vi /opt/httpd/conf/httpd.conf
(途中、省略)
#LoadModule dav_module modules/mod_dav.so
#LoadModule dav_fs_module modules/mod_dav_fs.so
#LoadModule dav_lock_module modules/mod_dav_lock.so
 ↓
LoadModule dav_module modules/mod_dav.so
LoadModule dav_fs_module modules/mod_dav_fs.so
LoadModule dav_lock_module modules/mod_dav_lock.so
(途中、省略)

# systemctl restart httpd2450
以上で作業完了です。
Xymonの有効化
Xymonのconfファイルをコピーします。
# cp -p /etc/httpd/conf.d/xymon.conf /opt/httpd/conf/extra/httpd-xymon.confmod_rewrite.soを読み込むように変更します。
# vi /opt/httpd/conf/httpd.conf
(変更部分のみ)
#LoadModule rewrite_module modules/mod_rewrite.so
 ↓
LoadModule rewrite_module modules/mod_rewrite.so

Include conf/extra/httpd-xymon.conf

# systemctl restart httpd2450
mod_rewrite.soが読み込まれているか確認します。
# /opt/httpd/bin/httpd -M|grep rewrite
 rewrite_module (shared)
以上で作業完了です。
apcupsdの有効化
Xymonのconfファイルをコピーします。
# cp -p /etc/httpd/conf.d/xymon.conf /opt/httpd/conf/extra/httpd-xymon.confmod_authz_core.soが読み込まれていなければ読み込むように変更します。
# vi /opt/httpd/conf/httpd.conf
(変更部分のみ)
#LoadModule authz_core_module modules/mod_authz_core.so
 ↓
LoadModule authz_core_module modules/mod_authz_core.so

Include conf/extra/httpd-apcupsd.conf

# systemctl restart httpd2450
mod_authz_core.soが読み込まれているか確認します。
 /opt/httpd/bin/httpd -M|grep authz_core
 authz_core_module (shared)
以上で作業完了です。
awstatsの有効化
Xymonのconfファイルをコピーします。
# cp -p /etc/httpd/conf.d/awstats.conf /opt/httpd/conf/extra/httpd-awstats.conf
# cp -p /etc/httpd/conf.d/awstatsreport.conf /opt/httpd/conf/extra/httpd-awstatsreport.conf
mod_authz_core.so及びmod_env.soが読み込まれていなければ読み込むように変更します。
# vi /opt/httpd/conf/httpd.conf
(変更部分のみ)
#LoadModule authz_core_module modules/mod_authz_core.so
#LoadModule authz_core_module modules/mod_env.so
 ↓
LoadModule authz_core_module modules/mod_authz_core.so
LoadModule authz_core_module modules/mod_env.so

Include conf/extra/httpd-apcupsd.conf
Include conf/extra/httpd-apcupsdreport.conf

# systemctl restart httpd2450
mod_authz_core.so及びmod_env.soが読み込まれているか確認します。
 /opt/httpd/bin/httpd -M|grep authz_core
 authz_core_module (shared)
以上で作業完了です。
ModSecurity(WAF、ソース)のインストール
参考URL:Apache×Mod SecurityでカンタンWAF構築
参考URL:CentOS7 apacheにmod_securityの導入と設定
参考URL:CentOS 7 ModSecurity 2.9.2のソースファイルからのインストール
ModSecurityの最新版をダウンロードし、インストールします。
# curl -O wget https://github.com/SpiderLabs/ModSecurity/releases/download/v2.9.4/modsecurity-2.9.4.tar.gz
# tar fxz modsecurity-2.9.4.tar.gz
# rm -f modsecurity-2.9.4.tar.gz
# yum install gcc-c++ flex bison yajl yajl-devel curl-devel curl GeoIP-devel doxygen zlib-devel pcre-devel
# cd modsecurity-2.9.4
# ./configure --prefix=/opt/modsecurity --with-apxs=/opt/httpd/bin/apxs --with-apr=/usr/local/src/apr-1.7.0 --with-apr-util=/usr/local/src/apr-util-1.6.1
# make
# make install
mod_security2.soは/opt/httpd/modules/に作成されています。
mod_security2.soのパーミッションを変更します。
# chmod 755 /opt/httpd/modules/mod_security2.somodsecurity.confをコピーします。
# cp modsecurity.conf-recommended /opt/httpd/conf/extra/modsecurity.confApacheのconfディレクトリに移動し、ルールセットを導入します。
# cd /opt/httpd/conf
# git clone https://github.com/SpiderLabs/owasp-modsecurity-crs.git
# cp -p owasp-modsecurity-crs/crs-setup.conf.example owasp-modsecurity-crs/crs-setup.conf
# mkdir -p /var/log/mod_security/data
# chown -R apache:apache /var/log/mod_security
REQUEST-900-EXCLUSION-RULES-BEFORE-CRS.conf.example及びRESPONSE-999-EXCLUSION-RULES-AFTER-CRS.conf.exampleのファイル名を変更します。
# cd owasp-modsecurity-crs
# mv rules/REQUEST-900-EXCLUSION-RULES-BEFORE-CRS.conf.example rules/REQUEST-900-EXCLUSION-RULES-BEFORE-CRS.conf
# mv rules/RESPONSE-999-EXCLUSION-RULES-AFTER-CRS.conf.example rules/RESPONSE-999-EXCLUSION-RULES-AFTER-CRS.conf
unicode.mappingをコピーします。
# cp /usr/local/src/modsecurity-2.9.4/unicode.mapping /opt/httpd/conf/unicode.mappingapacheディレクトリの所有者、グループを変更します。
# chown -R apache:apache /opt/httpdhttpd.confを編集します。
# vi /opt/httpd/conf/httpd.conf
(下記を最終行に追記)
<IfModule security2_module>
<IfModule unique_id_module>
  SecRuleEngine On
  SecRequestBodyAccess On
  SecDebugLog /var/log/mod_security/modsec_debug.log
  SecDebugLogLevel 3
  SecTmpDir /tmp/
  SecUploadDir /tmp/
  SecDataDir /tmp/
  SecAuditEngine RelevantOnly
  SecAuditLogParts ABIDEFGHZ
  SecAuditLogType Serial
  SecAuditLogType concurrent
  SecAuditLog /var/log/mod_security/audit_log
  SecAuditLogStorageDir /var/log/mod_security/data

  Include conf/owasp-modsecurity-crs/crs-setup.conf
  Include conf/owasp-modsecurity-crs/rules/*.conf
</IfModule>
</IfModule>
Apacheを再起動し、動作しているかどうか確認します。
http://<サーバ名>?union+selectにアクセスして、Forbiddenと表示されれば問題なく動作しています。
(WAF)設定ファイルの変更(modsecurity.conf)
上記(ModSecurity(WAF、ソース)のインストール)では、WAFに関する設定を/opt/httpd/conf/httpd.conf内に記載しましたが、/opt/httpd/conf/extra/modsecurity.confを利用するように変更します。
まず、httpd.conf内の<IfModule security2_module> 〜 </IfModule>までをコメントアウトまたは削除します。
新たに下記行を追記します。
# vi /opt/httpd/conf/httpd.conf次に、modsecurity.confを上記(ModSecurity(WAF、ソース)のインストール)と同様の設定値に編集します。
# vi /opt/httpd/conf/extra/modsecurity.conf
# systemctl restart httpd2450
以上で作業完了です。
(WAF)独自ルールの設定
ローカルネットワーク等をWAFの監視から除外します。
# vi /opt/httpd/conf/owasp-modsecurity-crs/rules/rules-01.conf
SecRule REMOTE_ADDR "@ipMatch 127.0.0.1" "phase:1,id:1,nolog,allow,ctl:ruleEngine=Off,ctl:auditEngine=Off"
SecRule REMOTE_ADDR "@ipMatch 172.27.0.0/24" "phase:1,id:2,nolog,allow,ctl:ruleEngine=Off,ctl:auditEngine=Off"
SecRule REMOTE_ADDR "@ipMatch 192.168.0.0/24" "phase:1,id:3,nolog,allow,ctl:ruleEngine=Off,ctl:auditEngine=Off"

or

SecRule REMOTE_ADDR "@ipMatch 127.0.0.1,172.27.0.0/24,192.168.0.0/24" "phase:1,id:1,nolog,allow,ctl:ruleEngine=Off,ctl:auditEngine=Off"

# systemctl restart httpd2450
以上で、作業完了です。
(WAF)Execution error - PCRE limits exceeded
参考URL:The word "Warning" causes "PCRE limit exceeded" #1689
下記を実行しました。
# sed -i -E -e 's/Warning\.\*([^?])/Warning.*?\1/g' /opt/httpd/conf/owasp-modsecurity-crs/rules/RESPONSE-951-DATA-LEAKAGES-SQL.conf

# systemctl restart httpd2450
効果はありませんでした。
SecPcreMatchLimit及びSecPcreMatchLimitRecursionの値を変更します。
# vi /opt/httpd/conf/extra/modsecurity.conf
(途中、省略)
SecPcreMatchLimit 1000
SecPcreMatchLimitRecursion 1000
 ↓
SecPcreMatchLimit 300000
SecPcreMatchLimitRecursion 300000
(途中、省略)

# systemctl restart httpd2450
とりあえず、ログへの出力回数は減少しました。
(WAF)Request Entity Too Large
参考URL:Apache(httpd)のリバースプロキシで大きなリクエストを制限する
WAFのログで記録されていました。
(該当箇所のみ抜粋)
HTTP/1.1 413 Request Entity Too Large

Message: Request body no files data length is larger than the configured limit (131072).. Deny with code (413)
このため、SecRequestBodyLimitの設定値を変更します。
# vi /etc/httpd/conf.d/mod_security.conf
SecRequestBodyLimit 13107200
SecRequestBodyNoFilesLimit 131072
 ↓
SecRequestBodyLimit 536870912
SecRequestBodyNoFilesLimit 536870912

# systemctl restart httpd2450
以上で作業完了です。
●SSLProxyの設定
参考URL:SSLProxyを使っているApacheを2.2から2.4にバージョンアップする際の注意点
イントラ用にリバースプロキシを設定したかったため、下記のように設定しました。
# vi /etc/httpd/conf.d/ssl.conf
SSLProxyEngine On
ProxyPass /test/ https://serverB.bigbang.mydns.jp/test/

# systemctl reload httpd
プロキシを設定しているサーバにアクセスしたところ、プラウザに
Proxy Error

The proxy server could not handle the request

Reason: Error during SSL Handshake with remote server
と表示され、想定通りに動作しませんでした。/var/log/httpd/ssl_error_logを確認すると、
[Fri Feb 25 22:10:11.192302 2022] [proxy:error] [pid 2716813:tid 140317051320064] (502)Unknown error 502: [client 192.168.0.12:54024] AH01084: pass request body failed to 192.168.0.8:443 (serverB.bigbang.mydns.jp)
[Fri Feb 25 22:10:11.192389 2022] [proxy:error] [pid 2716813:tid 140317051320064] [client 192.168.0.12:54024] AH00898: Error during SSL Handshake with remote server returned by test
[Fri Feb 25 22:10:11.192394 2022] [proxy_http:error] [pid 2716813:tid 140317051320064] [client 192.168.0.12:54024] AH01097: pass request body failed to 192.168.0.8:443 (serverB.bigbang.mydns.jp) from 192.168.0.12 ()
のようにエラーが記録されていました。
どうもプロキシサーバとserverBとのSSL処理が正常に動作していないようです。
調査したところ、当該エラーはプロキシサーバでホスト名が証明書の検証でCommonName(CN)やSubject Alternative Name(SANs)に一致しないというエラーのようです。
このため、SSLProxyCheckPeerCN offとSSLProxyCheckPeerName offの設定を追加することとしました。
これにより問題が解消され、リバースプロキシとして機能するようになりました。
●robots.txtについて
参考URL:robots.txtとは?クロール拒否する方法・書き方・必要性を解説
Googleアカウントを持っているのであれば、上記によりrobots.txtの内容をチェックできます。
●Webdavクライアント「CarotDAV」を使用する
参考URL:麗の小屋 - WebDAV Client CarotDAV -
CarotDAVは上記からダウンロード出来ます。
サーバ側の設定が問題が無ければCarotDAVを使用して簡単に接続できます。
SSL接続する場合でオレオレ証明書(自己証明書)の場合、接続時に「Server Certificate Error」と表示されますが、「Ignore」をクリックすることで接続することが出来ます。
また、Proxy経由での接続時、環境により下記の設定が必要かもしれません。
- CarotDAVでのProxyの設定(Connection Setting)が「Default Proxy」である。
- 自己証明書による接続時、IE(インターネットエクスプローラ)の証明書ストアに該当証明書をあらかじめ信頼しインストールしておく。
- hostsファイルに接続するサーバの名前解決ができるようにあらかじめ記載しておく。
●Apacheで作るファイルサーバ(LDAP認証編)
LDAPのインストールと基本設定
LDAPにはOpenLDAPを使用します。必要なパッケージは以下のとおりです。openldap-serversのインストールを忘れる場合が多いので、忘れないように注意しましょう。
# rpm -qa | grep openldap
openldap-servers-2.4.19-15.el6_0.2.i686
openldap-clients-2.4.19-15.el6_0.2.i686
openldap-2.4.19-15.el6_0.2.i686
上記のようにインストールされているかどうかを確認し、インストールされていない場合はyumコマンドでインストールします。
# yum install openldap*
(記載中断中)
500 Internal Server Error
Apacheで、エラー500で「Internal Server Error」となる原因としては、以下が考えられます。
- CGIの先頭にあるperlへのパスが誤っている。
- CGIそのものに問題がある。
- CGIの改行コードが違っている。(Linuxのみ)
-
CGIの先頭にあるperlへのパスが誤っている。
インターネットで流通しているフリーのCGIの多くは、perlへのパスは、「#!/usr/local/bin/perl」となっています。しかし、例えばRedHat標準のperlのパスは、「/usr/bin/perl」であり、修正が必要です。
CGIを使用する場合は、まず、perlへのパスを確認し、自分のシステムに合わせる必要があります。 - CGIそのものに問題がある。
この場合、切り分けのため下記のような簡単なテスト用CGIを、「test.cgi」等の適当な名前で元のCGIと同じ場所に置いてアクセスしてみるとよい。このCGIは、アクセス元のアドレスを返送するだけの簡単なものです。このCGIにアクセスしたとき、「500 Internal Server Error」と表示されれば、元のCGIが壊れているか、改行コード問題等で実行できなくなっているので、調査します。
[テスト用CGI例]
#!/usr/local/bin/perl
print "Content-Type: text/html\n\n";
print "Your_IP=$ENV{'REMOTE_ADDR'}\n";
Windowsの改行コードは「CR+LF」、これに対してLinuxの改行コードは「LF」のため、たったこれだけですが、CGIは動いてくれません。対策としては、エディタで改行コードを変更する方法ありますが、もっと簡単には、FTPクライアントで、CGIをアスキーモード又はテキストモードで転送すれば、OSに応じて自動変換してくれるので、この方法でもかまいません。
上記の設定を行ったにもかかわらず、「Internal Server Error」が表示されてしまう。
Apacheのエラーログには、下記のようなものが出力されています。
suexec policy violation: see suexec log for more details
Premature end of script headers: test.cgi
どうもsuEXEC関連のエラーらしい。そこで、ApacheでsuEXECが有効になっているか確認します。
# apachectl -V
 -D SUEXEC_BIN="/usr/sbin/suexec"
上記のような行が表示された場合で、そのパスにバイナリモジュールが存在していれば有効になっています。
# ls -l /usr/sbin/suexec ← モジュールの確認
-r-s--x--- 1 root apache 11060 2009-03-17 22:16 /usr/sbin/suexec
# mv /usr/sbin/suexec /usr/sbin/suexec_bak ← リネーム
バイナリモジュールを削除するか、リネームすれば無効になります。
# service httpd reload ← 設定反映のため再起動
●SSIが有効にならない
・/var/www/htmlの場合
有効にするために下記のように変更します。
#vi /etc/httpd/conf/httpd.conf
DirectoryIndex index.shtml index.html index.html.var ←  「index.shtml」を追記
SSIでCGIを読み込んだ時に下記のようなエラーが表示されます。
[Sun Sep 04 20:03:54 2011] [warn] [client ***.***.***.***] mod_include: Options +Includes (or IncludesNoExec) \
wasn't set, INCLUDES filter removed
CGIが実行できるように設定されていないため、オプションとしてIncludesかIncludesNoExecを設定しろと言うことです。
Options Includes Indexes FollowSymLinks ← 「Includes」を追記
# service httpd reload ← 設定反映のため再起動
・/home/(ユーザ名)/public_htmlの場合
前提条件としては下記のとおりです。
ホームディレクトリを利用してホームページを公開しており、公開領域は/home/(ユーザ名)/public_html、CGI領域は/home/(ユーザ名))/cgi-binです。
public_html以下にあるhtmlファイル等は問題なく表示できる。
index.shtml内での表示部分は<!--#exec cgi="cgi-bin/uptime.cgi"-->となっており、HTTPSを利用して、https://〜/cgi-bin/uptime.cgiでアクセスすると問題なく表示される。
しかし、https://〜/index.shtmlとすると想定どおりに表示されない。
まず、SSIが利用できるようにssl.confの下記(緑色)部分を追記しました。ssl.con変更後はhttpデーモンのリロードまたは再起動が必要です。
# vi /etc/httpd/conf.d/ssl.conf
DirectoryIndex index.shtml index.htm
Options +Includes Indexes MultiViews
# service httpd reload
しかし下記のようなエラーが表示されてしまいます。
mod_include: Options +Includes (or IncludesNoExec) wasn't set, INCLUDES filter removed調べたところ、SSI関連のところであるOptionsディレクティブをDirectoryタグで囲んでみると、
  DirectoryIndex index.shtml index.htm
  <Directory /home/public/public_html>
    Options +Includes Indexes MultiViews
  </Directory>
# service httpd reload
今度は、index.shtmlで[an error occurred while processing this directive]と表示されるようになり、ssl_error_logでは
invalid CGI ref "../cgi-bin/uptime.cgi"と表示されていました。どうも、パスの指定の仕方がダメなようです。いろいろ変更してみたところ
<!--#exec cgi="../cgi-bin/uptime.cgi"-->
   ↓
<!--#exec cgi="cgi-bin/uptime.cgi"-->
としたところ正常に動作するようになりました。
●Windows 7でwebdavを利用できない
OSがWindows 7だとwebdavフォルダと接続できないようです。
インターネットにはそれに関する情報がいろいろありました。
Windows7でwebdavが使えない不具合やWindows7でwebdavを使ってみたのような情報があり、簡単にまとめると以下のとおりです。
- Vistaから発生している現象
対処はWeb フォルダのソフトウェア更新プログラム: KB907306 を適用する - SSLなしのBasic認証なら接続可能
対処はWindows7でwebdavを使う方法:なんとなしの日記を参照 - 自己証明書SSLだとの接続不可能
対処はWindows7でwebdavを使ってみたを参照
32bit版はこちらから、64bit版はこちらからダウンロードできます。
(2104.3.5現在)
IEのバージョンが10位になった頃からか、上記のTeamFileが使用出来なくなってしまった。どうもIEのセキュリティに関係があるらしい。
ようやくその対応方法が分かったので、その対策として●サーバ証明書のインストール方法(Windows 7 IE10編)にその対応方法を記載しました。
●SSLv2、SSLv3の無効化
昨今、SSLv2の脆弱性が取り沙汰されています。このため、SSLv2を無効化したいと思います。
SSLv2を無効化するには。ssl.confを下記のとおり編集します。
#SSLProtocol all -SSLv2
 ↓
SSLProtocol all -SSLv2 -SSLv3 ← SSLv2、SSLv3の無効化
SSLHonorCipherOrder ON ← 行頭の#を削除
SSLCipherSuite ALL:!ADH:!EXPORT:+SSLv2:RC4+RSA:+HIGH:+MEDIUM:+LOW
 ↓
SSLCipherSuite ALL:!ADH:!EXPORT:!SSLv2:!SSLv3:RC4+RSA:+HIGH:+MEDIUM:+LOW
2016.03.02追記
上記の設定では、下記のようなエラーが表示されました。
# openssl s_client -connect localhost:443 -tls1
CONNECTED(00000003)
140592254707616:error:14094410:SSL routines:SSL3_READ_BYTES:sslv3 alert handshake failure:s3_pkt.c:1259:SSL alert number 40
TLS接続が正常でないため下記に設定変更しました。
SSLCipherSuite EECDH+HIGH:EDH+HIGH:HIGH:MEDIUM:+3DES:!ADH:!RC4:MD5:!aNULL:!eNULL:!SSLv3:!SSLv2:!LOW:!EXP:!PSK:!SRP:!DSS:!KRB5apacheを再起動します。
#service httpd restartSSLv2が無効になったか確認します。
$ openssl s_client -connect localhost:443 -ssl2
CONNECTED(00000003)
3078194924:error:1407F0E5:SSL routines:SSL2_WRITE:ssl handshake failure:s2_pkt.c:429:
SSLv3が無効になったか確認します。
# openssl s_client -connect localhost:443 -ssl3
CONNECTED(00000003)
139778341582752:error:14094410:SSL routines:SSL3_READ_BYTES:sslv3 alert handshake failure:s3_pkt.c:1259:SSL alert number 40
動作としては、SSLProtocol行の変更だけで無効になるようです。
最後にSSLのセキュリティランクを確認してはいかがでしょうか。
OpenSSLを利用されている方は下記サイトでセキュリティランクを確認してみると良いでしょう。
https://sslcheck.globalsign.com/ja/
●Unable to verify certificate 'Server-Cert'. Add "NSSEnforceValidCerts off" to nss.conf so the server can start until the problem can be resolvedでWebサーバ(httpd)が突然起動しなくなった
CentOS 6でWeb(apache)サーバが突然起動しなくなりました。起動しようとすると/var/log/messagesに下記のようなエラーが表示されます。
[notice] suEXEC mechanism enabled (wrapper: /usr/sbin/suexec)
[error] SSL Library Error: -8181 Certificate has expired
[error] Unable to verify certificate 'Server-Cert'. Add "NSSEnforceValidCerts off" /
                        to nss.conf so the server can start until the problem can be resolved.
mod_nssの場合、サーバ証明書がexpireするとサーバが起動しなくなるようです。この場合「ある日突然起動できなくなった」ということが起こりえます。
これを回避するには、nss.confにNSSEnforceValidCerts offを追加すればよいです。もちろんもし有効期限が切れているなら、サーバ証明書を更新したほうがよいです。
サーバ証明書の確認方法は、まず証明書の一覧を見て、次にサーバ証明書のニックネームを指定して(デフォルトはServer-Cert)、サーバ証明書の中身を見ます。
$ sudo certutil -L -d /etc/httpd/alias
$ sudo certutil -L -d /etc/httpd/alias -n Server-Cert
下記コマンドを実行してサーバ証明書の中身を確認します。
# certutil -L -d /etc/httpd/alias -n Server-Cert

or

# openssl s_client -connect localhost:443 | openssl x509 -text -noout

or

※Let's Encryptの場合
# openssl x509 -in /etc/letsencrypt/live/(管理しているドメイン名)/cert.pem -text

下記は
# certutil -L -d /etc/httpd/alias -n Server-Cert
の実行結果です。

Certificate:
    Data:
        Version: 3 (0x2)
        Serial Number: 3 (0x3)
        Signature Algorithm: PKCS #1 SHA-1 With RSA Encryption
        Issuer: "CN=Certificate Shack,O=mydns.jp,C=US"
        Validity:
            Not Before: Sun Jul 31 12:05:53 2011
            Not After : Fri Jul 31 12:05:53 2015
        Subject: "CN=localhost4.localdomain4,O=mydns.jp,C=US"
        Subject Public Key Info:
            Public Key Algorithm: PKCS #1 RSA Encryption
            RSA Public Key:
                Modulus:
                    e8:a3:30:c7:49:91:b9:fc:39:12:bb:b0:2a:90:af:58:
                    df:e3:c3:f8:81:24:48:d6:b7:1c:bd:1e:0e:b2:3a:13:
                    0c:7c:d3:21:ed:c5:5f:c8:e5:64:e1:8c:cd:22:6e:32:
                    d7:41:d6:61:83:2a:6f:22:37:23:c4:d5:d9:7d:dc:bb:
                    8e:d2:e0:10:72:42:c3:d4:43:c5:1b:0d:d3:e3:f6:c4:
                    c4:e3:8f:d6:65:a3:e9:f2:da:b0:a7:63:08:d8:87:2c:
                    2e:dc:05:6f:05:43:bb:b3:a1:1f:9e:c2:88:03:17:dc:
                    ea:22:ed:51:e8:b8:97:6e:62:ea:2f:16:1c:ab:2a:91
                Exponent: 65537 (0x10001)
        Signed Extensions:
            Name: Certificate Type
            Data: <SSL Server>
            Name: Certificate Key Usage
            Usages: Key Encipherment
    Signature Algorithm: PKCS #1 SHA-1 With RSA Encryption
    Signature:
        13:13:cd:fb:b5:56:70:45:8f:a6:4c:50:ce:db:06:ce:
        8f:07:7c:d8:ee:11:c7:3f:65:c6:aa:7e:d9:7c:7d:ad:
        14:5c:0d:27:22:b8:2f:d1:3b:22:f1:0b:9d:01:4f:ad:
        1f:56:0d:da:69:33:03:1f:0d:64:f2:5b:6c:a4:6e:d7:
        9c:5c:4a:3d:20:39:b3:a9:de:96:b0:af:ad:bc:6f:64:
        b4:7b:34:2a:3e:27:be:36:74:d8:b7:36:16:d9:d8:25:
        50:c2:58:68:c3:70:d5:ed:0d:5d:18:c0:84:ff:e1:a8:
        e3:83:b5:07:96:eb:e1:af:8b:ee:37:84:70:bd:d1:33
    Fingerprint (SHA-256):
        1E:8F:5B:3B:CD:9C:DD:E3:79:E4:98:D5:47:0C:F2:4F:3E:B7:A0 :D2:D4:1B:A9:E7:77:4C:A5:7B:22:4B:CB:94
    Fingerprint (SHA1):
        B6:EA:FE:50:74:53:0D:0E:1B:44:1F:EB:76:78:BD:DB:28:7E:D4:4E
    Certificate Trust Flags:
        SSL Flags:
            User
        Email Flags:
            User
        Object Signing Flags:
            User
サーバ証明書の期限が切れているようです。とりあえず回避策として/etc/httpd/conf.d/nss.confファイルにSSEnforceValidCerts off追記し再起動を実施しました。
上記の方法では一時凌ぎ的な感じです。したがって、下記の方法で証明書の期限を本来の正常なものに更新されますので、こちらは実施したほうが良いかと思います。
# rpm -e mod_nss
# rm /etc/httpd/alias/*
# yum install mod_nss
# service httpd restart
# service httpd restart
httpd を停止中:                                            [  OK  ]
httpd を起動中:                                            [  OK  ]
証明書の有効期限を確認してみます。
# certutil -L -d /etc/httpd/alias -n Server-Cert
Certificate:
    Data:
        Version: 3 (0x2)
        Serial Number: 3 (0x3)
        Signature Algorithm: PKCS #1 SHA-1 With RSA Encryption
        Issuer: "CN=Certificate Shack,O=mydns.jp,C=US"
         Validity:
            Not Before: Wed Aug 05 06:53:25 2015
            Not After : Mon Aug 05 06:53:25 2019
        Subject: "CN=www.bigbang.mydns.jp,O=mydns.jp,C=US"
        Subject Public Key Info:
            Public Key Algorithm: PKCS #1 RSA Encryption
            RSA Public Key:
                Modulus:
                    b3:13:c5:31:cc:62:48:c0:2b:e8:3e:ae:31:5c:04:aa:
                    cd:61:f8:74:dd:47:00:37:a8:4d:87:98:b2:ea:94:50:
                    76:8e:64:0a:be:6f:1a:fe:23:7c:db:59:b3:47:2e:56:
                    b4:bb:26:2a:99:7a:09:3f:70:74:a2:42:be:7f:58:71:
                    49:b2:21:5e:6d:6b:0f:ad:52:f8:67:37:eb:6f:6a:b1:
                    48:81:b7:59:b7:b5:a7:c0:e7:a2:29:94:1c:b1:32:c0:
                    14:f5:b9:a4:c2:b4:08:01:7d:88:6d:cb:76:26:7a:7a:
                    90:6a:86:4f:b4:7a:2d:7e:25:61:24:80:61:ec:9f:ff
                Exponent: 65537 (0x10001)
        Signed Extensions:
            Name: Certificate Type
            Data: <SSL Server>
            Name: Certificate Key Usage
            Usages: Key Encipherment
    Signature Algorithm: PKCS #1 SHA-1 With RSA Encryption
    Signature:
        50:2b:32:d1:7c:12:52:08:d9:9f:4b:58:6b:47:d1:04:
        fc:d2:4a:ed:0b:15:1c:23:59:2f:cc:24:b0:73:3a:2c:
        71:22:df:27:11:63:b0:48:d5:ee:c0:97:15:c6:c5:24:
        30:16:54:27:c0:0c:56:55:ac:a0:dd:8b:57:67:da:44:
        4f:df:95:6f:ac:e6:9e:31:1d:54:b4:b2:45:5d:8b:c9:
        ec:5d:12:36:89:f8:0c:d9:91:84:fb:54:14:50:ec:52:
        3d:a9:96:8e:5e:6c:6a:8e:7d:09:3e:8f:2e:ed:5b:b5:
        e5:70:44:c2:e4:22:08:90:6f:a0:2e:6f:17:3b:77:4e
    Fingerprint (SHA-256):
        6F:B6:A8:96:B8:73:69:74:8A:14:14:2F:2E:47:60:54:E8:AD:4B :62:A7:0A:BD:AA:80:43:3A:95:15:01:01:76
    Fingerprint (SHA1):
        B5:9F:67:B3:CC:52:06:B1:48:49:CB:17:CB:FA:9A:CD:95:F7:62:9A
    Certificate Trust Flags:
        SSL Flags:
            User
        Email Flags:
            User
        Object Signing Flags:
            User
有効期限が更新されていることがわかります。ただし、4年後に同じ現象が発生しそうですが・・。
●AH01906: RSA server certificate is a CA certificate (BasicConstraints: CA == TRUE !?)
●バーチャルホストの設定
CentOS 7でhttpdを再起動すると下記エラーが記録されていることに気が付きました。
[Thu Aug 13 17:28:15.530195 2015] [ssl:warn] [pid 19982] AH01906: RSA server certificate is a CA certificate (BasicConstraints: CA == TRUE !?)
[Thu Aug 13 17:28:15.568821 2015] [ssl:warn] [pid 19982] AH01906: RSA server certificate is a CA certificate (BasicConstraints: CA == TRUE !?)
これは当該サーバでイントラ用とインターネット用のドメインが異なっており、設定している自己証明書がインターネット用であることがわかりました。そのため、ssl.confでイントラ用とインターネット用のバーチャルホストの設定をきちんとするようにしました。
なお、下記記載方法はapache2.4対応版です。
<VirtualHost intranet.bigbang.dyndns.org:443> ServerName intranet.bigbang.dyndns.org Alias /webdav /var/www/webdav ErrorLog logs/ssl_error_log TransferLog logs/ssl_access_log LogLevel warn SSLEngine on SSLProtocol all -SSLv2 SSLCipherSuite HIGH:MEDIUM:!aNULL:!MD5 SSLCertificateFile /etc/pki/tls/certs/server.crt SSLCertificateKeyFile /etc/pki/tls/certs/server.key DirectoryIndex disabled DavLockDB "/tmp/DavLock" <Location "/webdav"> DAV On SSLRequireSSL AuthType Basic AuthName WebDAV AuthUserFile /etc/httpd/conf/.htpasswd <RequireAny> Require method GET POST OPTIONS Require user hoge john #Require valid-user </RequireAny> #<LimitExcept OPTIONS PROPFIND> Require local Require ip 192.168.0.0/255.255.255.0 Require ip 102.103.104 Require ip 102.103.204 Require user hoge john #</LimitExcept> Header add MS-Author-Via "DAV" </Location> </VirtualHost> <VirtualHost internet.bigbang.mydns.jp:443> ServerName internet.bigbang.mydns.jp Alias /webdav /var/www/webdav ErrorLog logs/ssl_error_log TransferLog logs/ssl_access_log LogLevel warn SSLEngine on SSLProtocol all -SSLv2 SSLCipherSuite HIGH:MEDIUM:!aNULL:!MD5 SSLCertificateFile /etc/pki/tls/certs/server.crt SSLCertificateKeyFile /etc/pki/tls/certs/server.key DirectoryIndex disabled DavLockDB "/tmp/DavLock" <Location "/webdav"> DAV On SSLRequireSSL AuthType Basic AuthName WebDAV AuthUserFile /etc/httpd/conf/.htpasswd <RequireAny> Require method GET POST OPTIONS Require user hoge john #Require valid-user </RequireAny> #<LimitExcept OPTIONS PROPFIND> Require local Require ip 192.168.0.0/255.255.255.0 Require ip 102.103.104 Require ip 102.103.204 Require user hoge john #</LimitExcept> Header add MS-Author-Via "DAV" </Location> </VirtualHost>
●A lock database was not specified with the DAVLockDB directive. One must be specified to use the locking functionality.
下記行を設定ファイルに追記します。
DavLockDB "/tmp/DavLock"記載後、httpdを再起動します。
●CentOSのOpenSSL脆弱性について
参考URL:【CentOS】CentOS導入OpenSSLバージョン確認・脆弱性対応の確認方法
インターネット上にOpenSSLに関する脆弱性情報の掲載があってもCentOSのパッチが表示されない(ダウンロードできない)ことがあります。
上記URLによると、
-
これは簡単に説明するとCentOS独自のopensslのバージョン表記であるため、と考えるとわかりやすいと思います。
CentOSでは、リリース時点のバージョンにパッチを当てる形で保守されます。
これにより、yum updateしても、バージョン番号などはそのままになっていることがあるのです。
脆弱性が報告されたのにいくらアップデートしても最新にならないよーーーー!と焦りがちですが、RedHatのCVEデータベースを見ると良いでしょう。
発表された脆弱性には、CVEという番号が振られてますので該当のCVE番号で検索すれば脆弱性の対象かどうかがわかります。
【公式】Redhat CVE Database
●CentOS 7のApacheが突然起動しなくなった
参考URL:SSLライブラリエラー:-8181証明書の有効期限が切れています
参考URL:apache mod_nss nss証明書について
/var/log/httpd/error_logに下記のようなログが記録されていました。
[Tue Jun 29 03:24:12.837317 2021] [:error] [pid 20757] SSL Library Error: -8181 Certificate has expired
[Tue Jun 29 03:24:12.858296 2021] [:error] [pid 20758] Unable to verify certificate 'Server-Cert'. Add "NSSEnforceValidCerts off" to nss.conf so the server can start until the problem can be resolved.
[Tue Jun 29 03:24:12.858296 2021] [:error] [pid 20758] Unable to verify certificate 'Server-Cert'. Add "NSSEnforceValidCerts off" to nss.conf so the server can start until the problem can be resolved.
ログからmod_sslではなく、mod_nssの証明書の有効期限に問題があるようです。
mod_nssの有効期限を確認します。
# certutil -L -d /etc/httpd/alias -n Server-Cert
Certificate:
Data:
Version: 3 (0x2)
Serial Number: 3 (0x3)
Signature Algorithm: PKCS #1 SHA-1 With RSA Encryption
Issuer: "CN=Certificate Shack,O=example.com,C=US"
Validity:
Not Before: Wed Jun 28 11:37:12 2017
Not After : Mon Jun 28 11:37:12 2021
Subject: "CN=localhost4.localdomain4,O=example.com,C=US"
:
:
(以下、省略)
HTTPS(443番ポート)でアクセスしたときに、mod_ssl、mod_nssのどちらで処理しているか確認するには、/etc/httpd/conf.d/以下のssl.conf、nss.confで「Listen 443」となっている方が有効となります。
もし、mod_ssl(ssl.conf)が443番ポートを受け持っているのであれば、nssを無効にすることでApacheを起動できます。
ただし、ssl.confで設定している証明書もnssと同じく期限切れになっている可能性があります。
mod_nssで443番ポートを使用している場合の一時的な対処方法は下記のとおりです。
/etc/httpd/conf.d/nss.conf内の記述に「NSSEnforceValidCerts off」を追記、Apacheを再起動します。
永続的な対処方法は下記のとおりです。
# yum remove mod_nss # rm /etc/httpd/alias/* # yum install mod_nss -y # systemctl restart httpd証明書の有効期限を確認します。
# certutil -d /etc/httpd/alias -L -n Server-Cert
Certificate:
Data:
Version: 3 (0x2)
Serial Number: 4 (0x4)
Signature Algorithm: PKCS #1 SHA-256 With RSA Encryption
Issuer: "CN=Certificate Shack,O=example.com,C=US"
Validity:
Not Before: Tue Jun 29 00:25:53 2021
Not After : Sun Jun 29 00:25:53 2025
Subject: "CN=localhost4.localdomain4,O=example.com,C=US"
mod_nssの有効期限が更新されていることを確認して終了です。
●Update SSL Certfile <サーバ名>
参考URL:認証局がLet’s Encryptの証明書を更新しようとしたらエラーが出た
参考URL:Let’s Encryptのサーバー証明書期限を自動延長するには?
参考URL:SSL 証明書を取得する (Let's Encrypt)
月に一度、Let's Encript(snapd利用)の証明書を更新スクリプトを動作させるようにしていました。
動作してメールに「Update SSL Certfile <サーバ名>」が来ていましたが、内容が「Update SSL Certfile failed」となっていて、SSL証明書は更新されていませんでした。
(CentOS 7で動作しているLet's Encript(certbot-autoを利用))は正常に毎月一度更新されています。
手動で実行してみた結果です。
# bash /etc/cron.monthly/update_sslcert.sh
===== Update SSL Certfile =====
2021年 7月 12日 月曜日 09:26:46 JST Update SSL Certfile start
Saving debug log to /var/log/letsencrypt/letsencrypt.log
- - - - - - - - - - - - - - - - - - - - - - - - - - - - - - - - - - - - - - - -
Processing /etc/letsencrypt/renewal/www.bigbang.mydns.jp.conf
- - - - - - - - - - - - - - - - - - - - - - - - - - - - - - - - - - - - - - - -
Renewing an existing certificate for www.bigbang.mydns.jp
Certbot failed to authenticate some domains (authenticator: webroot). The Certificate Authority reported these problems:
Domain: www.bigbang.mydns.jp
Type: unauthorized
Detail: Invalid response from https://www.bigbang.mydns.jp/.well-known/acme-challenge/3Y-dGOZbV656EnvH4H9MsrETzVsr5gKiuEtOcgNyfes [***.***.***.***]: \
"<!DOCTYPE HTML PUBLIC \"-//IETF//DTD HTML 2.0//EN\">\n<html><head>\n<title>404 Not Found</title>\n</head><body>\n<h1>Not Found</h1>\n<p"
Hint: The Certificate Authority failed to download the temporary challenge files created by Certbot. \
Ensure that the listed domains serve their content from \
the provided --webroot-path/-w and that files created there can be downloaded from the internet.
Failed to renew certificate www.bigbang.mydns.jp with error: Some challenges have failed.
- - - - - - - - - - - - - - - - - - - - - - - - - - - - - - - - - - - - - - - -
All renewals failed. The following certificates could not be renewed:
/etc/letsencrypt/live/www.bigbang.mydns.jp/fullchain.pem (failure)
- - - - - - - - - - - - - - - - - - - - - - - - - - - - - - - - - - - - - - - -
1 renew failure(s), 0 parse failure(s)
Ask for help or search for solutions at https://community.letsencrypt.org. \
See the logfile /var/log/letsencrypt/letsencrypt.log or re-run Certbot with -v for more details.
2021年 7月 12日 月曜日 09:26:55 JST Update SSL Certfile end
ログを確認しましたが良くわかりませんでした。
証明書を手動で更新するためのコマンド「certbot renew」を使用してみます。
# certbot renew Saving debug log to /var/log/letsencrypt/letsencrypt.log - - - - - - - - - - - - - - - - - - - - - - - - - - - - - - - - - - - - - - - - Processing /etc/letsencrypt/renewal/www.bigbang.mydns.jp.conf - - - - - - - - - - - - - - - - - - - - - - - - - - - - - - - - - - - - - - - - Certificate not yet due for renewal - - - - - - - - - - - - - - - - - - - - - - - - - - - - - - - - - - - - - - - - The following certificates are not due for renewal yet: /etc/letsencrypt/live/www.bigbang.mydns.jp/fullchain.pem expires on 2021-09-06 (skipped) No renewals were attempted. - - - - - - - - - - - - - - - - - - - - - - - - - - - - - - - - - - - - - - - -どうも、まだ、証明書の有効期間が十分に残っているため更新できなかったようです。
「Certificate not yet due for renewal」というメッセージは、サーバー証明書の更新の必要がないという意味のようです。
renewalコマンドは、30日以内に期限切れになるサーバー証明書のみ更新するそうです。
まだ、期限まで余裕があるサーバー証明書の場合、このようなメッセージが表示される、とのことでした。
●directory index forbidden by Options directive
Apacheのエラーログに下記が記録されていることを見つけました。
[Tue Sep 14 10:43:53.426114 2021] [autoindex:error] [pid 3968721:tid 139900052166400] [client 192.168.10.118:35282] AH01276: Cannot serve directory /usr/share/test/: No matching DirectoryIndex () found, and server-generated directory index forbidden by Options directive
このエラーは「https://www.bigbang.mydns.jp/test/」のように「/」で終わるようなアクセスをした場合、/etc/httpd/conf/httpd.confのDirectoryIndexディレクティブの記載がないか、漏れがあると記録されます。
これを修正にするには、/etc/httpd/conf/httpd.confのDirectoryIndexディレクティブを修正するか、Directoryディレクティブを使用して下記のように設定します。
<Directory /usr/share/test/> DirectoryIndex index.php : </Directory>設定完了後、Apacheを再起動します。
再度、URLにアクセスし表示されれば完了です。
解決手順としては下記のような順序でしょうか。
- 該当のディレクトリに「index.html」等を作成する
- 上記でも解決しない場合、「DirectoryIndex」の設定を確認する
- 上記でも解決しない場合、ファイルやディレクトリのアクセス権限を確認する
参考URL:perl のCGIで、Service Unavailable
ソースからインストールしたApache(2.4.50)でPerlで作成したCGIを動作させるとService Unavailableとなり、正常に結果が表示されません。
エラーログには下記にように記録されていました。
[Wed Oct 06 21:53:40.368104 2021] [cgid:error] [pid 7895:tid 139717559379712] (22)Invalid argument: [client 192.168.10.8:46748] AH01257: unable to connect to cgi daemon after multiple tries: /var/www/cgi-bin/test.cgi
ApacheでCGIを実行するモジュールが読み込まれているか確認します。
# /opt/httpd/bin/apachectl -M|grep cgi cgid_module (shared)上記のように表示されれば、正常に読み込まれています。
この場合、モジュールの問題ではありません。
参照URLのとおり設定したところ、正常に動作するようになりました。
# vi /opt/httpd/conf/httpd.conf
(途中、省略)
<IfModule cgid_module>
#
# ScriptSock: On threaded servers, designate the path to the UNIX
# socket used to communicate with the CGI daemon of mod_cgid.
#
#Scriptsock cgisock
</IfModule>
(途中、省略)
↓
(途中、省略)
<IfModule cgid_module>
#
# ScriptSock: On threaded servers, designate the path to the UNIX
# socket used to communicate with the CGI daemon of mod_cgid.
#
Scriptsock cgisock ← アンコメント(#を削除)
</IfModule>
(途中、省略)
# /opt/httpd/bin/httpd -k restart