●インストール
参考URL:CentOS7 ownCloudを使ったオンラインストレージ
※CentOS 7の初期リポジトリでインストールされるPHPのバージョンは5.4系。最新のownCloud 10.6(2020.12.20現在)にはPHPのバージョンが7.2以上が必要。これに対応するには、PHP 5.4系をアンインストールし、第三者のリポジトリ(remiリポジトリ)を登録、7.2系や7.3系をインストールするか、複数のPHPバージョンをインストールします。
ownCloudはWeb経由で操作しますので最初にApacheをインストールしておきます。
また、データベースも利用しますので、MySQL(MariaDB)もインストールしておきます。
ここでは、Apache、MySQL(MariaDB)の設定は完了しているものとします。
Apacheは、httpd-tools、httpd-devel、httpdをインストールしておきます。
下記ではownCloud用に使用するowncloudというデータベースを作成し、それにアクセスするユーザIDとパスワードを設定しています。
●owncloudの設定
http://(IPアドレス)/owncloud/にアクセスすると下記のような画面が表示されます。
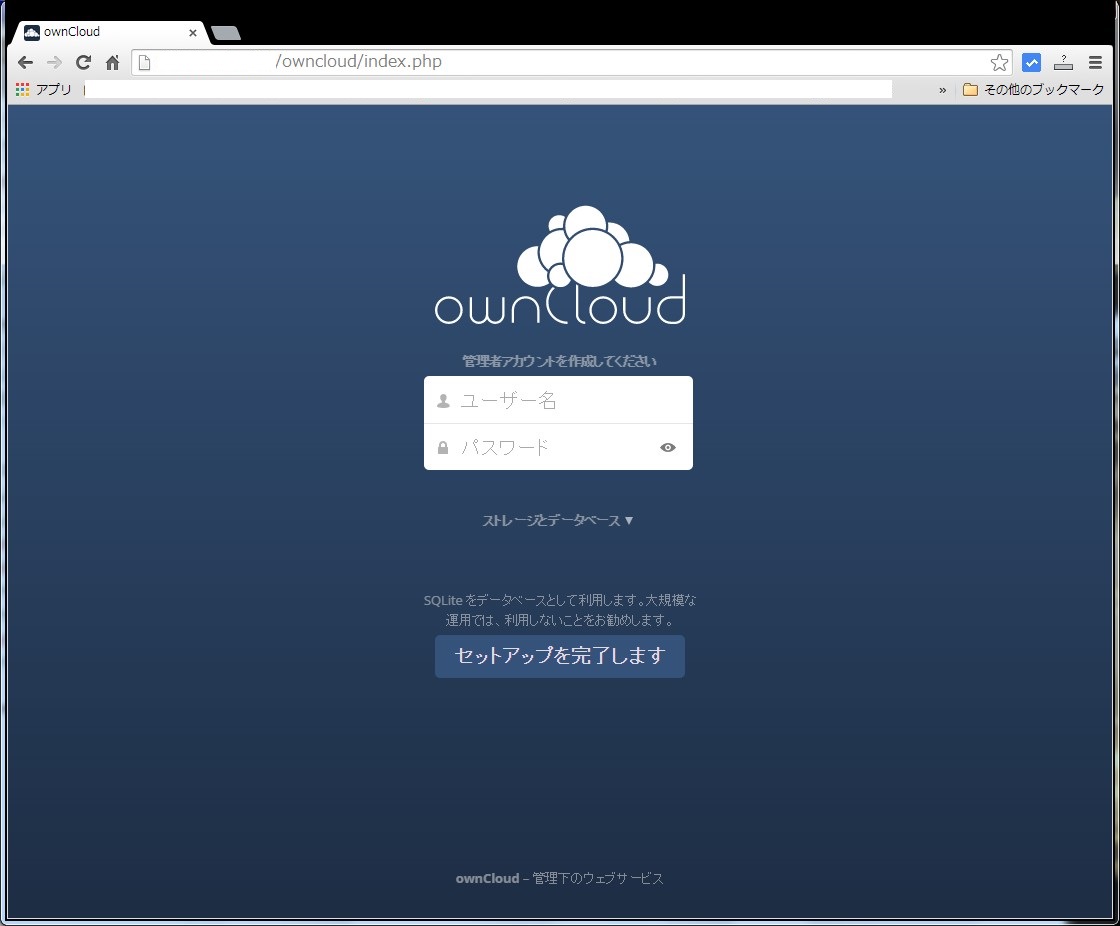
管理者用のアカウントを作成します。
管理者となるユーザ名及びパスワードをを入力します。
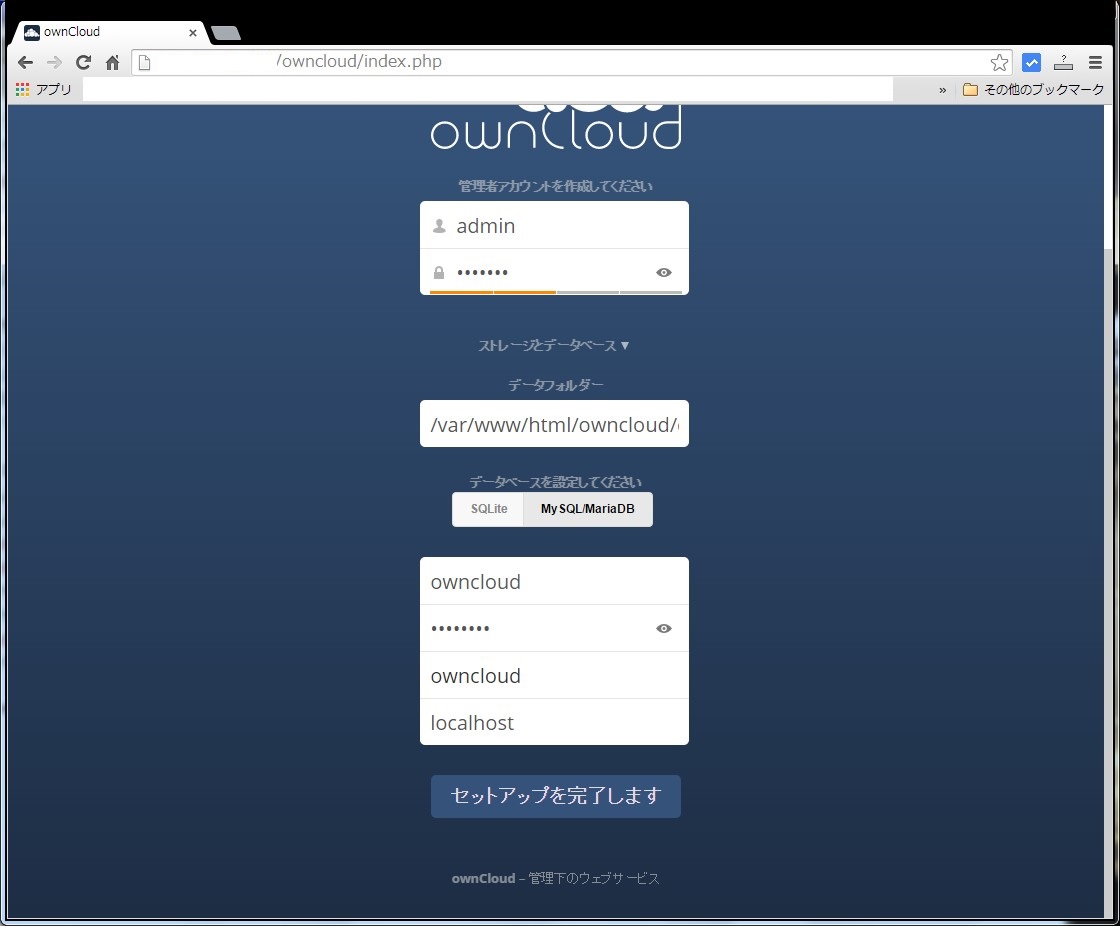
実際のデータのアップロード先となる(owncloudサーバを動作させている)フォルダ名をデータフォルダに記載します。
データベースにMariaDBを使用していますので、「ストレージデータベース」部分をクリック、データベースを選択します。
データベース名やユーザIDなどを入力する画面が表示されますので、MySQL/MariaDBを選択し、上記で設定したowncloudデータベースの情報を入力後、「セットアップを完了します」ボタンをクリックします。
問題がなければ下記の画面が表示されます。
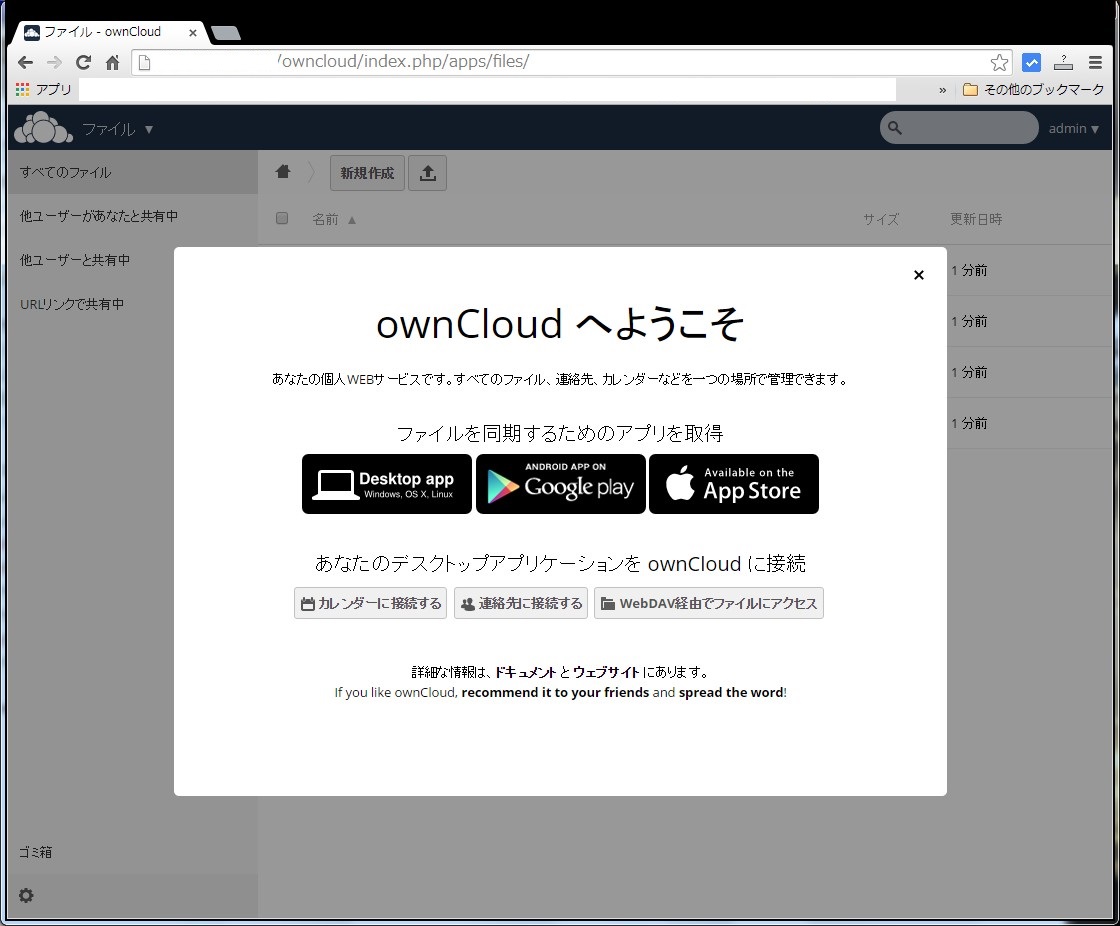
サーバ側のインストールはこれで完了です。続いてクライアントソフトのインストールになります。
●owncloudクライアントのインストール(サーバインストール直後)
リンク(例:Windowsにインストールする場合「Desktop app」をクリック)をクリッすると、ownCloudの公式ページが開きます。
ページを下にスクロールすると「Download Desktop App」というリンクがありますのでクリックします。
クライアント用のページが開きますので、環境に合ったアプリをダウンロードします。
インストールが完了すると次の画面が表示されます。
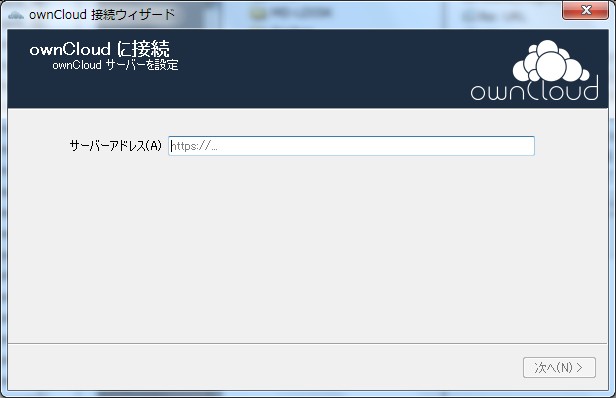
ownCloudをインストールしたサーバのアドレス ( http://(IPアドレス)/owncloud ) を入力して次へをクリックします。SSL証明書をインストールしている場合にはhttpsで指定することも可能です。
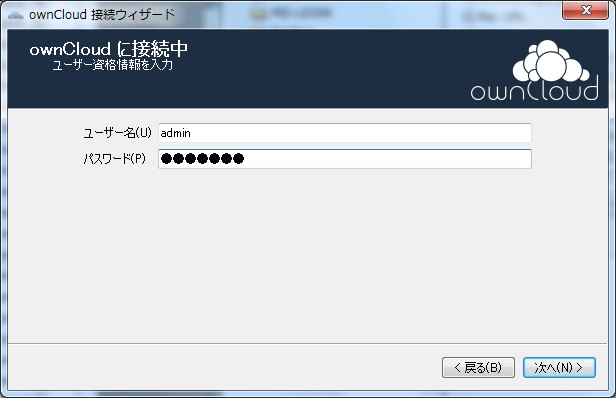
次に接続するためのユーザ名・パスワードを入力します。下記では最初に作成したadminユーザで接続しようとしています。
次に以下の画面が表示されます。ownCloudのフォルダとローカルのフォルダを選択して同期するフォルダを選択することになります。デフォルトではownCloud上にdocuments / music / photosなどのフォルダが存在しており、これらのフォルダが下記で選択したローカルのフォルダに同期されることになります。逆にローカルフォルダにファイルなどが存在する場合はownCloudフォルダに双方向で同期されることになります。
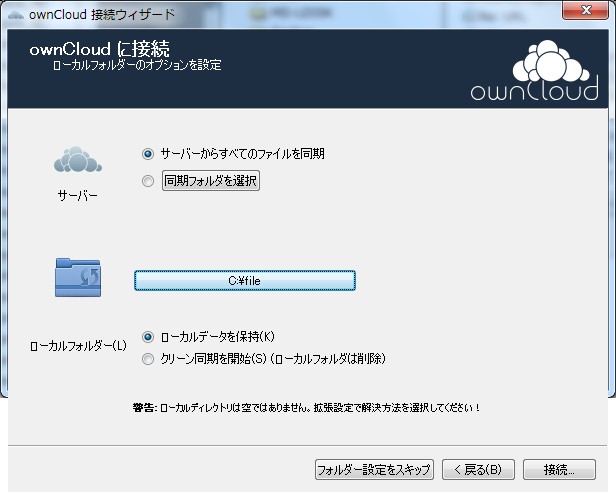
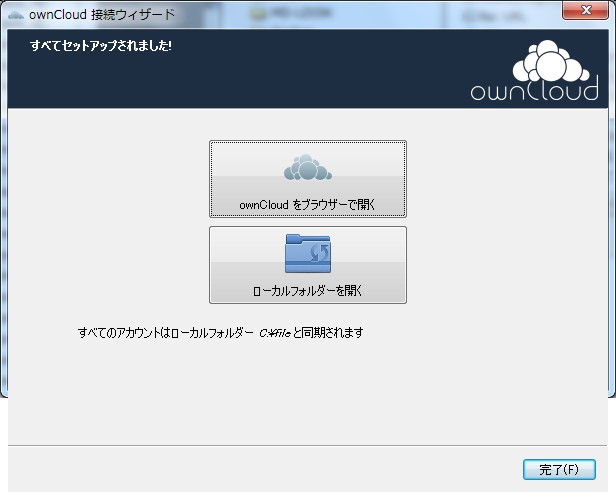
接続ボタンをクリックするとownCloudとローカルフォルダが同期されはじめ、以下の画面が表示されます。以降、どちらのフォルダにもファイルを追加、削除などを行うとそれがもう一方のほうにも反映され同期が常に行われる状態となります。
●owncloudクライアントのインストール(個別ユーザ作成後)
既にownCloud利用者として作成済み場合、下記のようにクライアントをインストールします。
ownCloudに教えられたアカウント及びパスワードでログインします。
ログインすると右上に表示されているアカウント名をクリックし、「個人」をクリックします。
画面を下にスクロールすると「ファイルを同期するアプリを取得しましょう」という表記があります。環境に応じたクライアントを選択しクリックします。
リンク(例:Windowsにインストールする場合「Desktop app」をクリック)をクリッすると、ownCloudの公式ページが開きます。
ページを下にスクロールすると「Download Desktop App」というリンクがありますのでクリックします。
クライアント用のページが開きますので、環境に合ったアプリをダウンロードします。
インストールが完了すると次の画面が表示されます。
参考URL:CentOS7 ownCloudを使ったオンラインストレージ
※CentOS 7の初期リポジトリでインストールされるPHPのバージョンは5.4系。最新のownCloud 10.6(2020.12.20現在)にはPHPのバージョンが7.2以上が必要。これに対応するには、PHP 5.4系をアンインストールし、第三者のリポジトリ(remiリポジトリ)を登録、7.2系や7.3系をインストールするか、複数のPHPバージョンをインストールします。
ownCloudはWeb経由で操作しますので最初にApacheをインストールしておきます。
また、データベースも利用しますので、MySQL(MariaDB)もインストールしておきます。
ここでは、Apache、MySQL(MariaDB)の設定は完了しているものとします。
Apacheは、httpd-tools、httpd-devel、httpdをインストールしておきます。
# yum install httpd
# rpm -qa | grep httpd
httpd-tools-2.4.6-18.el7.centos.x86_64
httpd-devel-2.4.6-18.el7.centos.x86_64
httpd-2.4.6-18.el7.centos.x86_64
次にownCloudをインストールしますが、リポジトリを別途用意する必要があります。
# cd /etc/yum.repos.d/
# vi isv:ownCloud:community.repo
[isv_ownCloud_community]
name=Latest stable community release of ownCloud (CentOS_CentOS-7)
type=rpm-md
baseurl=http://download.opensuse.org/repositories/isv:/ownCloud:/community/CentOS_CentOS-7/
gpgcheck=1
gpgkey=http://download.opensuse.org/repositories/isv:/ownCloud:/community/CentOS_CentOS-7/repodata/repomd.xml.key
enabled=1
ownCloudをインストールします。
# yum install owncloud
# rpm -qa | grep owncloud
owncloud-9.1.5-1.el7.noarch
owncloud-mysql-9.1.5-1.el7.noarch
owncloud-httpd-9.1.5-1.el7.noarch
php-owncloud-tarstreamer-0.1.2-1.el7.noarch
一部PHPのパッケージが不足した場合は、以下のコマンドで追加インストールします。
# yum install php-mysql php-gd php-pdo次に、phpを設定します。
# vi /etc/php.ini
// 692行目
default_charset = "UTF-8"

// 878行目
date.timezone = "Asia/Tokyo"
設定情報を保存するためのmariadb-serverを個別にインストールする必要があります。
# yum install mariadb-server
# rpm -qa | grep mariadb
mariadb-5.5.68-1.el7.x86_64
mariadb-devel-5.5.68-1.el7.x86_64
mariadb-libs-5.5.68-1.el7.x86_64
mariadb-server-5.5.68-1.el7.x86_64
データベースの初期設定を実施していない場合は、初期設定を実施します。/etc/my.cnfを編集し文字コードを設定します。
# vi /etc/my.cnf
[mysqld]
datadir=/var/lib/mysql
socket=/var/lib/mysql/mysql.sock
# Disabling symbolic-links is recommended to prevent assorted security risks
symbolic-links=0
# Settings user and group are ignored when systemd is used.
# If you need to run mysqld under a different user or group,
# customize your systemd unit file for mariadb according to the
# instructions in http://fedoraproject.org/wiki/Systemd
character-set-server=utf8  ←  文字コードを指定します
systemctlコマンドでmariadbを有効にしてから起動します。
# systemctl enable mariadb.service
# systemctl start mariadb.service
MariaDBの初期設定を実施していない場合は、初期設定を実施します。初期セットアップコマンドがあり対話形式に進めていきますので、それを実行します。rootパスワードを設定するところのみ入力する必要がありますが、その他についてはそのままEnterで大丈夫です。
# mysql_secure_installation
/usr/bin/mysql_secure_installation: 行 379: find_mysql_client: コマンドが見つかりません

NOTE: RUNNING ALL PARTS OF THIS SCRIPT IS RECOMMENDED FOR ALL MariaDB
      SERVERS IN PRODUCTION USE!  PLEASE READ EACH STEP CAREFULLY!

In order to log into MariaDB to secure it, we'll need the current
password for the root user.  If you've just installed MariaDB, and
you haven't set the root password yet, the password will be blank,
so you should just press enter here.

Enter current password for root (enter for none):[enter]
OK, successfully used password, moving on...

Setting the root password ensures that nobody can log into the MariaDB
root user without the proper authorisation.

Set root password? [Y/n][enter]
New password:[パスワード入力]
Re-enter new password:[パスワード入力]
Password updated successfully!
Reloading privilege tables..
 ... Success!


By default, a MariaDB installation has an anonymous user, allowing anyone
to log into MariaDB without having to have a user account created for
them.  This is intended only for testing, and to make the installation
go a bit smoother.  You should remove them before moving into a
production environment.

Remove anonymous users? [Y/n][enter]
 ... Success!

Normally, root should only be allowed to connect from 'localhost'.  This
ensures that someone cannot guess at the root password from the network.

Disallow root login remotely? [Y/n][enter]
 ... Success!

By default, MariaDB comes with a database named 'test' that anyone can
access.  This is also intended only for testing, and should be removed
before moving into a production environment.

Remove test database and access to it? [Y/n][enter]
 - Dropping test database...
 ... Success!
 - Removing privileges on test database...
 ... Success!

Reloading the privilege tables will ensure that all changes made so far
will take effect immediately.

Reload privilege tables now? [Y/n][enter]
 ... Success!

Cleaning up...

All done!  If you've completed all of the above steps, your MariaDB
installation should now be secure.

Thanks for using MariaDB!
続いてownCloud用のユーザとデーベースを作成します。
下記ではownCloud用に使用するowncloudというデータベースを作成し、それにアクセスするユーザIDとパスワードを設定しています。
# mysql -u root -p
Enter password:[パスワード入力]
Welcome to the MariaDB monitor.  Commands end with ; or \g.
Your MariaDB connection id is 10
Server version: 5.5.37-MariaDB MariaDB Server

Copyright (c) 2000, 2014, Oracle, Monty Program Ab and others.

Type 'help;' or '\h' for help. Type '\c' to clear the current input statement.

MariaDB [(none)]> CREATE DATABASE owncloud;
Query OK, 1 row affected (0.00 sec)

MariaDB [(none)]> GRANT ALL ON owncloud.* to owncloud@localhost IDENTIFIED BY '[パスワード入力]';
Query OK, 0 rows affected (0.00 sec)

MariaDB [(none)]> flush privileges;
Query OK, 0 rows affected (0.00 sec)

MariaDB [(none)]> quit;
Bye
owncloudはWeb経由でアクセスをしますのでApacheを有効にして起動します。
# systemctl enable httpd.service
# systemctl start httpd.service
これ以降Web画面で設定します。
●owncloudの設定
http://(IPアドレス)/owncloud/にアクセスすると下記のような画面が表示されます。
管理者用のアカウントを作成します。
管理者となるユーザ名及びパスワードをを入力します。
実際のデータのアップロード先となる(owncloudサーバを動作させている)フォルダ名をデータフォルダに記載します。
データベースにMariaDBを使用していますので、「ストレージデータベース」部分をクリック、データベースを選択します。
データベース名やユーザIDなどを入力する画面が表示されますので、MySQL/MariaDBを選択し、上記で設定したowncloudデータベースの情報を入力後、「セットアップを完了します」ボタンをクリックします。
問題がなければ下記の画面が表示されます。
サーバ側のインストールはこれで完了です。続いてクライアントソフトのインストールになります。
●owncloudクライアントのインストール(サーバインストール直後)
リンク(例:Windowsにインストールする場合「Desktop app」をクリック)をクリッすると、ownCloudの公式ページが開きます。
ページを下にスクロールすると「Download Desktop App」というリンクがありますのでクリックします。
クライアント用のページが開きますので、環境に合ったアプリをダウンロードします。
インストールが完了すると次の画面が表示されます。
ownCloudをインストールしたサーバのアドレス ( http://(IPアドレス)/owncloud ) を入力して次へをクリックします。SSL証明書をインストールしている場合にはhttpsで指定することも可能です。
次に接続するためのユーザ名・パスワードを入力します。下記では最初に作成したadminユーザで接続しようとしています。
次に以下の画面が表示されます。ownCloudのフォルダとローカルのフォルダを選択して同期するフォルダを選択することになります。デフォルトではownCloud上にdocuments / music / photosなどのフォルダが存在しており、これらのフォルダが下記で選択したローカルのフォルダに同期されることになります。逆にローカルフォルダにファイルなどが存在する場合はownCloudフォルダに双方向で同期されることになります。
接続ボタンをクリックするとownCloudとローカルフォルダが同期されはじめ、以下の画面が表示されます。以降、どちらのフォルダにもファイルを追加、削除などを行うとそれがもう一方のほうにも反映され同期が常に行われる状態となります。
●owncloudクライアントのインストール(個別ユーザ作成後)
既にownCloud利用者として作成済み場合、下記のようにクライアントをインストールします。
ownCloudに教えられたアカウント及びパスワードでログインします。
ログインすると右上に表示されているアカウント名をクリックし、「個人」をクリックします。
画面を下にスクロールすると「ファイルを同期するアプリを取得しましょう」という表記があります。環境に応じたクライアントを選択しクリックします。
リンク(例:Windowsにインストールする場合「Desktop app」をクリック)をクリッすると、ownCloudの公式ページが開きます。
ページを下にスクロールすると「Download Desktop App」というリンクがありますのでクリックします。
クライアント用のページが開きますので、環境に合ったアプリをダウンロードします。
インストールが完了すると次の画面が表示されます。